Rescuing Zelda
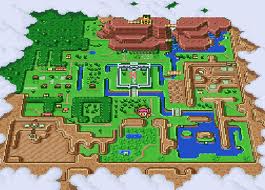
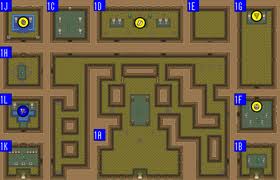
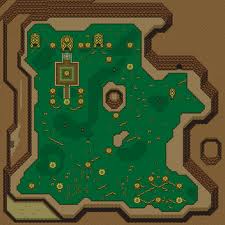
Welcome to The Legend of Zelda A Link to the Past. One of the most favored games of all time. Here’s a map to start you out with:
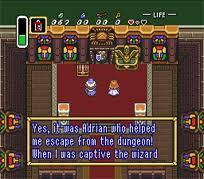
It will start out with Link at his house living with his uncle (you can call him Uncle Frank). Link is asleep and Zelda is calling him from the dungeon in the castle. Zelda is going to be sacrificed to unlock the way to the Golden Land (known as the Dark World). Uncle Frank will tell Link that he has to go save Zelda. HEY! Zelda called us, why can’t we save her?! Well, go out and save her anyways. Open the chest you see in your house and you will get a lantern. Get out of your house and go right and jump down the platform and follow the path upward. Keep following the path to get to the bridge. Follow the path to the right. Keep going right and then up the path. You will find a bush on a square. Lift it up and fall down the hole. It is a secret passage into Hyrule Castle. After you fall, head left to find. . . well, what do ya know? I guess Uncle Frank has learned his lesson of not letting you do it. He will give you a sword and shield. Yay! Head through the door on the left. Kill the enemies with your new and improved weapons and head right to find a treasure chest with money in it and some jars with magic in them. Go left and go up the stairs and you will be outside again. Cut through those bushes and go left. At least try to kill those soldiers, they are ANNOYING! Go up and enter Hyrule Castle. Head left and go through the door on the lower platform. Follow the path to the next room while killing the enemies. Go down the stairs. Kill the enemy for a key. Open the chest for your dungeon map. Go down and go down the stairs. Kill the enemies and head down the stairs. Kill the enemies and go down. Follow the path to the next screen while killing the enemies. Ignore the stairs and go through the door at the top. Kill enemies while heading right. Do the same thing in the next room. Open the chest to get yourself a boomerang. Pause it and equip your boomerang. Go back left and up through the locked door. Walk through this room and do the same thing with the other room. Kill the enemy and head right to face the monster that’s guarding Zelda. He isn’t really hard if you decide to throw 2 jars at him and he will die. Get the Big Key and free Zelda. The chest next to her has 5 rupees inside. Talk to Zelda first of all and she will start to follow you so you both can escape. Backtrack up the stairs and through the door. Go through the bottom door. Head down and up the stairs. Follow the upper platform right, up, and right. Go up here and jump off the platform. Go through the upper door. Go up, left, down, right and up the stairs. Go right and go up the stairs. Go up the stairs and up past the thrones. Get on the left side of the wall with the swords and push it right. Go through our newly discovered door and go up and left. Light torches with your lantern. Kill the enemies and head downstairs. Kill the enemies and go to the next room. Go left to light your torch and head right and open the chest. Go to the center and head up. Go to the upper right part of the screen to light your torch. Kill all the enemies and go through the left door. Go to the upper left part of this room and light the torch. Kill the enemies and go up through the door. Kill the enemies to get a key. Go to the upper right and kill the enemies. Go to the blocks at the top of the room. Push the middle block upward and go through the door. Kill the enemies and go through the lower door. Kill the enemies and pull the right lever to open the door. You will now have Zelda back to safety. Open the chest for a heart container.
Errands before the Eastern Palace
Get out of the castle and follow the path down and left. Kill the enemies and keep following the path left. Pretty soon, follow the path upward. Kill the enemies and enter into the Lost Woods. Go up until you see a small hut made out of a hollow tree stump. There are bushes right above it. Slash the center bush and go down the hole to find your first heart piece. 🙂 Get 4 of these things and you’ll have 20 hearts in no time. 😀 Jump down to the lower platform and go through the door to get out of here. Go back to the bushes that caused you to fall down and go upper right from there. You will see some logs. Go into the left log and go left to find a mushroom. It is useless for now, but we have to give it to the witch. Exit the Lost Woods the same way you came in. That is the bottom right. Head down to the next screen to enter Kakariko Village. You don’t want to talk to most of the people here because if you read the signs it will blame Link for kidnapping Zelda. HEY! We saved her . . . . . the soldiers kidnapped her! Of course, nobody will believe you. They will tell on you and you will have to fight some soldiers. Get on the white path and go left and down. Keep going until you see cave on the left. Go to the platform above the hole and jump off the platform into the hole. Open all the chests to find bombs and rupees. Bomb the upper wall to the left of the chests. Go in and open the chest to find your heart piece. Get out and jump off the platform and go through the door to get out. Go down and right from the cave to find a guy on a carpet. Don’t worry, he won’t tell on you. You can buy one bottle from him. It cost 100 rupees. Buy your first bottle and head right all the way. Go down one house and it looks like somebody was too lazy to think about mowing the lawn. Go to the house left of this one. There will be a guy that is sick. He will give you his butterfly net. This can also be used for catching fairies and putting them in your bottle. Have you passed by that long house? If you have, there is a secret back entrance. You can get there by going straight down once you get out of the sick dude’s house. Inside is a treasure chest with your next bottle. 🙂 You gotta love those bottles. Get out and head left and down to find a little house. Bomb the front of it and enter inside. This is the shop, talk to the guy on the top left of the shop and he’ll tell you where Sahasrahla is hiding. He’ll mark it on your map. Get out and go back to the person selling the bottles. Enter the house from the upper right from there. There is a green house there. Go inside it and go down the stairs. In there you will notice that the upper wall can be bombed. Go through it and lift the jars to get to the chest. Open it up for a heart piece. Exit this house and go back to where the person who sold you the bottle is. From there, head straight down. Go into the house with a woman outside. Bomb the right wall to find a chest that has arrows in it. Exit and get back on the path. Keep going right until you see a large bush, it really looks like a small tree. Head down to enter the southern part of Kakariko. Go down and left. Enter the house on the far right of the screen. There is a wall that can be bombed. Do so, and get out of the house on that side. Talk to the girl to start the maze race. Cut the 5 bushes upward, go left, and cut the 3 bushes to the left. Below the sign, jump the fence and talk to the dude to claim your prize. Another heart piece, now you should have 5 hearts. Jump down and head right to the main part of Kakariko. Go up and out of Kakariko. Keep going right for a long time, pass the graveyard and go down and cross the bridge. Go up after you cross the bridge and cut the bushes while killing the enemies. Go right and up and give the mushroom to the witch outside the shop. You can easily go left and back and you will have a new item waiting for you inside the shop. It is the magic powder. Get out and go left one screen, down 2 screens, right 1 screen, up once, up the stairs, right twice, down once, jump down the gap, go up the stairs, go right once, up the stairs, and up the stairs to enter the next dungeon.
Eastern Palace
You could’ve went out to find Sahasrahla, but he’ll mark the locations of the pendants and the master sword on your map.
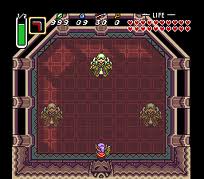
Lift the jar at the center to find a switch. Press it and enter the center door. 🙂 Kill the enemies here and press the switch in this room and head up. Go downstairs and there will be what appears to be large bowling balls. Try your hardest not to get bowled over. Follow the path upward and go left. Go up the stairs here and go right on the upper platform. Open the chest for some money. Go down the stairs and go up the other stairs. Go up twice and right once. Press the switch and go into the door. Go through the door on the top right and left the middle jar. Step on the switch. Go down once and open the chest for the dungeon map. Jump down, go up the stairs, and go left twice. Lift up the jars and press the switch. Go through the door and kill the enemies. Go up the stairs to get the compass in that chest. Go down the stairs and go right 3 times. Head down and up the stairs to the next room. Go right and down and step on the switch to get to the room on the right. Pick up the jar in the top right corner of the room to get a key. Go left twice and kill all the enemies so you can lift up the jar and step on the switch to get the big key. Go up once and right once. Open the chest so you can acquire the bow. Go up once and kill the enemies to get a key. Go through the door at the top right to get to a room with money. Get out and go to the top left door. Lift up the bottom left jar and press the switch. Go left once and the switch is in the top left corner. Watch out for the bowling balls. Go left once and kill the enemies so you can open the door. Go up once and this is the last room before the boss. Be sure you have plenty of arrows and full life. After you kill the enemies, go up once to face: Armos Knight.
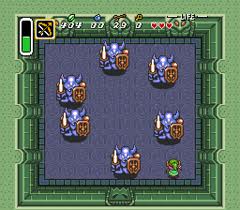
This might be a little hard at first, but you’ll get it eventually. It’s 3 arrows per knight. When there is one knight left, it will turn red and try to jump on you. You can either slash it or shoot it. After it dies you’ll get a heart container and the pendant of courage.
Errands before the Desert Palace
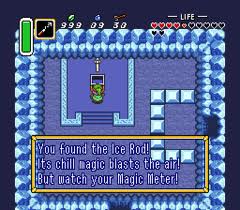
Get out of the dungeon and go down the stairs. Go down the other stairs. Go left on the path, then go up. Jump down to the small rectangular area and jump down again. Head down and left and jump down. You will appear back at the place where you have seen Sahasrahla. Go in and talk to Sahasrahla to get the pegasus boots. Pick up the jars and dash into the upper wall. Open 2 chests for money and 1 chest for bombs. Leave the house and make your way around. Head up the stairs and make your way around there. Go down and take the left exit to get out of here. Go left once and down across the bridge. Go left twice, down once, and all the way left. Then go up on the path. Keep going, then turn left. You are back in Kakariko. Go left once past the house and head up the space in between the 2 houses. Go up on the left side of it until you come across a house with a book on it. Go inside and there is a book on the top shelf and you can’t reach it, sadly. :'( Dash into the shelf with the book on it from behind the particular shelf. Get the book and leave. 🙂 Exit Kakariko the same way you came in. Go down to continue on the path. Go right once, up once, and right once. Doesn’t this place look familiar? 🙂 Of course. . . it’s your house. 😀 From there go straight down on the right wall. Keep going until you find a part of the wall that looks a little weird. 😉 Bomb it to find a fairy’s fountain. From there go down and right. Go up to find another hidden wall. Bomb it and enter it. Kill the snake thing. I know it’s called a mini moldorm, but still! There are 3 more you need to get. To get there walk in between the bottom of the holes and the wall. Kill the moldorms and go through the door. Talk to the guy to get 300 rupees. Open the chests for rupees, bombs, and arrows. Exit this place and go right twice and up all the way to the left part. Bomb the weird wall and enter it to find a chest with the ice rod inside.
Exit and go all the way right. Then go down once and left 3 times. Go to the far left of the screen and go up the passage. Go left once and get on the path. There is a cave at the top left, you can enter it if you need life desperately. 🙂 Go left once and move along the right wall until you see a cave. Enter it and enter into the next room. Bomb the bottom wall and enter it. There is a chest with a heart piece inside. Once you get the heart piece, exit and head left. You will see a platform and make your way around the platform. There are 3 rocks on the platform. One of them is blocking your way to the Desert Palace. Use the Book of Mudora on the sign in the middle. Head up and enter the Desert Palace.
Desert Palace
Go straight up until you see a beamos. These are things that will shoot lasers at you. Head right and lift the jars and head up once. This is a Swamola, you can only kill it when it’s above ground. Kill it and go up once. Kill the enemies and press the switch above the lanterns to get a treasure chest. Open it for the dungeon map. Take the bottom exit on the left side of the room. Head left once and up once. Run into the upper left lantern to get a key. Exit this room and go right twice, down once, and right once. Kill the enemies and open the chest for a compass. Go up once and run up past the shooting rocks. Open the chest for the big key. Run back down and go into the next room. Go left once, up once, and left 3 times. Lift the jar at the upper left corner to find a switch. Press it and go up once. Open the big chest for the power gloves. These will help you pick up all sorts of things from rocks to bigger things. Go down once, press the switch, go right once, down once, kill the enemies, and head left once. If you need fairies, push the 3rd block from the left. Head up once. When you get your fairies, head down twice and you will now be outside. Start heading down without falling off the cliff to grab a heart piece. Go back up and head right from where you came outside. Lift the rocks and enter the doorway. Move the middle block on the right side to the left. Head up once. Lift up the jar on the bottom left corner of the room to get a key. Go up the stairs and head down once. Kill the enemies, head right once, kill the enemies, head up once. Lift the 2nd jar from the right for a key. Head up once. Lift the jar at the upper right corner for a key. Head up once and kill the enemies. Light the 4 torches and the left part of the upper wall will move. Hey, a door. Now we should be getting somewhere. Go through the door and you will meet: Lanmola.
All you have to do is slash their heads at least 6 times when they come out of the ground. They will shoot four rocks at you. When there is one left it will shoot 8 rocks instead of 4. When it’s dead, grab the heart container. You have now acquired the Pendant of Power. I know blue means wisdom, but it’s the other way around when you play this game. 😀
Errands before the Tower of Hera
From where you are right now, head all the way down. Exit to the right and head right twice. Enter the building and push the side blocks upward and push the middle block either left or right. Open the chest for some bombs. Exit and re-enter. This time, move the middle block up and the side blocks either left or right. 😉 Go up once and pull the upper right switch. Water will now fill the path. Leave the building and just to the left of it is a heart piece calling your name. 😀 Go right once, up twice, and right once. Cross the bridge and go up twice. Go up from the right side of the river. Head all the way right until you see a large boulder blocking your path. Lift it up with our new and improved power gloves and head right once. Dash into the rocks and go up once on the right side of the screen. Kill the enemies and go up once. Follow the path up all the way. Head right while staying on the bottom part of the path. You will now meet up with King Zora. Talk to him and he will give you flippers for 500 rupees. You should have that money at this moment. Sweet! Now we can swim in deep water. From there go directly south. Swim down the first waterfall and follow the path of shallow water. Keep following it and you will reach land but still follow it and you will find another heart piece. Get it and go back into the water. Head down one of the waterfalls here. Now that you are back on the path, head left and down out of the Zora’s Waterfall. Go all the way left and then go up. Swim into the waterfall. There is a little pool of water that looks promising. Throw your boomerang in the pool. The Great Fairy will ask you if you put it in. Say yes and she will give you a magic boomerang in return. Exit and re-enter and throw in your shield this time. Say yes and you will get an upgraded shield in return. Exit and re-enter, if you have an empty bottle, put it in and say yes and you will get a green potion inside the bottle in return. Get out of this place and swim straight down from there to find a couple of whirlpools. One of them is not moving. Go in that one and you will appear at Lake Hylia. Swim up and you will see an island. Swim to the right part of the island and go up. You will notice a ladder. DON’T go up that ladder. We will use it later. 🙂 Follow the river to the left of the ladder. Head up once and follow the river right once. Swim under the bridge and you will see a ladder, go up it and you will find a dude and his tent. Talk to him for a bottle. Swim right twice from the island. Swim down once and go up that ladder over there. Go up once, left once, up twice, and go left across the bridge. Head up a screen on the left side. Head left 3 times, up a bit, right once, use the upper passage and dash into the rocks to find a chest. Open it to find a heart piece. Exit, head left once, up once, up a bit and lift the boulder to find a cave. Go in the cave and jump down onto the path. Take the first possible right and take the bottom route. Go all the way right until you find a wall. Go up a bit and go right. You will find an old man. Talk to him and he will stalk you until you get to one particular place. Go right once and go right, around the holes, go right all the way and go right once. Head down once and follow the path out of the cave. Hey, the atmosphere has changed. You are now on Death Mountain. This is the NEW Hyrule, so Ganon does not live here. Go down and right until you find a door. The old man will stop stalking you and he will give you a magic mirror. This will take you out of the Dark World in the spot where you were before once you get to the Light World. From outside the cave, go right a bit and up the ladder. Go right a bit and back left on the upper part. Go all the way left and climb the really long ladder. Stay against the bottom part of the wall and go a bit further until a cave is right under you. Then jump down on the platform with the cave on it. Enter the cave and head up the stairs and go down once. Get the heart piece and fall into the hole. Go left once and down out of the cave. Jump down and go left. Go up the long set of stairs and go all the way right. Keep going right until you find a portal. Go into the portal. HEY! What happened to you?! This is the Dark World. Since you don’t have the moon pearl, you are a bunny. Well, start finding cabbage patches. 😀 Go left a bit and head left. Use the magic mirror on a ninja star like shape on the ground. It’s more of a cross between a ninja star and a flower. Once you use it, you will appear to be back in the Light World. Head right and get the heart piece. Go up and jump off the rock at the top. Go right a bit and go up to enter the Tower of Hera.
Tower of Hera
This place gets really complicated. :'( It has all sorts of switches and twists and turns. Hit the switch when you come in. The blue blocks will go down and the red blocks will go up. Head left and go down the stairs. Kill the enemies and hit the switch and you will find your key. Be sure the blue blocks are down. So, hit the switch again. Go up the stairs and be sure to lower the red blocks. Go up and open the chest for a map. Go to the upper left of the screen and go through the locked door. Either destroy or avoid the flying tiles and hit the switch. Go right once and kill the enemies. Hit the switch and head down. Kill the enemies and light the torches and a chest will appear containing the big key. 😉 Use the mirror to warp back to the entrance of the dungeon. Hit the switch at least the correct way so you can go up the stairs to the right. Kill the enemies and head left. Kill the enemies and you will notice that there are some stars in this room. Press the star so you can get up to the door. Go in the door and kill the enemies. Head up the stairs on the right and kill the enemies. Lift the jars while you’re at it and open the chest in the middle of the room to get a compass. Head left and go up the stairs in the top left corner. Step on the star in the middle of the screen. Fall down the middle hole and open the chest for the moon pearl. Now when you go to the Dark World, you won’t have to hunt for cabbage patches. 😀 Head left and go up the stairs in the top left corner. Fall down the hole that is closest to the top wall. You will find some fairies. Take whatever you need and use the warp point to get back. Go right to the stairs on the upper right corner and head up them to meet up with: Moldorm.
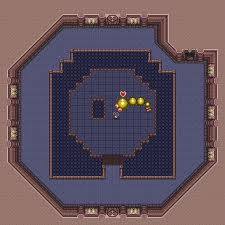
Moldorm will eventually get hard, but his weak point is his tail. First of all go to the bottom of the screen and jump down the wall. You have to hit Moldorm’s tail 6 times in order to kill him. After 4 times he’ll start to go faster. When he dies, grab the heart container and grab your last pendant. The Pendant of Wisdom.
The Master Sword
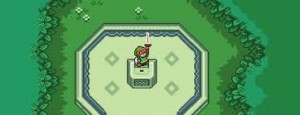
With all the pendants in hand, we can go get the Master Sword. Jump down the cliff and head all the way left where the long stairs are. Jump down and enter the cave that is left of the stairs. Go up and continue along the long path. Kill the enemies as you go. Go left to the next room and head left, then down. Exit the cave and jump down the cliff. Go up once and go all the way to the top left. Go left from here to enter the Lost Woods. Go down, left, down and go to the log on the left. Go through the left log and head left. Go through the next log and go all the way left. Go to the top log and head up. You will find the Master Sword. Go around behind the Master Sword and get it. Lift it up. 😀
Sahasrahla will now contact you and tell you that you can now defeat Agahnim. Go down. The minister will now contact you and say that the aliens are invading! Just kidding. . . the soldiers are coming to help Agahnim sacrifice Zelda. 🙂 Oh Wait, that’s bad! D= AAAAAAAAAAAAAAAAAHHHHH! WE HAVE TO GET TO ZELDA VERY SOON! Just after a few errands. The same thing will happen when you go to the castle and completely skip the errands. We really need these items before we face Agahnim and save Zelda. 😀 Now first of all, we need to see if the minister was lying. Go back to the entrance you came in from and go down twice and right once and go right a bit and go up into the sanctuary. You will find the minister standing. Check to see if he’s playing dead. 😉 It turns out he wasn’t lying and we were a second too late. Now the JERK has Zelda! 🙁 The minister mysteriously disappears after you talk to him. We have some errands to run before we save Zelda. These errands are EXTREMELY important. So exit the sanctuary and head left. Go up once and enter the cave to Death Mountain. Go through the cave and go up the long staircase. Go through the portal that leads to the Dark World. Now that you have the moon pearl you no longer have to search for cabbage patches. 😀 Use the mirror at Spectacle Rock and head up. Go left across the bridge and use the Book of Mudora to translate the stone and you will get the Magic of Ether. Head left and jump down the cliff and go all the way left. Go down the long staircase and go through the cave to get off of Death Mountain. Go down twice and right once. Go around the castle and head left and down twice. Go down the ladder into the water. Head down and right, climb the ladder and enter the cave in the waterfall. Inside the cave is a pond where the Great Fairy lives. Put 20 rupees inside and wait for about 5 seconds. Go back to the pond and throw in 20 rupees as long as you can until you hit 100 rupees. She will ask you if you want to carry more bombs or arrows. I would pick bombs, but you don’t have to if you don’t want to. Throw in 50 rupees this time and when you hit 100 rupees, you can upgrade again. Keep doing this until you run out of rupees. Remember this pond for later. 😉 Leave the cave and go back into the water. Head up and left, climb the ladder and head up twice, left once and lift the rock. Go left a bit and head up into the courtyard. Go up into the castle and hit the beam with your master sword. 🙂 Head left once and head up the stairs. Exit from the exit you see right here. Go right a bit and hit the beam with your new and improved sword to enter part 2 of this dungeon. 🙂 Head up once and kill the enemies here. Head right once and kill the enemies and open the chest for a key. Head up once and kill the enemies and head left and go up all the way. Head left and go down a bit and light the torch. Kill the enemies and go to the left side and open the chest for a key. Head down and go through the locked door. Kill the enemies and head left once and keep going left until you find a torch. Light it and head up. Kill the enemies and head right once. Light the torches and kill the enemies to get a key. Get the key and head up once. Kill the enemies and head left once. Kill the enemies and head down once. Kill the enemies and lift all the jars to get a key. Get it and head right once and push the left statue left a bit. Kill the enemies and head left once. Kill the enemies and head up the stairs. Head up once and you will find. . . . . OH NO! It’s the jerk and he’s going to kill Zelda! It turns out that you have to watch the killing of Zelda!
After he kills Zelda, :'( Go to the curtain at the top part of the wall and slash it to find a secret passage.
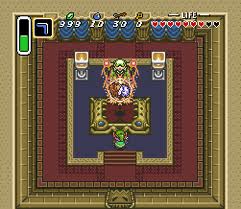
You will have to fight Agahnim! Prepare for revenge. What you have to do is reflect his own magic against him. Only deflect the small glowing ball that he shoots, avoid everything else. In 2 hits he will leave you alone. Agahnim will not admit his defeat and he will send you to the Dark World. Sahasrahla will tell you the important things that you have to do in the Dark World that you could not do before. This involves 7 more dungeons before the fight with the final boss.
Dark Palace
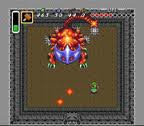
You guessed it, we have errands to run before we do this palace. These are very short errands so don’t worry about wasting your time. If you haven’t noticed, you are on top of a pyramid. Go down the set of stairs that you see and head all the way right. Jump down where there’s an opening and head around the pyramid and get the heart piece that is calling your name. Jump down off the pyramid and head right once, up twice, and right once. Lift up the rock on the far right part of the screen. Go right once and make your way around and head up a screen. Head all the way left and you will find a mysterious circle of rocks. Lift up the skull rock and throw it into the circle. There will be some sort of creature there. 🙂 He will give you the Quake Medallion if you leave him alone. Head down once, left twice, down 3 times, right once, up once, and head right until you see a tree. There are mysterious looking arrows on the ground. I wonder who decided to put those there? 😉 Follow the arrows up. To get by, you need to go up, left, and up. Follow the next arrow up and go all the way left. There is a green area here. Go left under the green area and head up. Enter the first opening in the area to the right. Enter the opening on the right. This is a maze. For some reason, we need to find a monkey and get it to follow you. 😉 Head all the way right, all the way down, all the way right, all the way down, all the way right, all the way up (I’m getting sick of this! >:( ), all the way right, then down, right, up, and right. Exit the area. FINALLY! If you hadn’t noticed, the monkey started following you. Pay him 10 rupees and he’ll stalk you. . . I’m scared now. Be careful not to get hit or the monkey will go back to the maze area and you’ll have to find him again. Go right through the next opening and up through the opening, and head right. Head up to the building and it appears to be locked. 🙁 Here’s where the monkey comes in handy! 😀 If you pay him 100 rupees he’ll open up the door for you. Give him his 100 rupees and head inside to enter the Dark Palace. The item in this dungeon is very necessary to get. If you don’t get it, you’ll have the hardest time of your life fighting this dungeon boss. In the dungeon, head right and step on the switch. Head through the door and kill the enemy here. Lift the jars for some goodies and head down the stairs. Head through the portal and bomb the bottom wall. Enter this doorway and follow the path. Bomb the wall at the top right part of the screen and head up once. Kill the enemies and head up once and up through the room. Go up the stairs and kill the enemies and open the chest for the map. Bomb the left wall and there will be a chest with a key in it. The right wall only has fairies. 😀 Now use your mirror to get back to the entrance of this dungeon. We will be using the mirror a few times in this dungeon. Head left and step on the switch and head through the door. Kill the enemies and head down the stairs. Lift the bottom right jar to find a switch. Press it and open the chest for a key. Use your mirror. Head up once and go through the locked door at the top. Head left, up, and bomb the crack. Fall down the hole and head up once and open the chest for a big key. Jump down to the right and lift the jar to find a switch. Step on it and open the chest for a key. Use the mirror (again) :(. Head up twice and head right and up. Push the block so it falls off to the right. Head up once and open the chest for a key. Jump down and head up the stairs. Head on the path to the door at the top left part of the screen. Dash up because the tiles on the floor will disappear once you step on them. 🙁 Go through the door on the left. Open the chest at the top left part of the screen for some bombs. I know it’s dark, just follow the directions carefully. 😉 There are no torches so it is permanently dark. Head through the maze as far down as you can. Head right and down and go back against the wall on the left side. Head down and right and go to the bottom part of the screen. Go all the way to the bottom right and open the chest for a key. Head left and up and go all the way right. Follow the path along the wall on the right side. Bomb the wall and enter it. Open the big chest for. . . . . . . . . . . THE HAMMER!!!! da da da da!!!!! This hammer will come in handy when fighting turtles. Go back into the maze and exit the maze from where you first entered the maze at the start of it. Head through the door on the right side of the screen. Kill the enemies and open the chest for a compass. (finally!) 😉 Go up one of the staircases. Don’t worry, they both lead to the same place. There is a key in one of the chests, get it and head down one of the staircases. Head down once and move the statue on the left, down. Head through the door and go a bit to the left and jump down to the lower platform. Kill the enemies and hit the switch on the bottom part of the screen. Head right once and head to the upper part of this room. Lift the 6 blocks and there is a switch at the upper right corner. Move the closest statue to the switch on the switch. Head up the stairs and through the door. Kill the enemies and head up once. Hit the switch and go to the right side of the room. There is a statue there that is not an enemy but it seems suspicious. Shoot the statue’s eye and head right and down the stairs. Move to the left and use the boomerang to hit the magical switch there. Head left once and kill the enemy. Head down once and light the torches. Kill the enemies and head right once. Move the upper block to the right. Head through the portal and kill the enemies. Head up once and head through the boss door. This is: Helmasaur.
You might know how to kill this boss but if you don’t know, then you must be blind! 😀 You have to hammer his protective head part and when it breaks after several hits, slash its face. This might take several hits. When he dies, get the heart container and get your first crystal. HEY! Whaddaya know? The first girl that was sacrificed is in there. She will explain to you where the rest of the girls are located (including Zelda) :). Now let’s get down to business. 😀
Errands before the Swamp Palace
Now we have the usual errands that take forever. 😀 Head back left through the maze. Exit at the bottom left and head down once, left once. Head left a bit and head down and you will find some stakes coming out of the ground. You can now hammer them down with the hammer. Pound them down and head left twice, down, and left once. Head all the way to the bottom left part of the screen. Head in between the circle of bushes and use the mirror. You will now be in front of a cave that is dying to be explored in. Lift the jars and get your heart piece. Exit the cave and head through the portal that you just made with your mirror. Head up and cut the bushes and head in between the trees. Head up once and head up and you will find a sort of aardvark. 😉 He is a flute boy. Well, don’t just stand there, go talk to him! 😀 He will tell you of the good old days when he would play his flute. Now use your mirror and head up, left, and dig a hole in the top left corner by the trees. The trees mark the corner. 🙂 Dig it up with the shovel that the flute boy gave you. 🙂 You will find the flute. This will come in handy when you’re in one place in the Light World and need it desperately to warp places. Sadly, we cannot do that right now. . . even if you are in the Light World. Head back to the Dark World through the portal you left. Talk to the flute boy and he will disappear. 🙂 Head back to the Light World and head down once, and up once on the left side. Head left into Kakariko. Head up once and walk into the first house on the left. There is an old man in here. Play your flute for him and he will tell you that he is the flute boy’s father. He will tell you that something good will happen if you play your flute in front of the bird statue. Hmmmm. . . . . . . something gives me an idea. 😉 Exit the house and get up the path to the left of the house. Keep going up until you find the bird statue. Stand on the “S” sign and play your flute. The bird will come to life and now anywhere you need to go in the Light World, just play your flute. Go to the very top left of the village and head up until you are in the Lost Woods. Head right and take the exit at the bottom. Pound the stakes and lift the rock and head through portal. Head up, left, down, and down once. Head all the way down and go right a bit. Go in the house that was a shop that you had to bomb to get in. Head down the stairs and open the chest for 300 rupees. Exit and head all the way right, you will find a house with stakes in front of it and instead of going in there, go in the house above it. Walk around here and open the chest for 300 rupees. Exit, head up once, right 3 times, and head to the top of the screen. Climb the ladder and use the mirror. Go in the cave and lift the jars. Bomb the upper part of the cave and get the heart piece. Exit and head back through the portal. Run into the rock for 20 rupees. Use the mirror just above where the rock was. You will appear in front of a grave. Go just under the grave and dash into it. Enter it and head up. Open the chest for a magic cape. This will turn you invisible as long as your magic meter is full. Exit the cave and use the portal, head left 3 times, and down once and head along the right side of the wall until you find an opening. Head right once and use the mirror. Head up the stairs and head right. Pound the stake and jump into the hole. Head up once and sprinkle magic powder in the bowl. There will be a bat-like thing that will curse you. There is a 1/2 sign above your magic meter. This means you only use up to 1/2 of the magic your using. Head down and left once and exit the cave. Use the flute and go to location 2. Buy some green potion and exit the shop. Use your flute and go to location 1, which is Death Mountain. Head right, up, left, climb up the huge stairs, head right, and go into the portal. Head down and jump down through the part where you can go into the cave. Pound the stakes and use your magic cape to get across the spikes, carefully. 🙁 Lift the block at the end and open the chest for the Cane of Byrna. This will surround you with a magical barrier that will protect you. It will drain the magic fast so use when it is absolutely necessary. Use your green potion (unless you’re feeling adventurous and want to cross the spikes without it). Use the magic cape to cross the spikes and exit the cave. Use the mirror and use the flute to go to location 3 which is Kakariko Village. Head back to the Lost Woods at the top left corner. Head right, down, and out of the Lost Woods. Head down and pound the stake. Lift the rock and head through the portal. Head back to the Village of Outcasts. If you don’t know what that village was, now you know. Enter the house at the top left part of the village. This is a treasure chest game. Keep playing this game until you get a heart piece. Exit and head to the upper right part of the village. Head up once, right once, up twice, and use your mirror. You will be in front of a dead tree. Run into it and all the leaves will fall down, revealing a hole. Fall down the hole and head right once to find a heart piece. Fall down and exit the cave. You should have 12 hearts right now. There are 20 hearts that you can get total. Use your flute and head to location 4 which is your house. I’m sure you’d love to go in the house and check it out. 🙂 Sadly, we can’t, we have to go to the Swamp Palace to save the next girl. And we have to go to all of the other palaces too. 😉 Head up once, left a bit, and go up across the bridge. Head up under the wall that leads to the castle grounds. Head right and down once. Pound the stakes, head down once, jump in the water, swim down a bit, and on the shallow water, use your mirror. Get the heart piece that is calling your name and head back through the portal. Now, would be a good time to go back to that pond where you upgraded your arrows and bombs. Go back and do that right now. You can hold up to 50 bombs and 70 arrows. Head up and swim up the little river at the top right. Follow the river until you come across a ladder. Climb up the ladder, pound the stakes, head left twice, down twice, left twice, and all the way left. Go to the place above the stakes at the left and use the mirror. Head left once, use the book of Mudora and you will find the Bombos medallion. This medallion is powerful and it can kill all the enemies on the screen. Head right once and go through the portal. Head right once, use the mirror, go into the building and move the blocks so you can go up once. Pull the switch at the top right and exit the cave. Head through the portal and enter the Swamp Palace.
Swamp Palace
This palace is a little complicated. Well, all palaces are, but still! Head up and jump into the water. Swim left and head up the broken ladder. Kill the enemies and open the chest for a key. Head through the locked door and head downstairs. Head down a bit, head left, bomb the wall, head through the wall, head left and open the chest for a map. Head left once, left the bottom jar, and you’ll find a key. Get it and head through the bottom left door. Kill the enemies, head left, head down the stairs, head up into the next room, lift the jar, and get the key right there. Head down once and head up the other set of stairs. Head through the door, kill the enemies, pound the moles, push the lever to the left, jump down into the water, and swim left. Head up the broken stairs and exit to the left. Head through the bottom door, head right, follow the path down once, head left, and follow the path up once. Push the bottom block right, open the chest for a compass, head up once, head left, and head up the first stairs you see. 🙂 Go through the door at the bottom left and head down the stairs, up through the door, lift the jar to get a key, get the key (obviously), head down once, up the stairs, right once, go to the stairs at the top left and go through the locked door. Kill the enemies, hit the orb, and push the lever on the left. Hit the orb and exit the room to the right. Head through the bottom left door, head left, jump into the water, and swim left. Head through the door, kill the enemies, and go down the stairs on the left side. Push the bottom block left, push the middle block up, head up the stairs, and up the other stairs at the top part of the screen. Head to the upper left part of the room, push the block up, fall down the hole, and open the chest for 20 rupees. I wonder how long this is going to take until we get to the other dungeons. 😉 Jump down off of the platform, head down, left, move the blocks the same way you did last time, head up stairs, head up the other set of stairs, head to the upper right, push the block up, fall down the hole, head right once, and open the chest for the big key. Head left once, jump down, head down, up the stairs, right once, and open the chest at the center of the room for the hookshot. This will come in handy when fighting the boss and hooking onto things. 😀 Since you are on the center part of the room, look to your right and you will find some jars there. You can hook onto practically anything that has to do with jars, rocks, etc. Hook onto the jars and lift the jar on the right side to get a key. Jump down and head back to the place that had the hookshot. Strap onto the jars above the huge chest. Head up once and head left. Kill the one enemy here, lift the upper left jar to find a switch, push the statue onto the switch and go to the right side. Head into the door on the left side and head up. Kill the enemy, head downstairs, push the lever, head down the stairs, head left once and head down. Go through the door on the right and open the chest for some rupees. 😀 Head left once and go all the way up. Head up 2 rooms and head back down one room. Push the 3rd block from the left, right and open the chest for 20 rupees. Head all the way to the right, enter the 2nd waterfall from the right, kill the enemies, head upstairs, kill the enemies, head down one room and jump into the water. Swim right, head upstairs, and lift the jar to find a key. Get it and head back into the water. You will find some ladders here, head up the next one on the left. Bomb the top wall and enter it. The jars have some items if you really need some. When you are done, head back down. Jump back into the water and head up the last ladder on the left. Head through the door and head up one screen. This is Arrghus. He is a little tricky once you fight him at first.
He will be covered in bubble-like things at first and you have to hookshot them off and slash the bubble things until they run out. Now Arrghus will get on the floor and try to kill you. You can slash him now. Do that until he dies. Get the heart container and the crystal. The 2nd girl will tell you about Ganon and the triforce. Also, she will tell you some hints about this place. 😉 2 down, 5 more to go.
Skull Woods
The Skull Woods is actually a dungeon in this game. There will be other dungeons that have names that don’t appear to sound like dungeons at all. 😉 These errands are short so don’t worry. 😉 From where you are, head right a screen, up 2 screens, and right a screen. You will find some stakes here. Pound them down and head up 2 screens. There are some enemies here, kill them and you will find a skull, a rock, and a stake. Just above the stake is a little opening. Go there and hookshot across the bridge. Head up a screen, left 3 screen, and up another screen. Head to the upper right part of this screen, lift the rock, and enter the cave. Kill the enemies and head up the stairs. Head down a bit, hookshot across the hole, head down, and use the magic cape to go through this rock here. Take off the magic cape once you get through the rock. Get the heart piece calling your name and jump off the platform. Head down 1 screen, left a screen, and up a screen to enter the Skull Woods.
You will not be in the dungeon just yet. Just head up and fall into the first hole you see. NOW, your in the actual dungeon. 😉
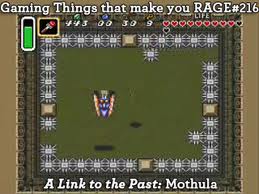
Head down, lift the jars, and open the chest for a key. You need to lift the jars to get to the key. 🙂 Head to the upper right part of the screen, and head through the door. Step on the stars and open the chest at the upper right corner for the map. Head left a screen, and head down and out of the dungeon. Head down, and left, fall down the hole to reenter the dungeon. Head down, right one screen, up, and open the chest for the compass. Head up a screen, kill the enemies, and open the chest at the top right corner for a key. Head right a screen, down a screen, head to the upper left, and head through the passage way. Head around until you see an entrance. Go in and use bombos to kill every single enemy on this screen. Pull the statue on the right side on the switch that is under the jar. Head up 2 screens, and use bombos. Open the chest for the big key. Use your mirror to warp back to the entrance of the dungeon. Head right and cut the bushes to find a hole. Fall down the hole and bomb the left wall. You will see some stars. Step on the first set of stars that you see. Hookshot across the hole for some magic. Pull the switch in the middle of the room and the wall will explode. Walk down through the wall and open the big chest to find the fire rod. Well, kill the enemies before opening the big chest first of all. 🙂 You can head to the right side or the left side and hookshot onto the statue. Head down one screen, and head to the upper left part of the screen. Get through the other entrance here and head left 2 screens. This room is a trap so whatever you do, DON’T step on the star! Instead, go to the top left corner and get a jar. Head down a screen, and head to through the area at the upper left. There is a gigantic skull here. Light it on fire with the fire rod. Hey, another entrance, go through it. Head up, up a screen, and head up to the middle of the room. Step on the star at the bottom left. Step on the star on the left side and step on the star at the upper right. Head right a screen, and light the bottom torch and the other 2 on the sides with the lantern. Light the upper torch with the fire rod. Head left a screen, and slash the upper part to find a secret passage. Head through it and kill the enemies. Get the key, and head right a screen to find a hole. Fall down it and you will find: Mothula.
You need to slash it 15 times with the sword or light it on fire with the fire rod 10 times. Pick one and kill him that particular way. When he dies get the heart container and the next crystal with the 3rd girl. She will tell you about that you are the hero and you need to save Zelda and the Golden Land. Only 4 more to go. 😉
Gargoyle’s Domain
First of all head down and head back into the dungeon of the Skull Woods. Head right 2 screens and go to the right side and go all the way to the bottom right to get out of the Skull Woods. We don’t have any errands to run before we go to this dungeon. This dungeon is very short and doesn’t include a lot of things. 😉 From the Skull Woods, head down a screen, and head left until there is a path that goes down. You know that you are in the Village of Outcasts. Head down that path and head down the stairs. Head right under the statue of a Gargoyle. Pull the trident here and there will be an entrance to your next dungeon.
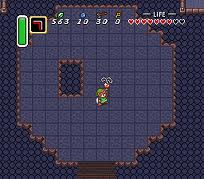
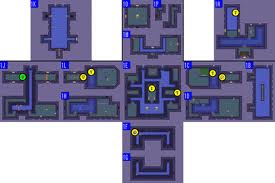
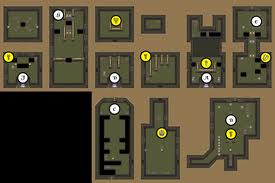
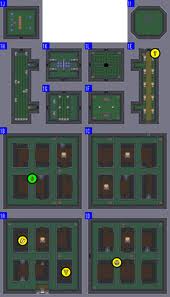
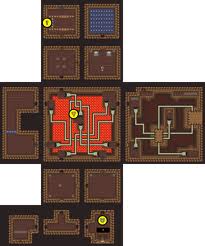
Well, now that you are in the dungeon, here’s what the map should look like.
Jump down and kill the enemies. Head up, and left and open the chest for your dungeon map. Head all the way right, head up a screen, right a screen, right, down a screen, down, and climb the ladder. Head left, down, and head around for a little while and open the chest for the compass. Jump down to the left of the chest where you got the compass. Head left a screen, and open the chest for the big key. Head right a screen and head right until you head up. Head up a screen and head up, and go up the ladder. Head right, up, up a screen, all the way up, and lift the upper right jar for a key. Head towards the bottom and head left 3 screens, up a screen, and lift the jar for a key. Hit the orb, head up the stairs, lift the corner jar to find a switch, step on the switch and head right 3 screens. Kill the enemies and open the chest for some bombs. Throw a bomb on the crack in the middle of the floor where the light is shining. This will come in handy when fighting the dungeon boss. Head left 3 screens, head down the stairs at the top part of the screen, head down a screen, and go through the door at the upper right. Kill the enemies and head right a screen. Head down the stairs at the top part of the screen, lift the rock, head down a screen, head right a screen, kill the enemies, and head all the way up to find a girl in a prison! D:
Well, don’t just stand there staring at her, GET HER OUT! 😀 Talk to the girl and she will ask you to take her outside. She will start to follow you. Open the chest in the corner there for a key. Head down, left 3 screens, pound the moles, and open the chest for the Titan’s Mitt. Head right a screen, all the way up, right a screen, up the stairs, lift the upper right jar, step on the switch, head right once, and up once to the boss room. The girl will say that it’s too bright (you bombed the floor in the middle of the room before) and she will turn into the boss: Blind.
All you have to do is hit Blind’s head constantly. He will grow three heads and the rest of the heads will keep flying around all over the place. When he dies, get the heart container and the 4th crystal. The 4th girl will tell you about the knights of Hyrule and how you can defeat Ganon. We’re halfway there. 🙂
Ice Palace
Now that we have the Gargoyle’s Domain behind our backs, now we only have 3 dungeons left (not counting the final dungeon). First we need to get ourselves a new sword. 😉 We have 2 more sword upgrades but we need to get sword upgrade #3. 😉 Head all the way right, and all the way down a screen. Head left and you will find a frog. He says that he is a partner to a blacksmith in the Light World. Hard to believe isn’t it? 😉 The frog will now start to follow you. Head right, up a screen, and take the first right and use the mirror there. You will now find a house right in front of your face. Go inside it and you will be at the blacksmiths. The blacksmith will thank you for finding his partner and bringing him here and will do anything for you. Exit the house and reenter it. Talk to the blacksmith and ask them if they can temper your sword. 😉 Pay him 10 rupees and exit the house. Head left a screen and back right a screen. Enter the house and the blacksmith will have the sword all done for you.
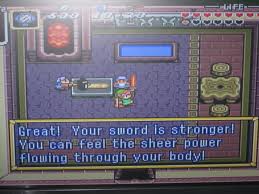
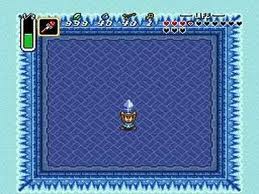
It’s true. Sadly, you cannot upgrade your sword again at this place. Our last sword upgrade will need to be accessed with a super bomb. We will get the last sword upgrade later. 😉 Exit the house and go through the warp point you left behind. Pound the stakes that you see there and you will happen to have stumbled across a secret passage. Go in it and get that heart piece calling your name. Exit the cave and head left a screen. Head all the way left and head up the stairs. Talk to the dude to play the game where you’ll need to dig. Keep digging in this game until you find another heart piece. Go back to the house where you got the tempered sword in the Dark World. Head up and you will find a mystical magical treasure chest. It can talk. D: Well, talk to it and you cannot open the chest. It will follow you. You have to go slow because you can leave it behind and it will go back to where it was before. Head left a screen and use your mirror. Head down a screen, right a screen, down a screen, and right a screen. Lift the bottom right rock and head down. Head left at the first opening you see. Head up and talk to the dude by the sign. He will open the chest for you. It contains a bottle. Well, this is our last bottle. He also says not to tell anyone that he used to be a thief. 😉 Now we can go to the Ice Palace. Head right 3 screens, jump into the lake, and swim up and swim right to the big island. Lift the black rock to find a portal. Go in the portal and you will be right in front of the Ice Palace. Enter inside and here’s your dungeon. Head up and there are enemies that can only be killed by the fire rod. Most of the enemies here can only be killed with the fire rod. So, kill the enemies and head left a screen. Kill the enemies here and get that key sitting over there. 🙂 Head down the stairs at the top part of the screen. There is a switch at the bottom left part. Press it and kill the enemies. Head right a screen, push the block right, head down and there are a million enemies here. The bombos medallion that you have will wipe them out entirely. Use it and open the chest for the compass. Lift the jar at the bottom part of the screen. Press the switch and head left a screen. There is a cracked part in the floor. Bomb it and fall down the hole. These are stalfos knights and can only be killed if you slash them then bomb them when they are stunned. Head down a screen, kill the enemies, get the key, head left, and down through the door. Hit the orb so it is on red. If it is already on red, then leave it alone. Hit the switch at the bottom left and head right a screen. Head down stairs and use bombos to kill. Head up a screen, head forward a bit, head left a screen. Head down stairs, kill the enemies, and open the chest for some bombs. Bomb the place near the stairs and fall down the hole on the right side. Head right and head right a screen. Lift the first jar above for a key. Lift the jar at the upper right for a switch. Press the switch, head down a screen, left a screen, lift the jar, press the switch at the bottom left, and open the chest for a key. Head upstairs, lift the first jar for arrows, head through the locked door. Head up, exit to the right, hookshot to the jar, and exit to the bottom part. Head up the stairs at the upper left, kill the enemies, hookshot to the right side, head upstairs, kill the lone enemy, pound the moles, lift the rock, and get the key. Pound the other moles, kill the enemy, lift the jars, and step on switch. There is this statue here that has a tongue sticking out. Pull on it and open the chest for your map. Head right a screen, upstairs, lift the jars to get to the chest, and open the chest for the big key. Pull the tongue, head left a screen, downstairs, lift the jar, hit the switch, hookshot to the chest, and open the chest for a key. Head left 2 screens, downstairs, bomb the left side, fall down the hole on the right side, and open the chest for the blue mail. This will give you half the damage you take. Push the blocks, head right a screen, up a screen, unlock the door at the top, head downstairs, head down a screen, right a screen, hit the orb, head left, up, upstairs, head down a screen, right a screen, press the upper right switch, head down a screen, left a screen, upstairs, up a screen, head to the top, head right a screen, down a screen, upstairs, left 2 screens, down stairs, fall down the right hole, head right a screen, push the block at the bottom left down, and fall down the hole. Kill the enemies, lift the jar, push the block on the switch, lift the left side jars, pull the statue on the right, lift the block at the bottom left, and fall down the hole to meet: Kholdstare.
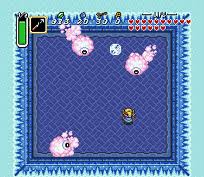
All you have to do is hit him with the fire rod. Then he will split into three. This should take about 4 hits with the fire rod. When he dies, grab the heart container and the 5th crystal. The 5th girl will tell you about the Hylian people and will talk to you some more about the triforce. Only 2 left. 😀
Misery Mire
This is a mire full of misery. 😀 Just kidding, we’re not even there yet. 😀 Use your mirror and use the flute. Go to location 6 which is the desert place. Take it all the way to the bottom left. Lift the rock to find a portal. Head through the portal, head all the way up, left, head through the entrance, head up, arrange the blocks in a certain way so that you can reach the chest, and open the chest for a heart piece. Exit this place and head all the way to the upper right. Use the mirror, lift the rock, and enter the cave. Push the blocks in a certain way and get the heart piece. Exit, and head back through the portal. Head left, down, get onto the big platform from the bottom, stand on top of it, and this is where the ether medallion comes in handy. Use it on the platform and you will enter the Misery Mire.
This dungeon is a little short, but it will be just fine. The boss is kind of creepy, but other than that, we’ll be fine. 😉 Head up, right, kill the enemies, hookshot across, head downstairs, kill the enemies, head up a screen, go downstairs, go to the upper right part of the screen, head upstairs, head up a screen, push the block either left or right, head up 2 screens, head downstairs, head all the way up, and open the chest for a key. Head down 2 screens, head right a screen from the room where you pushed the block, and lift the jar at the upper left for a key. Kill the enemies, wear your magic cape, press that switch on the spikes over there, and open the chest for a key. Head up 2 screens, follow the path to head left 2 screens, head up, left, and lift the jar for a key. Hit the orb so it is blue, head to the right side, head down a screen, use the magic cape, head down a screen, right a screen, down the stairs at the top, head right, past the blue block, through the door, and open the chest for the map. Head left a screen, up the stairs at the upper left, head down, head up on the wired platform, head up, lift the jar to find a switch, hit it, and open the treasure chest for a key. Go back across the wired platform, head through the locked door at the bottom left, kill the enemy, and get the key it leaves behind. Make sure the orb is on blue. Head left a screen, light the torches with either the lantern or the fire rod (whichever works for you), head up a screen, and open the chest for the compass. Head down 2 screens, lift the jar at the upper right for some magic, head down stairs, move the top and bottom blocks on each side left and right, move the center blocks up, light the torches, head down a screen, do the same thing with the blocks, light the torches, head right a screen, fall down the hole, and open the chest for the big key. Head through the left portal, head right a screen, down a screen, right a screen, downstairs, head to the bottom right part, head up the stairs you see there, head through the first door you see, head right a screen, hookshot onto the block, the tiles will disappear when you walk on them, dash up to the big chest, and open it to get the Cane of Somaria. This will make blocks and platforms appear at certain places. 🙂 Now we can cross over holes. 🙂 Head left 2 screens, up, left, up through the portal, upstairs, head all the way left, lift the jar for magic, head downstairs, head up, at the end of the path that you should be walking across, head down the stairs, head to the bottom right part of the room, head through the door, there are rupees in here, grab them all, head up, lift the upper left jar to find a switch, use the cane of somaria to make a block on top of the switch, head down a screen, left a screen, head up to the upper part of the screen, and bomb the left wall. Head through the left wall, there is more money in here, grab it all, head back right a screen, hit the orb with your boomerang, and head through the bottom left door. Bomb the upper wall, head through, make sure the orb is on blue, if it isn’t, hit it, head down a screen, left a screen, head all the way up, and hit the orb so it is on red. Head up the stairs at the center of the room and head through the door to meet: Vitreous.
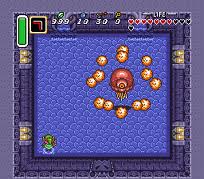
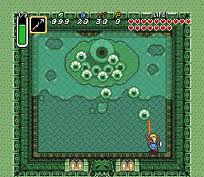
Vitreous is mainly a million small eyeballs surrounding a huge one. It’s kind of obvious on how you beat him. You have to destroy all of the smaller eyes with your sword and then aim for the huge one. Vitreous will hop around and try to kill you after you kill all of the smaller eyes. When he dies, grab the heart container and the 6th crystal. She will tell you how Ganon used the girls for power. Out of all the crazy things he could use. 😀 Well, we only have one more crystal to go. 😉
Turtle Rock
Now that we have 6 crystals, we are on the edge of getting to Ganon’s Tower and defeating Agahnim. The last crystal can be found at Turtle Rock. Before we go, we’re going to get a new kind of arrows, and a new sword (and some green potion if you want). Use your mirror and use your flute to go to location 7. Head right a screen, up a screen, head left at the upper left part of the screen, pound the stakes, lift the rock, head through the portal, pound the stakes, head right a screen, up a screen, and you will find your old house. Head inside your old house and it appears they stole all your stuff and made it a bomb shop. 🙁 Meanies! This bomb shop will come in handy because we are going to buy the super bomb. It is the brownish-red bomb on the left. It is for 100 rupees. Buy it and the super bomb will follow you. Don’t run or jump down cliffs because it will automatically self destruct. Don’t dash either. Exit the bomb shop and head right a screen. Pound the stakes, head up a screen, left a screen, upstairs, head left a bit, I think you have already noticed that you are back on the Pyramid of Power, and place the super bomb on the dark brown cracked wall. We needed to use the super bomb because average bombs won’t work. Head into the cave and there will be another pond. Place your bow and arrows in and the very fat fairy will ask you if you dropped it. Say yes and she will give you the silver arrows! 😀 Yep, the silver arrows make another comeback. 😉 Walk away for a few seconds and place your tempered sword in the pond. The fat fairy will come back and ask if you dropped it, say yes and she will give you the golden sword. This will make the fight with Ganon a slight breeze. 🙂 Now if you want a green potion, you can throw in an empty bottle. Now exit the cave and use the mirror. Use your flute and go to location 1, which is Death Mountain. Head all the way right a screen, hookshot across the broken bridge, head right, down, lift the black rock, and head through the portal. Head up and right until you are at the upper right part of the area. You will see 2 caves. Take the left one and head left. Head upstairs, head up, fall down the hole, head right, upstairs, head all the way down, fall down the hole, move the blocks in a certain way so that you can reach those 2 chests over there. They have rupees and bombs. Head left, upstairs, and head down and out of the cave. Lift the rock to the left of here and go into the cave. Head up a little past the edge. Use the ether medallion to see those platforms over there. Head up, bomb the left wall, the top wall has a fairy’s fountain, enter the hole in the wall, exit down, use your mirror and you will be on a platform with a heart piece right in front of your face. Get it and we have 1 more heart piece to get. If you have been keeping track of the heart pieces, there are 24 heart pieces total. We should have 23 heart pieces right now. Head through the portal you left behind, jump down, head right, up, exit right a screen, use the mirror, head down, lift the big rock, walk up, hit the stakes in a certain order, it is right up left, and head through the portal. You are now on top of Turtle Rock. Use the quake medallion to enter Turtle Rock. Stairs will form (or a door, whichever you prefer). Enter the second-to-last dungeon: Turtle Rock.
This is one of THE longest dungeons ever! You’ll see why in a minute. 😉 Head up and you will find a ?. Use the cane of somaria on it and get on that platform over there (with the cane of somaria). Head left, head through the first door to the bottom, head down, and open the chest for your compass. We’re going to try something real quick. Face down, hold a spin attack, walk up while holding the spin attack, the eye won’t shoot at you if you do this, use the cane of somaria and ride it to the top right. Head through the door on the right side of the room. Make a platform and ride down, down, right, go around, and up. Get the fire rod out. We are going to light some torches while on the platform. Ride all the way left, down, and right. Use the fire rod to light the bottom right torch. Head up and light the upper right torch, now use the fire rod to light 2 torches when your ride turns left and you will be above those torches. Wait for the platform to stop at land and run up to the door that is now open. Stay against the walls and walk up very slowly. Get your map in the left chest and get a key in the right chest. Head down a screen, head left, create a platform, get on it, and ride to the upper left and head through the locked door. Kill the enemy and get the key it leaves behind. Head up a screen, hit the orb, push the far upper left block, hit the orb, and open the chest for a key. Through the locked door is some stairs. Head downstairs, head to the bottom right, upstairs, and you will find some pipes you can go through. Head through the pipe, and exit through the door. Take the bottom pipe, head through the door, kill the enemy, and get the key. Head through the locked door, head through the pipe, and open the chest for the big key. Head through the bottom pipe, through the door, through the pipe, jump down, head to the bottom right, head through the door, and head through the upper pipe. Head through the door, kill the enemies, head down a screen, head through the left door, run down, bomb the bottom wall, run outside, cross the platform, use the mirror in front of the entrance, head through the door, kill the enemies, head through the door at the top, and open the chest for our last heart piece. 😀 Head down a screen, exit the cave, head through the portal, head through the same door, and open the big chest for the mirror shield. Sweet! We got a new shield. . . . sadly, it is the last shield we’ll ever get. 🙁 Head up a screen, head up through the locked door, use the pipe, head up a screen, bomb the right wall, head through it, kill the enemies, push the upper left block, pull the left tongue, head up a screen, get the rupees, head down a screen, head left a screen, bomb the upper wall, head up a screen, hit the orb, and open the chest for a key. Hit the orb, head up a screen, and head downstairs. Use the cane of somaria and ride it to get to the middle platform. Step on the switch, get back on the platform, go to the bottom left door, head down a screen, run down, head down a screen, head all the way down, bomb the bottom wall, and you are now outside. Head back in, get to the chest at the very bottom, and open that chest for a key. Use your mirror, head up a screen, left a screen, down the stairs at the top, use the cane of somaria on the platform, head up a screen, and you will meet one of the hardest bosses in history: Trinexx.
Yes, except there are 2 heads. The fire one can be killed with the ice rod and the ice one can be killed with the fire rod. Do that and when the heads are off, he will move around and he is now vulnerable with his armor off. Slash the glowing part in the center of the body and kill him. When he dies, get the heart container and the last crystal. Zelda will tell you that she knew that you were the Legendary Hero and she will tell you some more about Ganon. Zelda also tells you that Ganon is waiting for you at his tower. Okay, that’s where we’re going about right now. 😀
Ganon’s Tower
We have no errands because we have everything necessary. Including the sidequests. Head left a screen, keep going left and kill the enemies as you go. Cross the bridge, head left a screen, and you are now at the entrance to Ganon’s Tower. Go to the middle of the tower and the crystals will come up and open the door for you. Enter into the last dungeon ever! Be sure you have a lot of fairy’s and at least a blue potion. This dungeon is going to be rough. 🙂 Head down stairs, then head down the stairs at the top left. Kill the enemies, dash into the right torch, and get the key. Head left a screen, pound the moles, step on the star, lift the bottom right jar, and get your key. Head left a screen, hookshot across the gaps, head right a screen, step on the star, and open the chest for your map. Head left a screen, make sure the orb is on red, head down a screen, and lift the bottom right jar and get your key. Hit one orb with a bomb at perfect timing, head right a screen, use the magic cape, head left, push the lone block left, hookshot to the chest, and open the chest for a key. Head down a screen, take the left warp, take the far bottom left warp, head all the way right, go to the upper right portal and use the portal just above that portal. Head right a screen, up the path, lift the top jar, take the upper left path, use the fire rod to light the torch, hookshot to the jar under you, follow the invisible path to the door, head through the door, bomb the floor by the chest with the arrows, and fall down the hole. The Armos Knights are back and easier to kill. All you have to do is one shot with the silver arrows will kill them. Head up a screen and open the chests for some bombs, arrows, and the big key. Head down a screen, left a screen, dash into the upper wall, head through it for a fairy’s fountain, head down a screen, downstairs, push the right block, and open the chest for the red mail. Sweet! More defense! 😀 You’re not invincible, but you still have plenty of defense. 🙂 Head up a screen, right a screen, open the chests for bombs and arrows, lift the bottom left jar, use the cane of somaria to make a block on the switch, head right a screen, kill the enemies, and open the chest for a key. Head right a screen, kill the enemies, light all the torches, head down a screen, use the cane of somaria to create a block, throw it on the moving floor, when it is next to the orb, use the cane of somaria again to create an explosion, head left, and do the same thing again. Head left a screen, and open all the chests except the upper left one. You’ll see why in a few minutes. 🙂 All the chests contain rupees, bombs, and arrows. Open the upper left one now for the compass. Use the mirror, head downstairs, head up the middle stairs, kill the enemies, push the upper left block down towards the door, head down a screen, kill the enemies, head right a screen, kill the enemies, head up a screen, downstairs, head up, use the magic cape, hit the orb, head up, lift the middle block, hit the switch, head up the stairs at the bottom, head through the upper right door, head right, head up a screen, kill the enemies, head left, kill the enemies, head down, kill the enemies, head down kill the enemies, head down a screen, kill the enemies, head left 2 screens, and you will find another blast from the past. 😉 Lanmola is back and you have to kill him the same way as you did before. Except it takes 2 hits with the golden sword. Head up a screen, upstairs, use the ether medallion to see the correct path, head down a screen, dash across to the right, head up a screen, kill the enemies, head up a screen, kill the enemies, head right a screen, light the 4 torches with the fire rod, walk fast to the door, head right a screen, head to the bottom left towards the stairs, head up stairs, light the torches in a correct order, light the bottom right torch, the bottom left torch, and light the upper left torch with the lantern. Get the upper right torch with the fire rod. Head up a screen, kill the enemies, and get the key. Open the chests for some bombs. Head left a screen, bomb the bottom wall, head down a screen, hit the orbs, and open the chest for a key. Head down a screen to find another old friend. Moldorm is also back and you fight him the same way as you did before. 2 hits with the golden sword should take care of him. Hookshot to the chest and open it for some rupees. Head left, push the blocks, head left a screen, up the stairs at the top, head left, head through the upper left door to face the second-to-last boss: Agahnim.
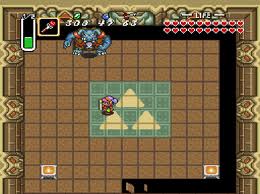
You have to kill Agahnim the same way as you have been doing. Reflect his own magic against him. He will split up and it is the darker shadow that you need to hit. Then Agahnim will die once and for all! 😀 Then Ganon will come out of Agahnim and turn into a bat and fly away. You will come back on top of the Pyramid of Power that now has a hole in it. If it is absolutely necessary, use the mirror, play the flute and head to the potion shop and buy 4 blue potions. Now head back to the Pyramid of Power in the Dark World. Fall down the hole in the pyramid and prepare for the showdown of your life! 😀
The Battle of your Life
He is EXTREMELY TRICKY! All you have to do at first is slash him like crazy and he will make it go dark making him invisible. Light the torches with the fire rod and then slash him like there’s no tomorrow. If the torches go out, light them again. Be careful, he will make the floor disappear at the edges. Keep slashing him. When he gets stunned after slashing him with the sword, shoot a silver arrow at him. This will take about 3 arrows (not including the one you just did). Sometimes it will take 4 depending on the timing. 😉 When he dies, head up a screen and you will find the triforce. Get it and enjoy the ending. Congrats, you just beat one of the hardest games of Zelda history. 😀
Special thanks to zeldadungeon.net for helping me beat the games and inspiring me to make this website. Thanks to google.com/images for helping me get the pictures for this website. A very special thanks to Nintendo for making The Legend of Zelda video games.










Stumbled on your blog through Stumbleupon. You know I will be signing up to your rss feed.
you’re in point of fact a just right webmaster. The site loading speed is amazing. It kind of feels that you’re doing any unique trick. In addition, The contents are masterwork. you have performed a excellent job on this subject!
As I web site possessor I believe the content material here is rattling magnificent , appreciate it for your efforts. You should keep it up forever! Best of luck.
Hiya, I’m really glad I have found this info. Today bloggers publish just about gossips and net and this is really annoying. A good web site with exciting content, this is what I need. Thank you for keeping this web-site, I will be visiting it. Do you do newsletters? Can not find it.
whoah this blog is excellent i like studying your posts. Stay up the great paintings! You understand, lots of persons are hunting around for this information, you can help them greatly.
I like the valuable information you provide in your articles. I’ll bookmark your weblog and check again here frequently. I’m quite sure I will learn many new stuff right here! Best of luck for the next!
Hi there, I discovered your site via Google at the same time as looking for a comparable topic, your web site got here up, it looks great. I have bookmarked it in my google bookmarks.
Thank you a lot for providing individuals with an exceptionally wonderful possiblity to check tips from this website. It really is so awesome and as well , full of a good time for me personally and my office mates to visit your site more than three times weekly to read the newest stuff you have. Of course, I am just at all times fulfilled for the sensational tips and hints you serve. Certain two tips on this page are really the best we’ve had.
You completed some nice points there. I did a search on the issue and found mainly persons will agree with your blog.
You completed various good points there. I did a search on the topic and found the majority of persons will have the same opinion with your blog.
I¡¦ve been exploring for a little for any high-quality articles or weblog posts in this kind of house . Exploring in Yahoo I finally stumbled upon this website. Reading this information So i¡¦m happy to exhibit that I have a very good uncanny feeling I discovered exactly what I needed. I so much without a doubt will make sure to don¡¦t disregard this site and provides it a look regularly.
Good web site! I truly love how it is easy on my eyes and the data are well written. I am wondering how I could be notified whenever a new post has been made. I’ve subscribed to your RSS which must do the trick! Have a great day!
You made some clear points there. I looked on the internet for the subject and found most individuals will approve with your website.
Hi there, You have done an incredible job. I will certainly digg it and personally suggest to my friends. I’m sure they will be benefited from this site.
You can definitely see your skills within the work you write. The world hopes for more passionate writers such as you who are not afraid to say how they believe. At all times go after your heart.
Hi my family member! I wish to say that this article is amazing, nice written and include almost all important infos. I would like to see extra posts like this .
I’ve been absent for a while, but now I remember why I used to love this blog. Thanks , I will try and check back more frequently. How frequently you update your web site?
Very nice post. I just stumbled upon your blog and wanted to say that I have truly enjoyed browsing your blog posts. In any case I will be subscribing to your rss feed and I hope you write again very soon!
As a Newbie, I am always browsing online for articles that can be of assistance to me. Thank you
Thank you so much for giving everyone an extremely spectacular opportunity to read from here. It’s always very pleasurable and also packed with a lot of fun for me personally and my office co-workers to visit the blog more than three times weekly to study the new items you will have. And lastly, I’m certainly pleased with your magnificent strategies you serve. Certain two facts on this page are unquestionably the most effective I’ve ever had.
Keep functioning ,great job!
My husband and i got so joyous that Albert managed to finish up his research through the ideas he discovered when using the site. It’s not at all simplistic just to find yourself releasing points which others might have been selling. And we all grasp we need the website owner to be grateful to for this. The specific explanations you have made, the easy site menu, the relationships your site give support to instill – it is many exceptional, and it’s really leading our son and the family understand that situation is fun, and that is seriously serious. Thank you for all!
I’m really impressed with your writing skills as well as with the layout on your weblog. Is this a paid theme or did you customize it yourself? Either way keep up the nice quality writing, it’s rare to see a great blog like this one nowadays..
You made some decent points there. I did a search on the subject and found most persons will approve with your website.
I like the valuable information you provide in your articles. I’ll bookmark your weblog and check again here regularly. I am quite sure I will learn plenty of new stuff right here! Best of luck for the next!
I take pleasure in, lead to I found just what I used to be looking for. You have ended my 4 day long hunt! God Bless you man. Have a great day. Bye
Good info and straight to the point. I don’t know if this is in fact the best place to ask but do you people have any ideea where to get some professional writers? Thanks 🙂
I wanted to send you that very small observation to help give many thanks as before on your beautiful pointers you’ve documented on this website. It has been certainly pretty open-handed of you to deliver without restraint all that numerous people would’ve offered for sale as an e-book to make some profit on their own, especially seeing that you might have done it if you ever decided. These creative ideas in addition acted as a fantastic way to be certain that the rest have similar dreams just as my personal own to know a lot more in respect of this problem. I’m sure there are some more pleasant situations in the future for folks who looked over your blog.
I wanted to send you a little remark to help thank you so much yet again on your spectacular suggestions you have featured in this case. It has been so tremendously open-handed of people like you to convey publicly all many of us would have offered for sale for an electronic book to earn some profit for their own end, principally now that you could possibly have done it in case you decided. The strategies likewise served to be the great way to be sure that many people have the identical dreams much like my personal own to see many more when it comes to this condition. I believe there are lots of more pleasant opportunities up front for many who start reading your website.
You made a number of fine points there. I did a search on the matter and found the majority of folks will agree with your blog.
We’re a group of volunteers and opening a new scheme in our community. Your site offered us with valuable information to work on. You have done a formidable job and our entire community will be grateful to you.
My brother suggested I might like this web site. He was entirely right. This post actually made my day. You cann’t imagine just how much time I had spent for this info! Thanks!
I wanted to put you that tiny remark to help say thanks yet again regarding the striking information you have contributed on this site. This is simply shockingly generous with people like you to supply publicly all that many people would have supplied for an electronic book in making some bucks on their own, specifically considering the fact that you could have done it if you ever considered necessary. Those secrets likewise worked as a great way to be certain that most people have a similar dream just as my own to know the truth somewhat more in regard to this problem. I am certain there are a lot more fun occasions in the future for individuals who scan your site.
You are a very smart person!
why, thank you. 😀
I’m still learning from you, while I’m trying to achieve my goals. I definitely liked reading everything that is posted on your blog.Keep the information coming. I enjoyed it!
To be as hungry as a horse
A friend in need is a friend indeed.
Terrific work! This is the kind of info that should be shared around the net. Disgrace on Google for not positioning this publish higher! Come on over and discuss with my website . Thank you =)
Amazing posting, I am checking back again on a regular to watch out for fresh news.
You actually make it seem so easy with your presentation but I to find this matter to be really something which I believe I would never understand. It seems too complex and extremely wide for me. I am looking ahead on your next put up, I¡¦ll try to get the hang of it!
I just couldn’t go away your web site before suggesting that I really enjoyed the standard information a person supply in your visitors? Is gonna be again incessantly to check out new posts
There’s life in the old dog yet.
I do accept as true with all of the concepts you have introduced in your post. They’re really convincing and will definitely work. Still, the posts are very short for starters. May just you please prolong them a bit from subsequent time? Thanks for the post.
Where’s a will, there’s a way.
There’s no accounting for taste.
The pot calling the kettle black.
Use your head to save your feet.
You completed some nice points there. I did a search on the subject matter and found nearly all people will go along with with your blog.
To ride shotgun.
Out of the frying pan and into the fire
Easier said than done.
I happen to be commenting to make you know what a brilliant encounter my friend’s princess developed browsing yuor web blog. She discovered lots of pieces, with the inclusion of what it’s like to have a very effective giving heart to have most people effortlessly know precisely various tricky matters. You undoubtedly exceeded people’s expectations. Thanks for imparting those warm and helpful, safe, edifying and as well as fun tips about the topic to Kate.
Nice post. I was checking continuously this blog and I’m impressed! Very helpful info specially the last part 🙂 I care for such info a lot. I was seeking this certain information for a very long time. Thank you and good luck.
I have been browsing online more than 3 hours today, yet I never found any interesting article like yours. It’s pretty worth enough for me. In my opinion, if all site owners and bloggers made good content as you did, the net will be much more useful than ever before.
The dogs have not eaten up the end of the day.
You can’t teach an old dog new tricks.
Every dog has its day.
Laughter is the best medicine.
My home is my castle.
Thanks for trying to describe the terminlogy to the rookies!
I was just looking for this information for a while. After 6 hours of continuous Googleing, finally I got it in your web site. I wonder what’s the lack of Google strategy that don’t rank this type of informative sites in top of the list. Usually the top web sites are full of garbage.
Truly difficult to find advised persons on this matter, however you be understood as you know what you are referring to! Appreciate it
Great ¡V I should certainly pronounce, impressed with your website. I had no trouble navigating through all tabs and related information ended up being truly simple to do to access. I recently found what I hoped for before you know it in the least. Reasonably unusual. Is likely to appreciate it for those who add forums or something, website theme . a tones way for your client to communicate. Nice task..
You can wait till the cows come home.
Nothing ventured, nothing gained.
He who pays the piper calls the tune.
Once bitten twice shy.
Well I sincerely enjoyed studying it. This information offered by you is very helpful for correct planning.
Time will tell.
I enjoy you because of every one of your labor on this blog. My niece loves getting into research and it’s simple to grasp why. A number of us know all regarding the powerful way you give important guidelines via the web blog and even improve participation from visitors about this article and our girl is learning a lot of things. Take pleasure in the remaining portion of the new year. You are always conducting a powerful job.
Don’t put all your eggs in one basket.
You could definitely see your skills in the work you write. The arena hopes for more passionate writers like you who are not afraid to say how they believe. All the time go after your heart.
Magnificent beat ! I wish to apprentice while you amend your web site, how could i subscribe for a blog website? The account helped me a acceptable deal. I had been tiny bit acquainted of this your broadcast provided bright clear concept
All’s fair in love and war.
I think this is among the most significant information for me. And i’m glad reading your article. But wanna remark on few general things, The website style is great, the articles is really great : D. Good job, cheers
Stick your head into the sands.
Once bitten twice shy.
Wow! This can be one particular of the most beneficial blogs We have ever arrive across on this subject. Basically Wonderful. I’m also a specialist in this topic so I can understand your effort.
You actually make it seem so easy with your presentation but I find this matter to be actually something that I think I would never understand. It seems too complex and very broad for me. I’m looking forward for your next post, I will try to get the hang of it!
Little by little one goes far.
Hey very cool website!! Guy .. Excellent .. Amazing .. I will bookmark your site and take the feeds additionally¡KI’m glad to search out a lot of helpful info right here in the post, we want develop extra strategies on this regard, thanks for sharing. . . . . .
The end justifies the means.
One man’s meat is another man’s poison.
To be as hungry as a horse
Good article and straight to the point. I am not sure if this is actually the best place to ask but do you guys have any thoughts on where to employ some professional writers? Thx 🙂
Don’t judge a book by its cover.
As I website possessor I believe the content material here is rattling fantastic , appreciate it for your hard work. You should keep it up forever! Good Luck.
I have been absent for a while, but now I remember why I used to love this site. Thank you, I¡¦ll try and check back more frequently. How frequently you update your website?
I do not even know how I ended up here, but I thought this post was good. I don’t know who you are but certainly you are going to a famous blogger if you aren’t already 😉 Cheers!
There’s no place like home.
Health is better than wealth.
I¡¦ll immediately take hold of your rss as I can’t to find your email subscription hyperlink or newsletter service. Do you have any? Kindly permit me recognize in order that I could subscribe. Thanks.
Necessity is the mother of invention.
It’s not the size of the boat, it’s the motion in the ocean.
Thank you for some other informative site. Where else could I get that type of info written in such a perfect approach? I have a venture that I am simply now running on, and I have been at the glance out for such information.
Let sleeping dogs lie.
Thanks , I have recently been looking for info about this subject for ages and yours is the greatest I’ve came upon till now. But, what in regards to the bottom line? Are you certain concerning the supply?
till the cow comes home
The grass is always greener on the other side of the fence.
Forewarned is forearmed.
you’re actually a excellent webmaster. The website loading pace is amazing. It kind of feels that you’re doing any distinctive trick. In addition, The contents are masterpiece. you’ve done a great job in this topic!
I have not checked in here for some time as I thought it was getting boring, but the last several posts are good quality so I guess I¡¦ll add you back to my daily bloglist. You deserve it my friend 🙂
(I got this from the) five-finger discount.
You are a very bright individual!
We are a group of volunteers and opening a new scheme in our community. Your website provided us with valuable info to work on. You’ve done a formidable job and our entire community will be thankful to you.
I¡¦m no longer certain where you’re getting your info, however great topic. I must spend a while studying more or figuring out more. Thanks for fantastic information I used to be looking for this info for my mission.
Very nice post. I just stumbled upon your blog and wished to say that I have truly enjoyed browsing your blog posts. After all I will be subscribing to your feed and I hope you write again very soon!
I am very happy to read this. This is the kind of manual that needs to be given and not the accidental misinformation that’s at the other blogs. Appreciate your sharing this greatest doc.
I¡¦ve learn a few excellent stuff here. Certainly worth bookmarking for revisiting. I wonder how much attempt you set to make such a fantastic informative web site.
Nice read, I just passed this onto a friend who was doing a little research on that. And he actually bought me lunch since I found it for him smile So let me rephrase that: Thanks for lunch!
Thanks for sharing excellent informations. Your web-site is very cool. I’m impressed by the details that you¡¦ve on this web site. It reveals how nicely you understand this subject. Bookmarked this web page, will come back for more articles. You, my friend, ROCK! I found simply the info I already searched all over the place and simply could not come across. What a perfect site.
Children and fools tell the truth.
It¡¦s actually a great and helpful piece of information. I¡¦m glad that you shared this useful information with us. Please keep us informed like this. Thanks for sharing.
I really appreciate this post. I¡¦ve been looking all over for this! Thank goodness I found it on Bing. You have made my day! Thank you again
wonderful submit, very informative. I’m wondering why the other specialists of this sector do not notice this. You should continue your writing. I’m sure, you have a huge readers’ base already!
I do not even know how I ended up here, but I thought this post was great. I don’t know who you are but certainly you are going to a famous blogger if you aren’t already 😉 Cheers!
It is in point of fact a nice and useful piece of information. I am glad that you shared this helpful info with us. Please stay us up to date like this. Thanks for sharing.
Excellent goods from you, man. I have understand your stuff previous to and you are just too wonderful. I actually like what you’ve acquired here, certainly like what you’re saying and the way in which you say it. You make it enjoyable and you still take care of to keep it wise. I cant wait to read much more from you. This is really a wonderful website.
I would like to thnkx for the efforts you have put in writing this blog. I’m hoping the same high-grade blog post from you in the upcoming as well. Actually your creative writing abilities has encouraged me to get my own website now. Actually the blogging is spreading its wings rapidly. Your write up is a great example of it.
I¡¦m not certain where you are getting your info, but great topic. I must spend a while finding out more or working out more. Thanks for excellent info I was on the lookout for this info for my mission.
I’m still learning from you, as I’m improving myself. I definitely enjoy reading all that is posted on your blog.Keep the aarticles coming. I enjoyed it!
I do not even know how I ended up here, but I thought this post was great. I don’t know who you are but certainly you’re going to a famous blogger if you aren’t already 😉 Cheers!
Normally I don’t read article on blogs, but I would like to say that this write-up very compelled me to check out and do so! Your writing taste has been amazed me. Thanks, quite great post.
Good web site! I really love how it is simple on my eyes and the data are well written. I am wondering how I might be notified when a new post has been made. I’ve subscribed to your RSS which must do the trick! Have a nice day!
You made some clear points there. I looked on the internet for the subject matter and found most individuals will go along with with your site.
I am always searching online for articles that can help me. Thx!
I have fun with, lead to I discovered exactly what I used to be having a look for. You’ve ended my 4 day long hunt! God Bless you man. Have a great day. Bye
That’s the way the cookie crumbles.
I think this is one of the most important info for me. And i’m glad reading your article. But wanna remark on some general things, The site style is great, the articles is really great : D. Good job, cheers
Please let me know if you’re looking for a article author for your blog. You have some really great posts and I feel I would be a good asset. If you ever want to take some of the load off, I’d really like to write some material for your blog in exchange for a link back to mine. Please shoot me an e-mail if interested. Kudos!
Say, you bought a nice blog site article.Definitely thanks! Really Neat.