Welcome to the Legend of Zelda Ocarina of Time walkthrough. This game is very hard so, listen carefully to this walkthrough. It is also 3-D so there will be no screens to pass by. I will describe what the places look like and where they are in the particular place. I’m not going to say a thing about the storyline, you have to figure it out. This will involve the 36 heart pieces, 100 gold skulltulas, all the upgrades, and the sidequest with the big surprise. Now, enjoy this game and follow the walkthrough carefully. 🙂
Inside the Great Deku Tree
At the start of the game, the Great Deku Tree will introduce himself and tell you that the other Kokiri in the forest have a fairy, except one. That is our hero that’s sleeping right here. Here’s part of his dream.
What happens in the dream is that there’s is a pretty girl with her attendant on a white horse, and Link has a fairy. Then when Link turns around there is an evil man on a black horse that wants to kidnap the girl. Then the screen will go white and the Great Deku Tree will call over Navi. The Great Deku Tree will tell Navi to go find the boy without a fairy. *cough Link cough* Enjoy the scene when Navi goes over to Link’s house. When Navi enters, Link will still be asleep. She wakes him up and introduces herself, and says that she will be Link’s partner from now on. Sweet! 🙂
When Navi is done talking, you can now control Link. Note that you don’t have a sword and shield yet. We’ll get them later and go to the Great Deku Tree. Exit your house and as you walk out, you’ll see a girl walk by in front of your house. The girl’s name is Saria. She is Link’s childhood friend and is very nice. Where you are now is the Kokiri Forest. This is where the Kokiri live. Saria is one of the kokiri. She looks like this.
If you talk to Saria she will congratulate you in getting a fairy and getting summoned by the Great Deku Tree. Now, you can go to the east of here. If you want to explore the area, then go ahead. When you’re done exploring, jump over the long stepping stones that look like very tiny islands and you will find one of the other kokiri blocking the way to the Deku Tree. His name is Mido, he is a huge jerk because he thinks he’s the Deku Tree’s favorite (not). Mido thinks that Saria likes him, when she doesn’t. When you talk to Mido he will explain that you don’t have a sword and shield. 🙁 Great! If you go tell Saria, she will call him a bum and say that he’s right that you need a sword and shield. 🙁 I’ll tell you where the sword is first. The shield in the Kokiri Shop cost 40 rupees plus shipping and handling. Just kidding, it only cost 40 rupees. 🙂 If you go to the far north of the Kokiri Forest, there are some rocks here, these help you practice your targeting skills. If you do some backflips and side jumps while targeting the rocks, you’ll get some rupees. When you’re done, go through that mysterious hole in the wall. There is a boulder here, so follow the path without getting hit by the boulder and near the end of the path you will find a treasure chest. Well, go ahead and open it. Inside it is the Kokiri Sword! 😀
Now, first go to the pause menu and it has 4 parts to it. There’s a map, the items, the tunics weapons boots icon, and the one where it will keep track of the songs, gold skulltulas, and how many heart pieces to get a full heart container. You can go to Mido’s house which is the house near the shop at the other end of the stepping stone sign. Behind his house is 5 rupees and inside his house are some treasure chests. Open them for some rupees and a recovery heart. Exit Mido’s house and start gathering some rupees. When you have 40 rupees or more, you can go to the shop. It is the place with a red roof. Now, on the east side inside the shop is a little opening that contains 5 rupees inside. Go talk to the shop person and buy the Deku Shield. If you have more rupees (you can hold up to 99), you can buy the Deku Sticks and the Deku Nuts, or a recovery heart if your life is running low. The shop should look like this.
When you’re done shopping, equip the shield on the weapons tunics and boots subscreen, and exit the shop. Go to where Mido is so we can rub it in his face. 🙂 He’ll let you pass and walk through the path. There is a new enemy here called a withered Deku Baba. You have to slash them and you will get a Deku Stick in return. You can also target enemies with Navi and she will tell you the weak point. On the item part you can see the directions of the C buttons or C stick if you’re using the gamecube controller. When the top part of it blinks and says Navi, then you can talk to Navi and let her tell you the weak point of the enemy. When you’re done killing the Deku Babas, head forward and meet the Great Deku Tree. 🙂
The Great Deku Tree will explain what you have to do right now. When he is done he will ask you if you have the courage to do this task. Say yes and the Deku Tree will open up and let you inside to get to you’re first dungeon. Navi will go with you. 🙂 This is the part when Navi gets really annoying, she will tell you things that you probably already know and you have to read what she says. 🙁
Welcome to the first dungeon of the game. There are 3 gold skulltulas in here, but I’ll help you get them. There are some new enemies: The Deku Baba (slash them), deku scrub (block their deku nuts with your shield), big skulltula (slash their backs), skullwalltulas (shoot them while their on the wall), gohma larva (slash them or shoot/slash their eggs), and the gold skulltula which you can either slash or shoot. Go up the ladder to the left and start following the path. Link will automatically jump so don’t worry. Keep following the path until you see some vines on the wall. There are some Skullwalltulas on the wall and they will knock you down if you try to climb the vines. Open the chest in front of you to get the dungeon map. Keep following the path and you will come across a door. Enter the door and there is a deku scrub in here. Block the deku nuts he shoots at you with your shield and follow him around and talk to him. He will give you some good hints then he will disappear. Go through the door that just opened and there is a treasure chest at the end of the room. The platform will disappear if you jump on it, so jump down on the floor below, climb the vines and open the chest for the fairy slingshot. Equip it and you can shoot deku seeds. You can either jump on the platform to go back or you can shoot that ladder hanging up there. Whatever you do, backtrack to the room with the vines. Shoot down those pesky skullwalltulas and climb the vines all the way to the top. Follow the path to the end and you will find a door. This is the room with the compass. Hit the switch to raise the platforms and jump across them to get to the treasure chest at the end. Open the chest for the compass. There is a gold skulltula in this room, so raise the platforms again and go to the left side of the room to find a big skulltula and the gold skulltula. Kill the gold skulltula, and get the token it leaves behind. Exit this room, and head to one of the edges of this room. We have to jump on the webs that are blocking a hole down to the next floor. Jump on the web from up there and you will fall in some water. Get on a solid surface and shoot the gold skulltula on the vines behind you. You can tell if there’s a gold skulltula there, because you can hear it. 🙂 Step on the switch, and there is a cage like thing with a gold skulltula on it. Shoot it and get the token by jumping to it. That’s all the gold skulltulas for now. You can open the chest by the torch for a recovery heart. Light a stick and jump over to the piece of land with a gigantic web coming from the wall. Burn the web with the lit stick and head through the door that is revealed. There is another deku scrub in here that you need to kill. He will tell you a code that is 23 is number 1. Weird. . . 🙂 Shoot the eye on the wall to open the door. This place is full of water. Navi will suggest that you dive underwater to get that switch over there. This will lower the water so you can get on the moving platform and ride to the other side. There is a big skulltula on the other side and you need to kill him. Push the big block under the opening so you can get to the door. In this room you have to light all the torches in here. There are some withered deku babas in here and light all the torches with your stick. Go through the door that opens up. There is a big skulltula on the wall, kill it and don’t move forward, there is gohma larva on the ceiling. Shoot the eggs and you can run around now. Burn the web that has a hole that you can crawl through on the other side. Crawl through the hole after you burn the web. Now, there is another web in the middle of the floor. You need to burn it. Push the block down, light a stick, get back on the platform with the web, and swing the stick to burn the web. Fall down the hole and you will fall in some water. Swim to shore and you will find 3 deku scrubs. Kill the middle one first, then the far right one, then get the far left one and talk to him. He will give you a hint about the dungeon boss in the next room. Go in the next room and walk into the mist. The door will close on you! Look up and you will find the boss: Gohma.
To kill her you need to stun her with a deku nut and slash her eye. Then she’ll start to climb up the wall and try to attack you with her gohma larva. Shoot her eye when it’s red and then slash her when she falls. This will go on for about 2 to 3 hits. When she dies, go grab the heart container and walk inside the blue light in the middle of the floor. Congrats, you beat your first dungeon. 🙂
Princess of Destiny
You will land in front of the Great Deku Tree. He will explain that we did awesome in breaking that curse and will tell you about the creation of the triforce and everything. When he’s done talking, he will give you the Spiritual Stone of the Forest or the Kokiri’s Emerald. 🙂 Then he will die. 🙁 We must go on and fulfill the wish of the Deku Tree. As you walk out of the place where the Deku Tree was, you’ll be met by Mido. He thinks that you killed the Deku Tree! JERK! 🙁 You can’t even explain to him what exactly happened! 🙁 Well, you can now go to that giant log thing at the other end of the forest. Head through it and say good-bye to the Kokiri Forest. As soon as you cross the bridge to get to the other log, Saria will be there waiting for you. 🙂 She will explain that she knew that you’d leave the forest because you are different from her and her friends (except Mido). She will give you the Fairy Ocarina to remember her. Sweet! This will help us learn some songs that will be very important. 🙂 Link will leave the bridge and welcome to Hyrule Field!
As soon as you turn the corner, there will be an owl there that will tell you about your map. Not very necessary so don’t pay attention to him. Head to the far northern part of Hyrule Field to get to the Hyrule Castle town. You might want to stay on the path because it will get dark and if you’re off the path, the stalchildren will come out and attack you. This is a problem because they are endless. 🙁 In the daytime the Peahats attack you. 🙁 When you get to the castle part, enter the door on the first part you enter. If you roll into the box in the corner straight ahead of you, you will find your 4th gold skulltula. Kill it, claim the token and exit the house. Go to the other end of the brick place and you will find the Market. You can explore and you will find a girl with red hair. Her name is Malon. Talk to her and she will tell you that she is waiting for her dad. Exit the market to the path above Malon and welcome to Hyrule Castle. The owl will come by and explain a little more about the princess and stuff. 🙁 When he is done, roll into the tree that is right there and your 5th gold skulltula will come by. 🙂 Kill it and claim the token. Exit back to the Market to find that Malon is not there! :! Go back to the castle and you will find Malon next to a wall of vines. Talk to her and she will ask you to go find her dad for her. She will give you the weird egg. Climb the middle vine behind Malon, and walk around the platform and jump down. Watch out for the guards and climb the rock wall that is near the gate. Jump off the platform and swim in the moat. Get to land and you will find a fat sleeping guy in front of some blocks. Wait for the egg to hatch which is after nightfall, and when the egg hatches, show the guy the chicken and he will wake up. Talk to him and this is Malon’s father Talon. He will run off and you can now push those blocks. Push the blocks into the moat, jump on top of the blocks, jump to the hole, and crawl through it. There are some more guards here. Dodge the first one, the 2 others, the one guarding the rupees (don’t even think about trying to get those), go through the upper path, and at the end of it, head through the opening and you will find a pretty girl at the end of the place. Talk to the girl and she will ask you who you are and how you got past the guards. She recognizes you from a dream of some sort and she likes you! 😉 She will explain the legend of the Temple of Time, and then introduce herself as Princess Zelda. 🙂 She thinks your name is very familiar. 😕 That’s weird. She will tell you that you need 3 SPIRITUAL STONES?! She will show you someone in the window, this is Ganondorf. Don’t you recognize Zelda and Ganondorf from your dream? 🙂 Zelda will mention that Ganondorf wants the Triforce and will take over the world. You have to get the other 2 spiritual stones and Zelda will protect the Ocarina of Time. She will also give you a letter with HER AUTOGRAPH!!! Go talk to the lady at the opening. This is Impa, she is one of the Sheikah and is Zelda’s attendant. She will teach you a song on the ocarina called Zelda’s Lullaby. This will come in handy for some of the places. Now, we have some collecting to do. 🙂 😀
Errands before the Dodongo’s Cavern
Impa will tell you about Death Mountain and the Gorons. They hold the Spiritual Stone of Fire. First we have some collecting to do before we go. 🙂 Let’s go get you a couple of songs, heart pieces, bottles, and gold skulltulas. Our next destination is Kakariko Village that is the place next door to Hyrule Castle town from the east. In Kakariko, there will be a girl with red hair that is missing her chickens! There are 7 of them that we have to find and she will give you a reward for returning her chickens. Don’t attack the chickens or they will kill you. Here’s what they’ll do after you slash the heck out of them.
Go find all the chickens. One is near the entrance. All you have to do is pick it up and throw it in the pen by the red head. Another one is up the steps on the west and it is near the entrance to Death Mountain. We need to use this chicken to get the other chicken that is behind the fence near the grey brick house. We can fly with the chickens. So fly over to that chicken, throw the chicken you have over the edge, get the other chicken, and fly off the other side of the fence. Get both chickens and throw them in the pen by the red head. Get the other chicken that is by the entrance to the graveyard, go up the steps close to you, go near the corner of the fence at the other end that is blocking the top part of the platform, aim for the corner of the other fence that is close, and jump to the corner. Get on a better surface, throw the chicken over, DO NOT GO IN THE HOLE OR THE CHICKENS WILL GO BACK TO THEIR ORIGINAL PLACES, get the chicken that is close to the ladder, climb the steps, and throw the chicken over the fence. Climb up the ladder on the brick wall, and you will find another chicken. Get it and fly over to the pen and throw all the chickens you got into the pen. Now, we have one more. It is in a box near the white house by the stairs to the Death Mountain entrance. The first stairs. 🙂 Roll into the box and throw it in the pen. Talk to the red head and she will tell you that she is allergic to cuccos and she will get goose bumps if she touches them. Well. . . that’s convenient. 😕 She will give you your first bottle. 😀 They look like this:
Now, let’s get the next song on your list. Go to the graveyard and there will be a list of graves around here. There is a heart piece here but if you pull on the gravestones, the kid will threaten to tell the gravekeeper, Dampe`. So, go to the biggest grave at the very end of the graveyard, and if you look at the 2 graves beside it, the 2 composer brothers will come by and haunt you. You have to slash them to kill them. They kind of look like Mario and Luigi from the Mario series. They will tell you about the song that they created a bajillion years ago. Go on the ground area that has a Triforce sign on it. Play Zelda’s Lullaby and the grave will explode. Go in the hole. There are some keese here. You need to shoot them with your slingshot. Once you kill all of them, the door will open. Go through the door, and there are some enemies in here that are pretty hard to kill in your condition. They are called redeads. They are very deadly. They scream to freeze you and if you get close they will eat your brains and that decreases your life. You could try to kill them but it might not work. Just try to get to the other side of the room and through the opening. Go read the wall that is at the other side of the room. Then there will be some music notes on the wall. It will play the song for you and you need to play it and you will learn how to make time go faster. This song will also stun redeads! 😀 So let’s get out of here and get ourselves a heart piece. 🙂
Now, that we are out of that redead infested grave, let’s get that heart piece. 🙂 Hey! It’s night outside! After you play the Sun’s Song, you can turn night to day and day to night. Pull back the grave on the last row facing the front 4th one. Go in the hole and there will be a redead here. Stun it with the Sun’s Song, go behind it, target it, and slash it like there’s no tomorrow. 🙂 When you kill it, go on the steps, and play the Sun’s Song. A treasure chest will appear. Open it to get your 1st heart piece. 😀
Get out of the hole and get out of Kakariko Village. Our next destination is Lon Lon Ranch which is the place in the middle of Hyrule Field. Go there and there will be a house to your left, and a barn to your right. We need to go in the house. There will be Talon sleeping in the house with a million cuccos. If you talk to him he will ask you to play a game for 10 rupees. Don’t talk to him yet. Instead, throw all the cuccos you can get, behind the desk that Talon is sleeping by. Now, talk to Talon and you will have to find all of his super cuccos. If you find all of them, you’ll get something good. 🙂 It will be easy for you because they are the only ones that aren’t behind the desk. Get the cuccos and he will reward you. You don’t have to cheat if you don’t want to, but if you don’t cheat, the cuccos are in the 3 corners of the normal cuccos. 🙂 When you’re done, Talon will reward you by. . . letting you marry Malon. 😕 It doesn’t matter if you say yes or no, because he was just kidding. The real reward is Lon Lon Milk. This will replenish 10 hearts. And you got your 2nd bottle. There are 4 bottles in this game. We can only get the first 3 for now. I’ll help you get the 3rd one after the Dodongo’s Cavern. 🙂 Exit the house and go to the center of the ranch where the horses are. Enter the place and you will hear Malon singing. Talk to her at least 3 times then whip out your ocarina. She’ll teach you Epona’s Song. This will come in handy later in the game but we don’t need it right now. You just need to get it before you get all the spiritual stones. Or else you can’t get it. 🙁 Now that we have Epona’s Song, let’s go explore some more of Lon Lon Ranch. There is a silo in the corner of the ranch. Enter it and move the blocks out of the way to reveal a hole in the wall that you can crawl through. Crawl through it and get your 2nd heart piece. Exit the silo and play the Sun’s Song. Roll into the tree by Malon’s house to find a gold skulltula. Now, some gold skulltulas only appear at night. Kill the gold skulltula and get the token. Go behind the area where the horses were and there will be a gold skulltula there. Kill it and get the token. Now, let’s go to our next destination which is the Kokiri Forest.
It is on the far right entrance in Hyrule Field. Go there and reenter the Kokiri Forest. Cross the bridge, and enter the Kokiri Forest. If it is daytime, play the Sun’s Song and go behind the Know-it-all brothers house and there is your 8th gold skulltula. Kill it and you have to backflip or jump slash to get the token. Now, if you go to Saria’s house, you will find that she is not there! If you ask Mido, he will tell you that Saria is in the Lost Woods. Let’s go there. It is at the top part of the forest. Climb the vines behind Mido’s house, follow up the ramp and enter the log. The Lost Woods is very confusing, but I’ll help you out. If you slash some grass here, you’ll find some bugs, we’ll need some bugs later, so why don’t we bottle one right now. What’s weird is that when you unleash the bugs, 3 bugs will come out and you can recapture one of the bugs. So, get a bug by equipping a bottle and swinging it at the bug to catch it. This works with fairies too. However, this will not work with a potion. You have to buy one. This can work with milk. Play Epona’s Song for a cow and it will give you some milk in your bottle. Take the path on the right that will lead to a tree with a nut in the middle of it. Shoot the nut in the middle 3 times and a nice deku scrub will come out and give you the 40 deku seed upgrade. Sweet! More ammo! 😀 Jump down the ledge and get on the tree platform and you will find some skull kids. Whip out your ocarina and follow along with the songs that the skull kids play. Do this 3 times in a row and they will reward you with your 3rd heart piece. 😀 Climb back up the ladder and take the path to your right when you climb up the ladder. Then the annoying owl will come by. For those who want to know his name it is Kaepora Gaebora. Let’s just stick with the annoying owl part. It tells you to follow the mysterious music. When you are done talking to the owl, head right, left, forward, left, right, and you will come across the Sacred Forest Meadow. There is a new enemy here called a wolfos. These things will come out of the ground and try to kill you. If you try to slash it before it tries to slash you it will block or dodge your attacks. So, wait for the right time and put him out of his misery. 🙂 The door will open! 😀 Now, follow the path through this maze while killing mad scrubs along the way. These things are not nice, they will try to kill you no matter what. When you block them they will try to run away from you, slash it and it will die. When you get to a place that seems like a large square, go to the top of it and climb up the steps. Kill the mad scrubs and go through the opening. Saria! She was here the whole time. Link will run up to her and Saria will tell you that she likes this place. 🙂 She’ll teach you Saria’s Song so that you can talk to her anytime, anywhere, anyhow. This song will come in handy when meeting the gorons. 🙂 So, climb the ladder at the bottom of the steps and there will be a small square in the middle of the top. Go in the square and fall down the hole there. This is a regular fairy’s fountain where you can get fairies! If you have any room, get a fairy. Don’t release the bugs because we need these. When you’re done healing, exit the hole, climb up the ladder, and get out of the Sacred Forest Meadow. Take any path you want to exit the Lost Woods. Reenter the Lost Woods and take the left route this time. There is a Skull Kid here. Get on the platform in front of him and play Saria’s Song for him. He will give you your 4th heart piece and you now have 5 hearts total! 😀 There’s another upgrade we need to get here. Take the other path in this room and it is at the far left corner. Go through it, jump down the platform, walk forward and you will meet a business scrub. If you hurt these things they will surrender and sell you an item. This business scrub will upgrade your deku sticks for 40 rupees. Go ahead and pay him the rupees. Now, we can exit the Lost Woods. Exit the Kokiri Forest as well. Our next destination is Kakariko Village. So let’s go there.
I think you remember that Kakariko is right next door to Hyrule Castle Town. So, go there and go to the graveyard. Follow the brick path and head left on the brick path and you will see a patch of soft soil. Dump the bugs on the soft soil and quickly recapture one. Your 9th gold skulltula will jump out. Kill it and get the token. Go back to Kakariko Village and play the Sun’s Song. There is a construction area with red bricks. There is a step like thing on the bricks and your 10th gold skulltula is behind it. Kill it and get the token. There is a house made out of grey bricks by the entrance of the village to Hyrule Field. This is the house of Skulltula where a family has been cursed and they are very rich! They need a certain amount of skulltulas to break the curse. You need 100 gold skulltulas to save all of them. Your 11th gold skulltula is behind the house of skulltula. Kill it and get the token. Your 12th gold skulltula is in the tree at the center of the village. Roll into it, kill the skulltula, and get the token. There is a watch tower near the entrance to Death Mountain. Your 13th gold skulltula is up there. Shoot it, and climb the ladder to get the token. There is a white house that is close to the entrance to Death Mountain. There is also your 14th gold skulltula behind it. Kill it and get the token. Now, enter the house of skulltula and one of the kids got the spell off of him. Talk to him and he will give you the Adult Wallet! 😀 Sweet! Now, we can carry up to 200 rupees! 😀 Exit the house of skulltula and go to the guard near the entrance to Death Mountain.
Dodongo’s Cavern
Show the guard Zelda’s letter and he will recommend a new shield for you. If you tell the Bazaar at the Market that he sent you, then you’ll get a special discount. 🙂 Go to the Market and go to the Bazaar. Talk to the dude and buy the Hylian shield from him for some rupee amount that’s less than 80. This is heavy and you can’t hold it up. Equip your Hylian Shield. This will work in places with fire because if you use the Deku Shield, it will burn away and you’ll be forced to buy a new one! 🙁 Go back to Kakariko and go enter the Death Mountain Trail. 🙂
There are some more enemies here that are called tektites that are kind of like jumping spiders. You have to kill them with your sword. 😉 Follow the trail and you will find a gigantic rock and a goron. If you talk to him he will tell you that the rock blocks the entrance to the Dodongo’s Cavern where gorons go and get their fill of rocks. 😕 They eat rocks. . . well, that’s interesting. 😕 Follow the path up the mountain and you’ll come to 2 paths. Take the one on the right, it leads to Goron City which is our next destination. Keep following the path and you will find a small opening. Go inside it to get to Goron City. 😉
What you need to do is get to the bottom floor where the gigantic jar thing is. There is a room at the upper left corner of the floor. Go close in front of the door and play Zelda’s Lullaby. The door will now open for you! 😀 Go in and follow the path to meet the boss of the gorons. If you talk to him he will get all his anger out on you and talk about the dilemma they’re having. 🙂 Play Saria’s Song for him and he will start dancing. . . . I’m scared now. 😕
He will tell you how awesome the song is (it’s true) and he will tell you that his name is Darunia, the big boss of the gorons. When you tell him that you want the Spiritual Stone of Fire or the Goron’s Ruby, he will tell you if you want it so badly that we have to go beat up those monsters in the Dodongo’s Cavern. 🙁 But, he’ll give you the goron bracelet as a token of your friendship. 🙂 With this thing, you can lift up bomb flowers lying around. 🙂 Now, there’s a heart piece we can get here. 🙂 First, get a stick and use a torch in Darunia’s room, exit Darunia’s room and light all the torches in this room. The gigantic jar thing will start spinning. 🙂 Climb up the steps to the second to bottom floor, grab the nearest bomb flower, and throw it in the jar. It has to land on the face that has a really happy goron face on the front. This might take a few tries but you can do it. When that happens, jump down and get heart piece #5. 🙂 Exit Goron City from the way you came in and head to the right of the city. There will be a goron and a bomb flower. Go pick up the bomb flower and throw it over the edge of where you got the bomb flower. If you aimed it right, the gigantic rock will explode and let you in the Dodongo’s Cavern. But, you can’t get the Spiritual Stone until you beat the dungeon itself. 🙁 So, jump down and enter the Dodongo’s Cavern. 🙂 Make sure that you have your Hylian Shield equipped because there will be a lot of fire. 🙂
The new enemies are: beamos (throw bombs at them), baby dodongo (slash and back away), lizalfos (slash them like there’s no tomorrow), dodongo (throw a bomb at them), armos (bomb them at the right time), fire keese (like regular keese only they fly around on fire), and blade traps (can’t be killed but dodge them at the right time). Put a bomb flower on the dark brown wall and it will explode and lead to the entrance to the Dodongo’s Cavern. 🙂 Navi will alert you that there are lava pits everywhere. It’s like we didn’t know that? 🙁 You have to jump to the left platform, get a bomb flower, kill the beamos if you want, bomb the weird wall on the left, and open the chest to get the dungeon map. 🙂 Now, you can bomb the other wall and a business scrub will be there. There is a barred door here but we’ll get to that later. Go to the other side and bomb the weird looking wall on the right to find an opening. Go inside it and there will be some baby dodongo’s here. Kill them and follow the path to the place where there care some statues and a switch. Pull the statue on the right on the switch so it will stay there. Climb up the platform and go in the door. Kill the keese in this hallway and go through the door. It will shut behind you! D= There are some lizalfos here. They are the miniboss. When they come to you, they will try to slash you, you have to slash them back to kill them. When both of them are dead, go through the door to your left. In this room there are some dodongos in here. You can either bomb them or you can slash their tails. Either way works fine. Light all the torches in here and go in the barred door that is now open. In this room. . . does it ring a bell? We’re back in the main room. Walk forward and step on the switch. The barred door on the other side of the room is now open. Go to the other side and go through the door. In this room there are some suspicious looking steps and you need to go up them, but we’ll get to those later. Grab a bomb flower and bomb the weird wall near the steps. Go through the door, kill the armos with a bomb, and open the chest for the compass. Exit this place, grab the bomb flower next to you, and bomb the middle of all those bomb flowers. The stairs will fall down now. Go up the stairs and walk around until you find some vines. Kill the skullwalltula and your 15th gold skulltula. Get the token and go through the door close by. Push the armos that is near the ladder, and climb up the ladder and hit the switch. After you hit the switch go through the door that opens. In here there is a bridge, run across the bridge without stopping and head through the door. Look out for the blade traps in the narrow passages! 🙁 That wasn’t very nice. Get to the other end of the room and Pull the block so you can get up on that platform close by. You can open the chest for 20 rupees. Get the bomb flower and throw it at the weird wall near the ladder at the right time. Go through the opening and head through the door. There is a platform that has fire on it. Shoot the eye and the fire will go away, jump over to the other side and go down the hallway and through the door. And. . . . . oh no. . . the return of the lizalfos! 🙁 Kill them and head through the other door that opens. Shoot the eye and. . . the other platform is also on fire. Jump on the platform and shoot the eye switch to the left. Then jump through the opening. In here, jump to the other platform and climb up the platform on your right. Open the chest to get the. . . . BOMB BAG!!!!!! Now, we can blow up things.
Go through the opening and head down the hall. Step on the switch. One of the platforms below will make you go up to the second floor faster. Get on the bridge with the gaps. This time, fall down one of the gaps and place a bomb on the black part. Go to the other side of the platform you’re on and bomb the other black part. Then a new entryway will open up. 🙂 We could go in there, but we have a gold skulltula to find. Go back to the room with the baby dodongos and walk forward until you get to the weird wall. Bomb the wall and head through the door. There is a gold skulltula hiding behind a torch. Kill it and get the token. The gold skulltula not the torch. 😀 Go back to the main room and go through the door in the middle of the room. In the room to the left is the boss. But unfortunately, we can’t get to the boss room just yet. Instead, go through the room on the right. This room is shaped like an S. Climb the blocks and go through this room until you find a weird wall. Throw a bomb at the weird wall and head through it. In here is a gold skulltula hiding behind an armos. Kill the armos and the gold skulltula, and get the token. Exit the room, and head to the right, and through the opening. We’re back in the room before the boss. Push the block off the platform and push it to the middle of the room where there is a switch. Go through the left door and you will be close to the boss room. You’re a level above the boss room. Bomb the floor in the middle and open the chest for some bombs. Fall down the hole and you will meet the boss: King Dodongo.
All you have to do is run far back, get a bomb out, run close to him, and throw the bomb in his mouth, then slash him. Repeat this process until he goes into the lava. The lava will dry now and you can go get the heart container. Go through the blue light.
You will land in front of the entrance to the Dodongo’s Cavern. Darunia will drop in and talk about how awesome you are. Why thank you! 😀 He will have you become Sworn Brothers and he will give you the Goron’s Ruby.
Darunia will tell you about the Great Fairy that lives on top of Death Mountain. Then the gorons will come and try to hug you. Link gets scared and runs up the mountain. Head back towards Kakariko and there will be a weird wall. Bomb it and there is a gold skulltula behind it. Kill it, and climb the wall to get the token. Go back to the entrance to the Dodongo’s Cavern and there is some soft soil here. Put some bugs in it and quickly recapture one. Kill the gold skulltula that pops out and get the token. 🙂 Let’s head back to Goron City. Go to the floor where there is a giant rolling goron. Go to the place that looks like a cave. There is a sign inside. It says that if you stop the goron here, you get something good. Bomb the goron there at the right time and the giant goron will give you an upgrade: The big bomb bag! You can now carry 30 bombs. Get back to the top floor and bomb the rocks. Go through the opening near those rocks, and there will be a room full of rocks. Bomb the one on the right, the one that is straight ahead of you, the left one, the forward one, the left one, roll into the crate, kill the gold skulltula and get the token. 🙂 You should have 20 by now. Leave Goron City and get back to the place where the path splits. This time, take the left one. Bomb the rocks, jump across, climb the platform, and follow the path. During this path, some rocks from the volcano will start to fall down on you. Be sure you have your Hylian Shield equipped. It will cease when you get to the ladder. Shoot the skullwalltulas and climb up the mountain. Once you are at the top, go through the opening to get to the Death Mountain Crater.
Whew! Is it toasty in here or what? If you’re time isn’t high, then exit and go back in. Roll into the crate, kill the gold skulltula, and get the token. Go to the edge and climb down the ladder. There is a hole in here and get the heart piece. 🙂 You should have 6 heart pieces by now. Jump into the lava and you will appear back at the entrance to the crater. Exit the crater and go bomb the odd wall on your right. Go in the place and this is a Great Fairy’s Fountain. Go on the Triforce symbol and play Zelda’s Lullaby. The Great Fairy of Power will come out and give you a magic meter with a new spin attack! Sweet! But, shouldn’t the Great Fairy be wearing clothes? 😕 She will tell you of a friend of hers by Hyrule Castle. Exit the fountain and talk to Kaepora Gaebora. He will take you down the mountain. Grab onto his talons and he will drop you on top of Impa’s house. Go to the right on top of Impa’s house and there is a platform there over the chicken pen. Go on the platform and enter the hole in the wall. You are now in a cage with a cow and. . . your 7th heart piece! Get the heart piece and get out of here. Go to the House of Skulltula and enter it. Talk to the other guy that got the curse broken on him and he will give you the Stone of Agony. It will vibrate near gold skulltulas. If you have a rumble pak it will work. This won’t work with an emulator on the wii or the game on the gamecube. This will only work for the Nintendo 64, sadly. 🙁 Let’s go to the next destination. 🙂
Jabu-Jabu’s belly
You’ll find out what the next dungeon is in a while. Right now, we have some errands to run. Go to the Market and go to the shooting gallery. Pay the guy 20 rupees and see if you can shoot the rupees. If you get all of them, you will get the 50 deku seed upgrade. 🙂 Now, go to the Bombchu Bowling Alley in the Market. Talk to the lady and pay her 30 rupees. The prizes are: bomchus, bombs, biggest bomb bag, 50 rupees, and heart piece 8. Here’s what she’ll do.
What you have to do is dodge all the obstacles, aim at the correct angle, and make the bombchu go in the middle. You have to do this 3 times and you’ll get the prize. Repeat this process until you have at least the biggest bomb bag, heart piece 8, and some bombchus. It is very important that you have these. You should have 7 hearts, 40 bombs, and 10 or 20 bomchus. When you’re done, exit the bowling alley and play the Sun’s Song. Go to the stand that is under the dude in the window, and have the dog back there follow you. Take it to the Back Alleyway in the Market and go in the door. Talk to the fat lady in the blue dress and she will give you heart piece 9. Go to Hyrule Castle, climb the vines, jump down, bomb the rock that you see, and crawl through the hole. This is another Great Fairy’s Fountain. Go on the Triforce symbol, play Zelda’s Lullaby, and the Great Fairy of Magic will appear. She will give you Din’s Fire. This will come in handy when burning torches and things. Exit the fountain and exit the Hyrule Castle area and exit the Market. We are going to the Zora’s River which is next door to Kakariko from the east of it. As you enter, the annoying owl will come by and tell you annoying things. When he flies away, roll into the tree to your left and a gold skulltula will fall down. Kill it and get the token.
Bomb the rocks, and you will find a cucco. Don’t worry about him yet. There is a guy by a fence and he sells magic beans. We’re going to deal with him later. Pick up the cucco, jump over the river, jump over the river to get to the other side, climb up the hill by the pillars, jump to the platform with the one blade of grass on it, and as you get close to the edge of it, let go of the cucco and you will be on the platform. Turn to one of the pillars, there is your 10th heart piece, get it and go grab the cucco before he flies away. Go to the hill like platform, throw the cucco up there, climb up it, get the cucco, cross the shallow water, throw the cucco over the deep water to the north of the little island, cross, get the cucco, follow the path until you reach a waterfall and a Triforce sign. Turn around, jump to the platform and get your 11th heart piece. 🙂 Throw the cucco away, play the Sun’s Song, jump off the platforms, and there will be a ladder here. There is also a gold skulltula here. It should look like this.
Kill it and get the token. Climb up the ladder, follow the path and get to the Triforce sign. Get on the Triforce sign and play Zelda’s Lullaby. Jump into the opening in the waterfall and you will now be at the Zora’s Domain.
This is the town of the water people, the zoras. Follow the path up the the place where King Zora is. Light a stick with a torch and light the torch at the bottom of the stairs. Relight a stick if necessary and light the torch by the zora shop, the shallow part to the right of the waterfall that torch, stay on the edge of the water, go in the waterfall, light the 2 torches there, and open the chest to get heart piece 12. You should have 8 hearts by now. Climb up the ladder and go back to where King Zora is. Go through the west opening and there is a zora here. She will let you play the diving game for 20 rupees. If you catch all the rupees she throws in the water, you’ll get a prize. She’ll throw rupees in the water, and you have to jump from there and dive in the water to get the rupees. So do that and get the rupees. You can hold the control stick up to dive in further, but you can only stay down there for 3 seconds or something. 😕 So, do that and once you get all the rupees, run up the path and talk to the zora to get the prize.
This is the silver scale. It will let you dive deeper. Jump back in the water and dive under to find a small opening. Go through it and you will appear at Lake Hylia. This is where we get our 3rd bottle. You’ll see Navi go underwater and mark something. Dive under and get it. It should look like this.
Get out of the water and go to the place where there are scarecrows. Talk to the scarecrow on the lower row. Whip out your ocarina and play 8 notes that you can remember. This is a hidden song so don’t worry about it. Now, that we’re here, there are some more goodies we can get. Go to the little house on the island. Enter it and pay the guy 20 rupees to go fishing. Get the fish that weighs 10 pounds. The big ones always start in the middle. So go get it. When you get it, keep it, and talk to the guy and ask him to weigh your fish. He will give you heart piece 13. Go to the house near the bridge and pour some bugs on the soft soil. Recapture a bug, kill the gold skulltula that comes out, and get the token. Cross the bridge to the island with the huge tree. Play the Sun’s song, swim over to the island with the 2 pillars, kill the gold skulltula, and get the token. Head back to the Zora’s Domain from the place where you entered, follow the path to the king, and show him the letter in the bottle. He will let you go to see Jabu-Jabu in the place thing. King Zora is so fat that he takes so slow to move. 🙁 When he’s finally done moving, go get a fish in the shallow part of the Zora’s Domain near one of the torches. Go follow the path by the torch in the throne room and go through the opening to the Zora’s Fountain. It should look like this.
Go on the thing in front of the whale Jabu-Jabu and dump a fish in front of him. He will suck it up. . . and you too. That’s going to be a story to tell Zelda when you get to the castle! 😀 Here’s the entrance of the dungeon.
There is no fire here so you can use your Deku Shield. There are octoroks and bubbles here. Kill them and shoot the dangly thing on the ceiling near the door to open it. Head through the. . . door? There is an enemy here called a biri and they will electrocute you if you slash them. They are also immune to deku seeds so don’t try it. Go through the door at the other end. In this room you will find. . . Princess Ruto! She will tell you that she knows nothing about the letter in a bottle and that she’s not leaving until she finds the thing she’s looking for. Oh, let her lie. She will fall down a hole. Fall down the same hole with her and talk to her twice. She will make you carry her! 🙁 Great. She’ll say this if you leave her behind.
Go through the door that is very close to you, go down the hallway while killing the bubbles, and here’s a puzzle for you. Unfortunately, Ruto doesn’t feel like swimming in deep water. 🙁 So, we have to throw her on the other platform. First, there are some vine things to your right. There is a gold skulltula up there. Kill it, step on the switch, climb the vines and get the token. There’s a fairy at the top of the vines, but we might already have one and we need those bugs. If the water drained, step on the switch again and swim to the platform you threw Ruto on. Pick up Ruto, bring her down he hallway, and. . . uh. . . the door appears to be locked. 🙁 You can either throw Ruto at the dangly thing, or you can shoot it. Head through the door. There is an octorok here. Kill it as if you were killing a deku scrub, pick up Ruto and wait. Jump on the elevator when it comes down, and wait to get to the upper floor. Go through the door that leads to the room with the holes. Go to the door at the other end of this room and head through the door. This place makes some feel a little bit uncomfortable. Take the path to the right, and when the path splits, take the one with the switch. There are some sting ray like enemies in here, you can kill them by getting close to them and shooting them. When they all die, go open the chest for the boomerang. Now that we have the boomerang, let’s go explore some more. 😀 Exit the room and go to the other path that is to the left of the entrance. Take the one with the blue switch. You have to leave Ruto on the switch for the door to stay open. Go through the door, and there is a. . . red tail hanging from the ceiling. 😕 That is quite disgusting! 🙁 What you have to do is target it, then kill it with your boomerang. When you have finished, a chest will appear. Open the chest to get the dungeon map. I wonder how they do that when your inside a whale. 😕 Exit this room and you will find Ruto bugging you about how you left her behind (yawn). Pick her up and take her to the other path that is really close to this place. Navi will tell you that the red slimy thing is gone! :! That is because you beat the red tail. 😕 So, that’s how you get rid of those things. We have to find the green one so we can reach the boss. Go in the room that your right in front of and you will be timed for 40 seconds to kill all the bubbles. Get a deku nut and you can kill almost all of them with the deku nuts. When you kill them, open the chest for the compass. Exit this room and go back to the place where the paths split near the room with the boomerang. This time, take the other path. Go in the room and there will be a blue tail. We have to get rid of the blue slimy thing before we get to the green tail. Do the same thing with this thing, throw a boomerang at it. When you’re done, get Ruto, exit this room, and go to the path in the middle and the blue slimy thing will be gone. Enter the door, and there is the last tail. There are some biris in here too, so be careful. Kill the biris first with your boomerang, and then kill the green tail with your boomerang. The green slimy things will be gone. So, exit this part of the dungeon and fall down the hole that had the green slimy thing on it. When you fall down, there will be some gold skulltulas nearby. It should look like this.
Hit the gold skulltulas with the boomerang and you can get the token with the boomerang. After you kill both skulltulas, you should have 28 skulltulas by now. Enter the door close to you and you will find. . .
IT’S THE SPIRITUAL STONE OF WATER!!!!!! 😀 Throw Ruto onto the platform and she will rush over and get it. She’ll tell you about how she lost it and she wants you to take her home. Just as you walk close to the platform, it will rise up to the ceiling with Ruto on it. The door will be blocked, and what comes down from the platform, isn’t Ruto. IT’S A BIG OCTO!!!!!! This is your miniboss, he should look like this.
What you have to do is stun him with the boomerang at the right time, and when he spins around, stun him again and if it lands on his back, slash the glowing orb. Repeat this process, but watch out, he burrows. When he dies, get on the platform and it will rise. In the jars, there are some hearts and a fairy. You can get the fairy if you want to. Go down the hallway through the door. Get on the platform and it will drop, allowing you to reach the place close to the boss room. Get a box and put it on the blue switch. Go in the door and in this room, you have to hit the dangly thing with your boomerang. Kill the biris, climb the vines, and there is a wall between you and the dangly thing. You have to throw the boomerang at the correct angle to make it go around the wall and hit the dangly thing. When the door opens, head down the other vines. Get the gold skulltula on the vines and get the token. Go through the door to the boss room. It will start out when the door will turn into a wall, then some biri-like creatures come down. Then you see a gigantic creature thing attached to the biri-like creatures! This is: Barinade.
The trick is to keep moving and throw the boomerang at whatever you need to target! Throw the boomerang at the things that are attached to the ceiling and he will start to move around. You need to stun him and kill all the biri-like creatures with your boomerang. When you kill the biri creatures, more will come out. Repeat this process until all the biri creatures are dead. Then Barinade will move around and shoot electricity at you. Throw your boomerang at it and slash it. Repeat this process and he will die in a very interesting way! Get the heart container and go to the big blue light to find Ruto! When you go in the light she will get mad at you for taking so long and you both will rise. You will land on a thin tree branch. Ruto will smile at you and you will fall in the water. I guess Ruto changed her mind and fell in love with you. She will compliment you and ask you what you want. It doesn’t matter which one you choose because, she can read your mind. 🙂 She will give you the Spiritual Stone of Water, or the Zora’s Sapphire.
There are a couple of gold skulltulas we can get right now. Go to the island and roll into the tree to get the 30th gold skulltula. Kill it and get the token. On the wall, there is a brown rock and a gray rock. Bomb the brown rock by the walll and you will find an opening. Go through it to find a Great Fairy’s Fountain. Play Zelda’s Lullaby on the Triforce symbol and the Great Fairy will give you Farore’s Wind. You can only use this in dungeons, sadly. Farore’s Wind will make a warp point so that you can warp to that place when you have to go back to the start of the dungeon, then you can warp to it. Exit the fountain and play the Sun’s Song. Go on the tree bridge like thing and look on the wall, there is your 31st gold skulltula. Kill it and get the token with the boomerang. Now, let’s go see Princess Zelda. 😀
The Temple of Time
Now, exit the Zora’s Domain, and the Zora River. As you walk toward the castle town, the sky gets cloudy. Uh oh! You might recognize this from the very beginning of the game. Impa and Zelda will be riding on their horse and Zelda will throw something to you. It lands in the moat. Then Ganondorf comes by and tries to get information out of you of where they are. Which Link is too smart to tell him and will take out his sword in defense. Ganondorf will shoot something at you and will try to go after them. I always wonder whether he caught up with Zelda and killed her or they got away and Ganondorf fell off a cliff. Either way you think about it, you have to wait until you beat the game to know for sure what happened. If you have already beat the game, don’t spoil it! Now that you have control, you probably have forgotten about the item in the water. 😉 Why don’t we dive underwater and take a look. Get it and you have. . .
Then the scene will go to a different place.
That sucks, you can’t see Zelda again while you still have the ocarina of time. 🙁 She will teach you the Song of Time. The Song of Time helps you open up the door of time. This will come in handy in a little bit, but we have some more errands to run.
We need to get some more gold skulltulas, heart pieces, and we need to plant some magic beans. First, we’re going to get some gold skulltulas. Go to Lon Lon Ranch, and play the Sun’s Song if it isn’t night yet. On the house window at the top, the gold skulltula is just chilling there. Kill it and get the token with the boomerang. There’s another one near the silo on one of the outer walls. Go kill it and get the token with the boomerang. Exit Lon Lon Ranch. Go to the small tree in between Kakariko and the Hyrule Castle town. Bomb it and a hole will appear. Fall down it and you will see a big skulltula and a gold skulltula. Kill the big skulltula and kill the gold skulltula and get the token with the boomerang. Get out of here and go to Kakariko Village. Go to the House of Skulltula and the 3rd dude is free. He will give you the Giant’s Wallet which will hold up to 500 rupees!!! 😀 You can go around and get some rupees. Keep doing this until you have 500 rupees. A faster way would be to climb the chains to the drawbridge and jump off them once you reach the top. When you have 500 rupees, go to the Zora River and buy all the magic beans he has. With 500, you can buy 9. There are 10 total. Once you have 9, go back to the drawbridge and make 500 more rupees. Then buy the last magic bean. The magic bean dude is by the fence near a bean plant. You can only do 8 locations now. Save the other 2 for later. The first soft soil is right next to the guy selling the magic beans. The next one is in the graveyard at Kakariko. It is by the set of graves to your left. There is a guy here. This is Dampe`. Talk to him and you will get to play his gravedigging game. Let him dig in the soft parts in front of the graves because one of them has a heart piece inside. Once you find it, go get the gold skulltula on the wall by the other set of graves. Go plant a magic bean near the entrance to the Dodongo’s Cavern. Exit Death Mountain and go back to the Kokiri Forest. Go back to the Deku Tree, because there is one gold skulltula in there that we could not reach at the beginning of the game. Go to the room with the gohma larva, light the northwest web on fire, bomb the wall, and go in the door. Go kill it with the boomerang and get the token with the boomerang. Exit the Great Deku Tree. Go to the soft soil by the shop and put some bugs in there and quickly recapture one. Kill the gold skulltula that pops out and get the token. Plant a magic bean here and go to the Lost Woods. Head left twice and put some bugs in the soil here. Recapture one, kill the gold skulltula, and get the token. Plant a magic bean here and head back to the entrance to the Lost Woods. Head right, left, right, left, left, and this is the hidden meadow. There are a couple of business scrubs here that sell nothing needed. There is some soft soil by the business scrub on the right. Put some bugs in there, recapture one, kill the gold skulltula, and get the token. Plant a magic bean here. You should have 39 gold skulltulas by now. Head back to the entrance to the Lost Woods and head right, left, right, left, straight, left. There is a rock here. Bomb it and fall down the hole. There is a business scrub here that will upgrade your deku nuts for 40 rupees. Block his attack and talk to him. Pay him his 40 rupees and you will now get to carry 30 deku nuts. Sweet! Exit the Lost Woods and exit the Kokiri Forest as well. Go to the bottom right entrance in Hyrule Field. This is the way to Lake Hylia. Go in the square with all those fences around, and bomb the ground near the center of the square. Fall down the hole, block the attack, and talk to the business scrub. He will sell you heart piece 15 for 10 rupees! BUY IT! 😀 Exit the hole, get to the other side of the square and enter Lake Hylia. Play the Sun’s Song to make it night and get on the bridge. Face the house and there will be a gold skulltula sitting there. Kill it and get the token with the boomerang. Plant a magic bean by the house too if you haven’t done it yet. Exit Lake Hylia and go to the far west entrance in Hyrule Field. You’re close to Gerudo Valley. Go to the circle of rocks and place a bomb in the center of the rocks. Go in the hole and burn the webs in here with Din’s Fire. Go in the area with the cow and the gold skulltula is right behind the cow on a web. Kill it and get the token with the boomerang. Get out of the hole and enter Gerudo Valley. You can’t enter the Gerudo’s Fortress yet. Population of Gerudo Valley: a lot of girls, one cow, and one chicken. Ganondorf is a gerudo but we’re not counting him. Play the Sun’s Song if it isn’t night yet. Near the entrance is a small waterfall. There is a gold skulltula on it. Kill it and get the token with the boomerang. Grab the chicken, get on the bridge, turn to the right, and jump to the waterfall while holding the chicken. Keep going in the waterfall until you find an opening in the waterfall. Go in the opening to find your 16th heart piece. You should have 10 hearts by now. Jump to the surface part by the waterfall. This is the lower part of Gerudo Valley. Go to the far end of the platform and put some bugs in the soft soil. Don’t recapture one because we need the bottles for later parts of the game. Kill the gold skulltula and get the token. Plant a magic bean here and jump in the water. You will have to follow the current back to Lake Hylia. Go back to Gerudo Valley and grab the chicken. Fly over to the platform with the box, and roll into the box to get your 17th heart piece.
Head back to Kakariko and go to the House of Skulltula. The next kid will give you some bombchus. Head back to the Market and go in the Happy Mask Shop. Talk to the Mask Salesman and he will let you borrow the Keaton Mask. Exit the shop and go to Kakariko Village. Show the mask to the guard that’s guarding the entrance to Death Mountain. He will take it and give you 15 rupees. Go back to the mask shop and talk to the mask salesman. He will now let you borrow the Skull Mask. Well, you have to give him 10 rupees first. Take the Skull Mask to the Lost Woods. Head right, left, right, left, left, and you are now in the Hidden Meadow. Go to the grass area and go where the butterflies are hanging out. You will fall down a hole. Put on the Skull Mask and walk forward onto the spotlight part. The Deku will come out and start to stalk you. 😀 Go to the place where their leader is and talk to the leader. He will give you a deku stick upgrade that holds 30 deku sticks. Exit this place and the real person you need to give the mask to is Skull Kid. Go back to the entrance to the Lost Woods. Head left and talk to the Skull Kid while wearing the Skull Mask. To talk to him you have to stand on the platform in front of him. Then he will take the mask and pay you 10 rupees for that 20 rupee mask. That sucks! 🙁 Go back to the mask shop and pay the mask salesman 20 rupees. He will now let you borrow the spooky mask. Get it and go to the graveyard in Kakariko. It has to be daytime or it will not work. Wear the Spooky Mask and talk to the kid in the graveyard. He will take it and pay you 30 rupees. That’s full price. 😕 Go back to the mask shop and give the mask salesman 30 rupees. He will now let you borrow the Bunny Hood. You have to give this to the jogger in Hyrule Field. He just does laps around Lon Lon Ranch in Hyrule Field. Track him down and wait until nighttime and give him the Bunny Hood. He will give you who knows how much money. Go back to the mask shop and pay the mask salesman 50 rupees. He will say that that’s all the masks you need to sell and he will give you the Mask of Truth. Head back to the Lost Woods, head right, left, right, left, left, go in the hole where the butterflies are hanging out, put on the mask of truth, and walk forward. The deku will come out again. Go talk to the leader and he says that your mask is so scary that they’re giving you the deku nut upgrade that gives you up to 40 deku nuts. Sweet! Let’s get out of here and head to the Market.
There is a place to the right near the path to the castle. This place leads to the Temple of Time. Enter it and go up to the altar in front of a giant wall. Whip out your ocarina and play the Song of Time. It should look close to this.
The spiritual stones will fly out of your pocket and will automatically be placed on the altar. Then the Door of Time will open up. Go inside it and you will find something that will get you places. This is the item.
Navi will tell you that this is the Master Sword. Why don’t you walk up and pull it out. Be prepared, because you will not be able to learn anymore songs if you pull it out. 😀 You will learn some more songs but not in this form. You’ll see when you pull it out.
When you pull it out, a scene will come by when Ganondorf will thank you for. . . oh crap. . . . . HE INVADED AND STOLE THE TRIFORCE!! D: That’s just great. 🙁 First he gets rid of Zelda, now he steals the Triforce?! A scene will come by when someone is calling your name. Link wakes up and sees a man right in front of him. This is Rauru, one of the ancient sages. He looks like this.
He will tell you how Ganondorf and his girlfriends attacked the Temple of Light (which is where you are now) and stole the Triforce. Rauru will tell you to look at yourself and you will see that. . . YOU’VE GROWN UP! You’re old enough to be the Hero of Time now! Rauru will explain that when you pulled it out, you were too little to be the Hero of Time and you were sealed here for 7 years. 7 YEARS?! That means. . . oh no. . . Ganondorf turned Hyrule into a world of monsters! Rauru will tell you that you have to awaken 6 sages and Rauru is one of them. Only 5 more to go. Rauru will give you the Light Medallion. This has his power in it and he will help however he can. The only good thing about being grown up is that the owl isn’t around anymore! 😀 The Light Medallion looks like this.
You will appear back at the Temple of Time. The sad thing is that you can’t use your: boomerang, slingshot, deku sticks, magic beans, and your mask of truth! You can only use: Din’s Fire, Farore’s Wind, deku nuts, ocarina, and bombs. As you walk down to exit the Temple, a person will be there. This is Sheik, he’s one of the Shiekah. He teaches you warping songs. He will tell you the locations of the sages are in the forest, on a mountain, under a lake, in a graveyard, and in a temple for a sand goddess. He says that you know the first sage. She’s a girl. He says that you can’t get to the Forest Temple where the girl is yet. He suggests that you go to Kakariko Village first. Well, let’s go there. First let’s go to Lon Lon Ranch and see what happened there.
Forest Temple
Exit the Temple of Time. When you get to the Market, you will find redeads EVERYWHERE! Get out of here and get to Lon Lon Ranch. Once you enter, go to the place where the horses are and talk to Ingo. That one dude that worked in the stables. He will tell you that Talon got kicked out. He will let you ride his horses for 10 rupees. Don’t go to any of the other horses, instead, play Epona’s Song and Epona will come to you. Get on her by getting close to her and pressing A and have her jump over the fences. Do this and you will get 5 rupees from each jump. Talk to Ingo and he will have you race him. You have to press A to go faster. When you win, he’ll freak out hilariously and will say that if you win this next one, you keep Epona. Beat him and he will not let you leave the ranch. Jump over the fence with Epona and you will escape. Now every time you play Epona’s Song, Epona will come for you. 😀 Go to Kakariko Village and head to the Graveyard. Get on the magic bean plant and you will fly to the box. Break it and you will get a heart piece. Pull back the grave with the flowers on it and go in the hole. AAH! A GHOST! This is the ghost of Dampe`. He will let you race him. Follow him and don’t get the rupees along the way. When you make it to the end, he will give you his treasure. It’s called the hookshot. A treasure chest will appear. Open it to get the hookshot! With this, you can grapple onto things. Go through the door and you will find some blocks, they look like the door of time. Play the Song of Time and the blocks will disappear. Go up the steps and get on the spinning platform. Stay on it until you get to the heart piece. Get it and exit the windmill.
Play the Sun’s Song and hookshot onto the roof of the House of Skulltula, and hookshot onto Impa’s roof. Go to the wall part and you will find a gold skulltula. Kill it and get the token with the hookshot. Exit Kakariko and head to the Market. Go to the castle and this is Ganon’s Castle. That sucks! 🙁 Go to the right until you here a gold skulltula on a wall. Turn around, kill it and get the token with the hookshot. 🙂 Now, let’s head to the Kokiri Forest.
Go to the Kokiri Forest and you will find Big Deku Babas and mad scrubs everywhere! Play the Sun’s Song and go behind the Twin’s House. There is a gold skulltula here, kill it and get the token with the hookshot. Get to the Lost Woods. Head right, left, right, left, left, and ride the bean you planted. Make sure it’s night time. Get on the platform and kill the gold skulltula. Get the token and jump down. Head back to the entrance. Head right, left, right, and. . . hey! It’s our good friend Mido (not). Talk to him and he wants proof that you know Saria! Play Saria’s Song for him and he will let you pass. So, head through that, head straight, left, right, and you will be back in the Sacred Forest Meadow. Be careful, in the passages are some moblins. Target with L or Z whichever version you’re playing, and if you see one, get your hookshot out and wait for him to pass, when he passes by you, kill him with the hookshot. If you don’t see one, then go through. Repeat this process until you reach the stairs. Climb up the ladder behind you and if it is night, you will see a gold skulltula on the left wall. Kill it and get the token with your hookshot. Jump down and head up the stairs. There is a club moblin here. Dodge its attacks by moving in the opposite direction his attacks go. When you get behind him, slash him. When he dies, head up to where Saria is. I think I should say was here. SHE’S GONE! Sheik will drop in and will tell you about the song to get you back here. He will teach you the Minuet of Forest.
Saria is trapped in the Forest Temple. Look up and hookshot on the log above a door. Go through the door to enter the Forest Temple.
The new enemies here are: blue bubbles (skulls with blue fire around them), stalfos (skeletons with shields), wallmasters (try to grab you from the ceiling, Navi will warn you if one is near), floormasters (split into 3 smaller ones after you slash them), and the green bubbles (skulls with green fire around them). Remember this code, because you’ll see it very often in this dungeon. Forest sign above the door means forward, and if there’s nothing above the door, that means backwards. As you enter the temple, you will find 2 wolfos in here. You should know how to kill them because of that time in the Sacred Forest Meadow where you had to kill one to get through. Just don’t worry, you’ll kill them. When you’re done, hookshot onto the vines close to you. Climb up the vines until you reach the flat part of that tree branch. Jump to the other branch and open the chest, or you can hookshot to the chest and open it. Either way, open the chest for a key. You might want to jump back to the first branch because there is a gold skulltula nearby. Get on the first branch and turn to your right. Kill it and get the token with the hookshot. Jump down and go through the door. You’re now in a hallway with a big skulltula. You can easily kill it now with the hookshot no matter what side it’s facing. Go through the door at the end of the hallway and walk forward. You will see an elevator, it should look like this.
Then 4 poes will come out and take the fire away from the torches. These are the Poe Sisters: Joelle, Beth, Amy, and Meg. Then the elevator will fall down and disappear. That’s the way to the boss room! 🙁 So, we can’t get there just yet. Go straight forward and head up the stairs. Turn to your right and you will find a gold skulltula. Kill it and get the token with the hookshot. Head through the door and you will find your first blue bubble. Target it and hold your shield up so the bubble runs into it. Its fire will go away and you can now slash and kill it. Go in the door to face your miniboss/average enemy: Stalfos. There are 2 stalfos in here and you have to kill them kind of as if you were killing a wolfos. The stalfos have shields so they will block your attacks. Once you kill them all, open the chest for a key. In one of the jars is a fairy. You can get it if you want. Head back to the room with the elevator. Head to the northwest door with a time block in front of it. Play the Song of Time and it will go away. Enter the door. You’ll come out and you’ll see a big Deku Baba in your face. Kill it and head to the right. There are some vines here with some skullwalltulas on it. Kill the 2 lower ones with the hookshot and try to climb past the upper one. Get to the door and head through it. Kill the blue bubble and open the chest for the map. Go through the door with the symbol above it. You’ll be in front of a regular deku baba. They’re so tiny now. 🙂 Kill it and hookshot onto the black square with a hook. You’ll appear on another platform. Hit the switch and the water from the well will drain. Jump down. Don’t go in the well yet, there’s a gold skulltula here. Hookshot onto the small chest on the platform. Inside the chest is a heart. Around the corner on the platform is a gold skulltula. Kill it and get the token with the hookshot. Jump down and jump down the well. Go to the other side of the well and you will find a chest. Open it for a key. Climb up the vines and head back to the room with the elevator. Head through the locked door to the west, hookshot the big skulltula, and head through the door. This is a room with a lot of blocks. Kill the blue bubble and climb up the 2 ladders close to you. Navi will point out that there are arrows on the floor. 😉 If you turn a certain direction, you will find a block. Push it the way the arrows direct it and you will find a place where you can push it in and insert it. Follow the arrows to where the block was before. There will be a ladder there and climb up the ladder. Go around and you will find a red block. Push it all the way forward and head back down the ladder. Once you are down, climb up the block and climb up the platform. Head around the corner and you will find the red block. Push it all the way forward until it clicks. Climb up the block and up the platform. Head around the corner and you will find 2 blue bubbles and a door with an eye switch. Ignore the eye switch and head through the door. This hallway is all twisty. Head down the hallway and you will find a couple platforms. There is also a wallmaster here. Jump to one platform and jump to the other one and head through the door. This is Joelle’s room. Just head down the stairs and head through the door. There’s a gigantic hole in the middle of the room. Cast Farore’s Wind if you get careless and decide to jump off. There are 2 stalfos in this room. Kill them and then the ceiling will fall down and cover the hole. Then 2 more stalfos will pop out and try to kill you. Kill them and a chest will appear. Open it to get the Fairy Bow. 😀 Sweet! Now we can shoot things that are out of reach of the hookshot.
Head back to the room with the blocks. Shoot the eye switch and head through the door. At the end of the hallway, jump down the platform and open up the blue chest. You will get the boss key! 😀 There is also a hole in this room, jump down it and you will appear in a room with a couple blue bubbles. Kill them and head through the door. Turn to the left and jump on top of the flat platform that has pillars. There is a gold skulltula on the wall to your left. Kill it and get the token with the hookshot. Jump back onto the platform you were on before, kill the big deku baba, and enter the door to the right. There is a floormaster in here. When it turns green, that means it’s invincible, slash it when it is not invincible, and use Din’s Fire to kill the smaller floormasters. Open the chest for a key. Get out the door, and head to the door with the knob. Get back to the eye switch. I know it is closed but shoot it again to twist the hallway again. Head back to Joelle’s room. Once you are here, we can now shoot the paintings with Joelle on it. Shoot one of them but don’t get too close or she will move to a different painting. After you shoot all the paintings, Joelle will come to life and get down the stairs. Target her and block her spin attacks with your shield. She will disappear, when she appears, slash or shoot her. Repeat this process until you kill her. Then you will get the red fire back. Open the chest for a key. Go through the door and you are back in the room where you got the bow. Head through the door with the forest sign on it. This is Beth’s room. She is the blue poe sister. Do the same thing you did with Joelle and kill Beth the same way you defeated Joelle. After you kill Beth, you get the blue fire back! 😀 Open the chest for the compass. Head up the stairs and head through the locked door. This is another twisty room. There is another wallmaster in here so try to make the jump to the door on your right. Head through the door. There are some green bubbles in here. Wait for their fire to disappear and you can shoot them. Head down the hallway to the door at the other end. This room has lava. Try to get on one of the platforms and either use Din’s Fire to burn away the ice, or to try to shoot an arrow through the torch flame onto the switch. Either way, the hallway will untwist. Head back to the hallway and get to the twisted room. Jump down the hole and you will be in a room with a checkered floor. Navi will point out that the ceiling is falling down. Go to the places where the ceiling doesn’t fall down on. The chest in here contains a bundle of arrows. You can open it if necessary, but it is important that you get to the door at the other end of the room. This is Amy’s room. This is a timed puzzle after you shoot the painting. The trick is to push the green blocks together to create Amy. The blue block needs to go. After you create Amy, she will appear and try to kill you. Kill her the same way you defeated Joelle and Beth, and you will get the green fire! 😀 Head through the door, and you will be back in the room with the elevator. Meg is in here too. She is trickier than the other poe sisters because she clones herself. Like this.
The real Meg is the one the spins around again. Shoot the one that spins. Repeat this process and you will get the purple fire! 😀 You will now have the elevator up and running. Go take the elevator and this is a puzzle. Push the walls that stick out. You have to push them in the correct angle. There is a gold skulltula hiding in one of the tan places. Get it on the correct one, kill it, and get the token with the hookshot. There is a switch in one of the tan places too. Step on the switch and push it to the correct way. There is another switch on the red place. Step on that switch and push it the correct way to get to the blue one. This one has the switch that will open the path to the boss room. Head through the boss door and head up the stairs. Look at all the paintings. They are all the same. Then when you turn to go back, a fence will pop up and block the way! 🙁 When Link turns around, you will see Ganondorf! D: Then he pulls off his face and it turns out he’s: Phantom Ganon.
At first he is on a horse and will go into one of the paintings. You can tell the horse is coming out if it runs toward you. He will also create an illusion that will turn back. Shoot the one that comes out of the painting. Repeat this process until the horse dies. Then he will rise and try to kill you. He will shoot balls of energy at you. Hit it with your sword and it will be like playing ping pong. Phantom Ganon will miss eventually and he will fall down. Go slash the heck out of him when that happens. Repeat this process and he will die. Ganondorf will say that you only defeated his phantom and he will banish the phantom to another dimension. Go grab the heart container and head into the blue light. You will appear back in the Chamber of Sages. A girl will come out of the forest sign.
She will tell you that you don’t have to explain everything and she will tell you about what she has to do and everything. You can talk to Saria and she will tell you hints of what is absolutely necessary of what you need to do. 🙂 Saria is the Sage of the Forest. She will give you the Forest Medallion that has her power in it.
The scene will change when there is a text that says: “Saria will always be your friend.” Then you’ll land in front of the dead Deku Tree. Wait a minute. . . there’s a stem right in front of the Great Deku Tree! As Link walks close to it. . . POP! There’s a little Deku Tree in the ground. This is the Deku Tree Sprout. What he does is that he tells you about Link’s destiny and about his past back in the day. After he’s done, we have some errands to run and another sage to get. 🙂
Fire Temple
Head all the way over to the Temple of Time. Go talk to Sheik and he will explain that if you put the Master Sword back in the Pedestal of Time, you will be a kid again. When that time comes you might have to come here quickly. Sheik will teach you the song that warps you to the Temple of Time: the Prelude of Light.
Then something glowing light above Link and Sheik will appear. Then it will disappear once you are done.
Sheik will disappear. Now, you can go back to the past anytime you want now. But, if you’ve been following this walkthrough, you should have everything necessary by now. Now, let’s head to Lake Hylia. Do you remember the Scarecrow’s Song you made? If you don’t remember it, head back to Lake Hylia as a kid and teach the scarecrow an eight-note song that you’ll remember. If you can remember the eight-note song, then head to Lake Hylia and play your eight-note song to the scarecrow. If you play that song in a certain place, a scarecrow will come by and you can hookshot onto him. Now, let’s head over to Kakariko Village. Head to the House of Skulltula and the 5th child will be uncursed. He will give you a heart piece. You should have 12 hearts by now. Exit the House of Skulltula and head to the red brick house. This is a shooting gallery. This place will upgrade your arrows. Talk to the guy and pay him 20 rupees to play. You should remember how to do this back from where we got the 50 deku seeds upgrade. If you beat this one, you’ll get the 40 arrow upgrade. Head to Death Mountain.
Near the entrance to the Dodongo’s Cavern, you should have planted a magic bean. Ride the plant up and jump off onto the platform with the heart piece. Go get the heart piece. Jump down and reenter the Dodongo’s Cavern. We’re going back in here because we missed a couple of gold skulltulas. Go to the elevator and get to the second floor. Get back to the room with the stairs and bomb flowers. Whatever you do. . . DO NOT LOWER THE STAIRS! Instead, jump on the stairs from the corner of the vines from the outside. Climb up the stairs and when you reach the top there is an opening. Head through it and you will find a gold skulltula. Kill it and get the token with the hookshot. Head back to the room with the baby dodongos. Play the Scarecrow’s Song when Navi flies over to a platform and turns green. The scarecrow will come. Hookshot onto him. Kill the gold skulltula next to him and get the token. Now, our next destination is Goron City.
Exit the Dodongo’s Cavern and head to Goron City. Play the Sun’s Song if it isn’t nighttime already. There is a gold skulltula we can get in Goron City. It’s behind the pedestal floating in the middle of Goron City. Get on one of the ropes, turn toward the back of the pedestal, and hookshot it to kill it and get the token. Get to the floor where you first saw the big rolling goron. In case you haven’t noticed, there is nobody here. 😕 Stop that small goron on the floor with a bomb and he will think that you’re working for Ganondorf. Run up and talk to him and he will say that he has your name. His father is Darunia. 😉 That’s really great little goron, but where exactly is Darunia? He will tell you that the dragon Volvagia was awakened by Ganondorf and he is going to feed all the gorons to Volvagia. Well, that’s just great. The goron will start to cry. Talk to him about the dragon, then talk to him about the gorons. The goron will tell you that Darunia went to the Fire Temple to seal the dragon. Darunia is doing this because he is a descendent of the hero that destroyed Volvagia with the legendary hammer. 😉 The goron will give you the red Goron Tunic. This is heat resistant, so the timer doesn’t come by when you go in the crater! 😀 The doors at the bottom floor will open. The left one, contains the goron shop. The goron is still in the shop. 😕 Weird. Go in Darunia’s room and slap on that Goron Tunic. Pull back the goron statue with a spear on it and you will reveal another entrance to the Death Mountain Crater.
Welcome to the Death Mountain Crater. 🙂 (again). Hookshot onto that piece of wood hanging there and as you get on the bridge, you have a visitor here.
Sheik will tell you about a bunch of things that you need to know about what happened here. Then he will teach you the song that will warp you here, the Bolero of Fire.
Now that you have learned it, play the Prelude of Light. Put the Master Sword back in the Pedestal of Time. You are now a kid again. Play the Bolero of Fire and there is a patch of soft soil here. If necessary, play the Prelude of Light and head to Kakariko Village. Lift up the rock near the entrance to the graveyard and grab some bugs. Now, play the Bolero of Fire. Dump the bugs on the soft soil and our last patch of soft soil will come a few dungeons later. Kill the gold skulltula and get the token. Plant a magic bean here, play the Prelude of Light, pull out the Master Sword, and play the Bolero of Fire. Ride the magic bean plant up to the black mountain, jump over and get the heart piece. From the platform with the Triforce symbol, head straight forward into the opening. Jump down the hole or climb down the ladder. Turn around and enter the Fire Temple. Be sure you have the Goron Tunic on or you will be timed.
Head up the stairs and you will find 2 fire keese. Kill them and head to the door on your right. WHAT?! This door appears to be locked so head through the other door. Hey! We found Darunia! 😀 He will tell you that he has to defeat the dragon himself while we go get the other gorons. Well, we all know how the fight is going to turn out in the end. 🙁 Hey! He didn’t even have the boss key and he got in! 🙁 Cheater! There is a goron in here that we need to free. He is on the platform to your left. Jump the platforms, step on the switch and talk to the goron. He will tell you a secret for releasing him. He tells you that you have to do something about that pillar in the ceiling over there. The goron will leave. Open the small chest here for a key. Get out of this room and head through the door that you couldn’t get through before. Head to the left side of this room where the time block is. Play the Song of Time in front of the time block and head through the door. There is are some new enemies in here. There’s a Like-Like (they eat your Hylian and Deku shield, and they eat your goron tunic), and the tiles (just dodge, block, or slash them). Kill all the enemies by slashing them and you will find a gold skulltula here. Kill it and get the token with the hookshot. Exit this room and work your way over to the door on the other side of this platform. Enter the door you find. Step on the switch and talk to the goron. He will tell you that some walls you slash, don’t make the usual *clank*. The goron will leave. Open the chest for a key. There are 8 gorons in this whole dungeon. We have 6 more to go. 😉 Exit this room and head all the way to the right side of the room. DON’T OPEN THE LOCKED DOOR YET! 😀 There is a weird wall here. Slash it to see what sound it makes. It shouldn’t make the usual *clank*. Bomb it and head through the door. Free the goron and he will tell you that there are some switches that you have to hit with your sword and you can also use bombs for it. Open the chest for a key. Exit this room and head to the bridge. Cross it and head through the locked door. Head over to the other platform, climb up the wired wall, kill the keese in here, jump onto the platform, and push the block onto the flame that shoots up. You will create an elevator. Jump on it and unlock the door at the top platform the elevator goes to. In this room, there are some new enemies called torch slugs. You have to slash them to take them out. Jump to the platform with the crystal switch and push the block off the platform. Jump down and pull the block back. Climb up to the higher platform and drop a bomb on the switch. Head up the other platform and quickly climb up the ladder. Head through the door. This room is full of boulders so watch your step. Follow the wall on the right until you here a gold skulltula. Slash the wall to see if it makes a *clink*, then bomb it. There is a gold skulltula here. Kill it and get the token with the hookshot. Keep following the wall until you find a goron. Free him and he’ll tell you that fake doors can be killed with bombs. Open the chest for a key. Keep following the wall until you come across a door. Head through the door to find a dark hallway. Head to the end of it to find a goron. Free him and he’ll tell you that you can slash your sword or roll around if you’re on fire. Open the chest for a key. Keep following the wall until you find a locked door. Head through it. Shoot the eye switch and head through the door on your right. Open the chest for the map. Exit this room and head through the locked door. Jump onto the metal part and. . . RUN! The fire wall is going to kill you! Keep following the metal platform while avoiding red bubbles and head through the door at the end. You should notice that we are now above the room with the boulders. Jump from platform to platform while killing torch slugs along the way, and you will find a switch. Step on it and jump from platform to platform to get to the goron. He will tell you that if you can’t reach a place, play your ocarina. The goron will leave. Open the chest for a key. Get to the middle platform and you will probably find a crack on the floor. Navi will tell you that she hears goron voices down there. Bomb the crack and fall down the hole. There is a ladder, so don’t worry about going all the way back again. Step on the switch and you will reveal a shortcut and another goron. Talk to him and he will tell you a good hint about killing this dungeon’s miniboss. Get the key and head up the ladder. Let’s take a little detour to get a couple gold skulltulas and some money. Head to the entrance of this room on this level. Get to a certain place on that platform and Navi should turn green. Play the Scarecrow’s Song and hookshot to the scarecrow. If you’re facing the wall, turn around, and hookshot to the elevator going up. Go up the elevator and head through the door. Head around the corner, climb up the ladder, and you will find a gold skulltula. Kill it and get the token. Climb up the ladder to the next door. Go forward a little bit, and turn left. You will find a gold skulltula. Kill it and get the token. You can either step on the switch and head all the way up to open the chest for 200 rupees, or you can exit this place by jumping down that huge gap. Head into the door that has the wired floor. Head across it and when you come across a platform, jump to it. You will make it! Just believe! 🙂 When you get up there, head through the locked door. This room may look easy, WRONG! This place has invisible fire walls that will pop up every time you get close. Head to the right. Make your way around the pillars to the real door. Head down this hallway and open the chest for the compass. Exit this place and make your way to the door at the far left. Pass through and this is another maze that has invisible fire walls. Make your way through and you will get to the door. Head through the door and there is a goron on the lower floor. DON’T GO DOWN THERE! Play the Song of Time where Navi turns green and a time block will appear. Jump down now and head through the door. There is another invisible fire wall maze. Navigate through it and hit the switch. Navigate through to get to the platform at the end. There is a fake door here. Bomb it and head through the real door. This is your miniboss: Flare Dancer. The easiest way to defeat him is to target him and hookshot him. Then slash the little guy that’s running around. Repeat this process until he dies. Note that when the Flare Dancer changes color, that means he’s dying. Get on that platform over there and it is actually an elevator. Head through the door and you are now in another room with a crystal switch. Climb up to the other platform, drop a bomb on the crystal switch, climb up to the other platform and head through the door. This room is very tricky, use Farore’s Wind in case you fall down that hole. Step on the switch and head up the thin staircase. Do it fast because you are timed to get up to that treasure chest. If you fall down, use Farore’s Wind. Get up to the treasure chest and open it for the dungeon item: the Megaton Hammer! 😀 If you hammer certain things, they will disappear or fall and you can get to cool places. Retrace your steps back to the entrance to this room. Hammer that block sticking out of the ground there. Fall down the hole, hammer the totem pole, and head through the door. Kill the keese and hammer that thing sticking out of the ground. Grab a box and head down the steps. Put the box on the switch and head through the door. Hammer the platform and you will appear back in the fire maze room. Climb up onto the platform and hammer the rusty switch there. You are back in the room with the goron. Jump to the other platform and hammer the rusty switch. Talk to the goron and he will tell you about some statues in the entrance room. Get the key, climb up the time blocks, and head through the door. Jump to the platform across from you and hammer the weird thing. Fall down. Hey! We’re back in the boss room! Unfortunately, we can’t go in there because we don’t have the boss key. Head back to the place where we entered this dungeon. To the left of the stairs is a totem pole. Hammer it and head through the door. Kill the torch slugs and the keese in this room and head through the door. Kill the tiles and the Like-Like and kill the gold skulltula and get the token. Head through the door on the left. There is another Flare Dancer in here. You can pound it with the hammer and then slash it now. Repeat this process until it dies. You can open the chest for some bombs if you want. Enter the door on the right. Pound the rusty switch and free the goron. He will tell you to help Darunia. Open the blue chest for the boss key. Now, head through the door and go to the room before the boss. Jump across the platform to the door. Open it and head through it. Where’s Darunia? 😕 Uh oh, I think I know what happened. 🙁 Jump to the platform with the lava holes. An earthquake will come by and you are now trapped here on this platform. Then the boss will come out.
This dragon is very easy. He will go in one of the lava holes. When you see fire coming out of one, that means he’s coming out. When his head pops out, hammer it and slash it. When Volvagia flies into the air, hang on the edge of the platform to be safe. Repeat this process until you have slayed the dragon. 😀 Get the heart container and go into the blue light. Here’s the Sage of Fire.
He will tell you that you are awesome and that he will give you something as a token of your friendship. You probably have seen the scene before when Death Mountain erupted. Darunia will give this to you.
You will appear back at the Death Mountain Crater. Hookshot back across the bridge, head as far left as you can until you find a few boulders blocking a cave. Hammer them and enter the cave. Here’s another Great Fairy’s Fountain. Go on the Triforce symbol, play Zelda’s Lullaby and the Great Fairy of Wisdom will come out. She will give you a magic meter upgrade! 😀 Exit the fountain and exit the Death Mountain Crater. Ride the magic bean in front of the Dodongo’s Cavern as far as it can go, and get on the path with the rocks falling down. They are not! 😕 Make sure it’s night. Head to the red rock near the ladder to the top of Death Mountain and pound it. Kill the gold skulltula and get the token. Head to the entrance near Goron City, and there is a red rock above the Dodongo’s Cavern. Pound it. Kill the gold skulltula and get the token. Now, our next destination, is the Zora’s River. First we have an errand to run.
Ice Cavern
Head to the entrance near the Market. Enter the lone door and talk to the dude. This dude wants you to get him some poes. We are going to be hunting Big Poes. We needed Epona and your bow for the job. Exit the Ghost Shop and hop on your horse. The first Big Poe is right at the entrance to the ruined bridge and there is a sign there. Pass by it and shoot the Big Poe twice to kill it. Quickly bottle it before it disappears. There are 10 Big Poes in Hyrule Field. If you run out of bottles to put them in, go turn them in at the Ghost Shop. You have to target the dude and show him the bottle to give him a Big Poe. You have to run in between the tree and the wall near the entrance to Lon Lon Ranch and the Big Poe will appear. In the top left corner of Hyrule Field are black bushes and some trees by a stream, the Big Poe is in one of the bushes. Run through it to find it. Between the entrance to Lon Lon Ranch and Gerudo Valley is a tree. Face Hyrule Castle and run beside the tree. Kill the Big Poe and bottle it. This next one is very frustrating and might take a few tries. Run through the small area where the color changes near the entrance to Gerudo Valley. The Big Poe will appear, kill it and. . . you know the drill. 🙂 In the south part between Lake Hylia and the Kokiri Forest are a lot of Trees. Find the correct patch of bushes, run through them, and the Big Poe should appear. Kill it and bottle it. In the same spot, there is a brown boulder and a tree directly south of it. Face Lon Lon Ranch and run past on the right side of the tree. Kill the Big Poe and bottle it. Along the road between Lon Lon Ranch and the Kokiri Forest, is a silver boulder. Run past it on the path and kill the Big Poe and bottle it. East of Lon Lon Ranch is a V shaped wall. It’s in the corner of it. Go there and kill the Big Poe and bottle it. The last one is also very frustrating. It is on the overhang near the entrance to Kakariko Village. Go there and kill the Big Poe and bottle it. You should have turned in all 10 by now. When you turn all of them in, here’s your prize.
Now, you have more stuff to carry. Now, let’s head to the Zora’s River. Ride the magic bean to the middle platform. Make sure it’s nighttime. There is a gold skulltula on the wall somewhere. When you find it, kill it and get the token. Go the main way to the Zora’s Domain. WAIT! When you get to the area by the bridge, get on the fence, make sure it’s nighttime, and a gold skulltula is on the wall. Kill it and get the token. As usual, get to the waterfall, get on the Triforce symbol, play Zelda’s Lullaby, and jump through the waterfall. WHAT?! THIS PLACE IS COMPLETELY FROZEN IN ICE! Go to the top of the waterfall in here and turn to your left. There is a gold skulltula here. Kill it and get the token. If you go to where the king is, he’s frozen in red ice. This can only be melted with blue fire. Head into the Zora’s Fountain. Jabu-Jabu is gone! 😕 Oh well, jump from ice platform to ice platform and you will come across a heart piece. Go get it. Now, jump to the opening at the end of the ice platform trail. Enter the opening and your first minidungeon: the Ice Cavern.
The new enemies here are: Freezards (ice statues that blow ice at you, slash them a certain amount of times to kill them), jar (regular jars that float around and try to kill you), ice keese (keese that will freeze you if you get too close), and the last enemy is a surprise. Head down the hallway and at the end of it, is a blade trap and some freezards. Kill the freezards and head through the opening. Head down the hallway and slash the stalagmites if necessary. This room has a spinning blade and some silver rupees. If you have played Majora’s Mask, these rupees don’t give you 100 rupees. There is a gold skulltula against the wall with a silver rupee behind the stalagmites. Kill the gold skulltula, get the token, and get the silver rupee. Go get the other silver rupees and head through the opening. Be sure a couple of your bottles are empty. This room has some ice keese and some freezards. You can kill the ice keese with your arrows or the hookshot. Be careful not to touch them. Jump to the platform with the blue fire on it. Navi will point out that it is not natural. Fill 3 of your bottles with some blue fire and jump to the platform with the chest trapped in ice. Melt the ice with our blue fire and open the chest for the map. Go fill your bottle with blue fire again. The other 2 bottles are needed in the Zora’s Domain. Head back to the room with the spinning blade. There are 2 walls with red ice blocking the way. Thaw the left one first. Head through it and you will find some more blue fire. Get some in a bottle. Kill the keese. One the right side with stalagmites is a chest in ice. Thaw it out and open the chest for the compass. Refill your bottle with blue fire and head to the left side with the stalagmites. Thaw out the heart piece and get it. On one of the stalactites here is a gold skulltula. Kill it and get the token. Refill your bottle with blue fire. Head back to the room with the spinning blade and thaw out the other wall covered with red ice. Head down the hallway and you will find some ice keese in this room. Kill them and follow my directions of how to solve this puzzle. On the eastern wall above a hole is a gold skulltula. Kill it and get the token with the hookshot. How you solve it, you need to figure out because this is a very easy puzzle. There is some blue fire at the other end of the room and you can go refill now if you want to. You need to get all the silver rupees. There is one on a platform that is stuck in ice. If you push the block in a wrong place, push it off the edge and it will go back to where it started. Once you get all the silver rupees, go to the blue fire and get some more in your bottle. Head through the opening that opened and thaw out the ice here and head through the door. In here you’ll face your surprise enemy/miniboss: White Wolfos.
Just kill them like you would kill any other old wolfos. Once it dies, open the chest to get the iron boots. You will sink down in deep water and walk down there if you wear these guys. Just as soon as you get the iron boots, Sheik will come by. He will tell you that the zoras are trapped under the ice. Well that sucks. Sheik managed to save Princess Ruto, but she went to the Water Temple to try and break that curse. Sheik will teach you the song that will warp you to Lake Hylia. It is called, the Serenade of Water.
As soon as you learn it, Sheik will vanish. Put on your iron boots and sink down that small hole full of water over there. There is a door here, head through it. Get to surface and exit the Ice Cavern. Jump down and get to the Zora’s Domain. Stand right next to the king and thaw him out with the blue fire. Go stand on the platform and talk to him. He will thank you and give you the awesomest tunic next to the Goron Tunic: The Zora Tunic. This will let you breathe underwater! 😀 Slap it on and head back to the Zora’s Fountain. Sink down to the bottom of the Zora’s Fountain. Get the heart piece down there. Head back up to the surface and exit the Zora’s Fountain. Head down in the Zora’s Domain to the Zora Shop. It is blocked with red ice. Thaw it out and you can go get a new Zora Tunic if a Like-Like eats one. We have a new sword to get. Exit the Zora’s River and go ride Epona to Kakariko Village.
Go talk to the cucco lady and she’ll give you the Pocket Cucco. Play the Sun’s Song twice and enter the first white house you come across. You will find Talon sleeping in here. Show him the cucco and he’ll wake up. Talk to Talon and he’ll go back to Lon Lon Ranch. Go show the cucco to the cucco lady and she’ll give you the blue cucco Cojiro. We need to take him to the Lost Woods. Ride Epona to the Kokiri Forest. I wouldn’t recommend warping there, because there will be some items that are timed and if you warp, it will immediately make time go to 1 second. Go to the Lost Woods and head left. Show Cojiro to the dude and he’ll give you the odd mushroom. You are timed for 3 minutes. Run back to Epona and ride her to Kakariko Village. Enter the Potion shop near the entrance to Death Mountain and head through the secret back way. Jump down, climb up the stairs, and enter the brick house. Talk to the old lady here. Show her the odd mushroom and she’ll give you the odd potion. You are not timed for this one so don’t worry. If you want a blue potion that restores both your life and your magic, talk to the old lady here and you have to pay her 100 rupees for the ultimate potion (a.k.a: the blue potion). Get back on Epona and ride back to the Kokiri Forest. Head back to the Lost Woods and head left. Oh, a girl from the forest is here. Show her the odd potion and she will explain that the poor guy turned into a stalfos. 🙁 The girl will give you the Poacher’s Saw. Get out of the Lost Woods and the Kokiri Forest. Ride Epona to Gerudo Valley. The bridge appears to be. . . uh. . . broken. The Gerudo did that to not let anyone pass. You can actually jump the bridge with Epona. Jump the bridge and show the Poacher’s Saw to the guy that’s yelling stuff. He will give you the broken Biggoron Sword. Jump over the bridge again with Epona and head to Death Mountain. Climb to the top of Death Mountain and you will find Biggoron that has just awakened. Show him the broken Biggoron sword and he would love to fix it. Except, he has volcano dust in his eyes so he needs some eyedrops. They had eyedrops back then? 😕 He will give you the Perscription. Take it to the Zora’s Domain and show it to King Zora. He doesn’t have the eyedrops?! That’s just great! 🙁 He will give you the Eyeball Frog and tell you to take it to Lake Hylia. Whatever you do, DO NOT WARP THERE! You are timed for 3 minutes, run back to Epona and ride her as fast as you can without using all the carrots to Lake Hylia. Once you’re there, get into the house and show the guy the Eyeball Frog. He will want to eat it. 😕 That’s just disgusting! 😕 When you tell him that you need it, he will make the eyedrops. You have to take the eyedrops to Biggoron in 4 minutes. Run out of the house, ride Epona back to Kakariko, run to the magic bean at the entrance to the Dodongo’s Cavern and ride it! This will save us some time. When you get to where it stops, run up the mountain as fast as you can. Show Biggoron the eyedrops and he will use them right now. He will say that they work great and he can get to business. He will give you the claim check. You can either run around for a while or you can play the Sun’s Song to make 4 days pass. Either way, when your ready, go show Biggoron the Claim Check and he will give you the Biggoron Sword!
This sword is even more powerful than the Master Sword. This will come in handy with the boss fights later on. 🙂 With that in hand, let’s go to our next destination: the Water Temple.
Water Temple
We need to get a couple more heart pieces first before we go to the Water Temple. The 26th one is at the northwest corner of Hyrule Field. There are 2 trees here. Bomb the one closest to Lon Lon Ranch in this area. You will find a hole. Fall down the hole and you will find a pool of water. Slap on your Zora Tunic and iron boots. Sink down to the bottom of this place and you will find your heart piece. Go get it, resurface, and get out of this hole. Now, let’s head to Lake Hylia. You can warp there with the Serenade of Water, or you can ride Epona there. Either way, go to the house by the entrance to Lake Hylia and ride the magic bean to the roof of the house. Get on the roof, climb up the ladder, and get the heart piece that’s sitting there. There’s a gold skulltula inside the house here. Enter the house, sink down to the bottom of the pool in here with the iron boots and the Zora Tunic, and you will find a box. Roll into it while underwater, and the gold skulltula will pop up. You can only use your hookshot while underwater. Kill the gold skulltula and get the token. Now, we can head to the Water Temple. If you haven’t noticed, the lake appears to be dry. There is only one deep pool of water nearby. Sink down to the bottom of it and you will be at the entrance to the Water Temple. It appears to be blocked. Get your hookshot out and hookshot the crystal above the door. This will open the door. Walk inside to enter the Water Temple.
This is the trickiest dungeon ever! There are so many puzzles and keys and you have to change the water level! 🙁 The new enemies are: spike (look like see urchins, kill with sword or hookshot), and the shell blade (look like clams, kill with hookshot). Float up to the surface and jump back into the water right in front of you. Swim to the entrance to the right, and sink down. Follow the path and head through the opening. You will see a red block. We’ll get to that later, head back to the room with the giant pillar like thing. Head through the east opening from the entrance. This opening has torches in front of it. Head through and you will find. . .
Princess Ruto is here! 😀 She will be mad at you for “leaving” her behind for 7 years. She will tell you that you need to help her fight the monsters in this temple. She will swim up to the surface in this room. Follow her up! 🙂 Once you get up, *gasp*. . . she is gone! 🙁 She was probably kidnapped by the boss! 🙁 Well, go through the door here. There are some spikes in here. The enemy, not the pointy things sticking out of the ground. Kill them with the sword or the hookshot and open the chest for the map. Head back to the room before and you will find a Triforce symbol on the wall. You know what that means! 🙂 Time to play Zelda’s Lullaby in front of it. 😉 When you play Zelda’s Lullaby, the water will drain. You will find 3 of these Triforce symbols in this whole temple. This one will lower the water level, the second one will raise the water level halfway, and the third one will fill this whole temple up with water. 😉 Jump down the hole and you will find a lit torch and some unlit torches. 😉 Are you thinking what I’m thinking? 😉 We need to light the unlit torches. You can either shoot an arrow through the flames and aim at the torch, or you can use Din’s Fire to light the torches. 😉 Head through the door and you will find some shell blades. 🙁 Use your hookshot to kill them. Wait for their mouth to open, then release the hookshot at the right time. A chest will appear. Open it to get a key. 😉 Exit this room and exit this part of the dungeon to the room with the big pillar. Take the entrance directly to your left, and you will find a crack in the floor. Bomb it and sink down to the bottom. Kill the shell blade, head to the end of the hallway, and resurface. Get on the platform and step on the switch. Climb up to the other platform, hookshot onto the statue, and kill the 2 tektites. Stand right in front of the gate, spin attack and you will hit a crystal switch. There is a gold skulltula here. Kill it and get the token. Head back to the room with the giant pillar. Take the west entrance. Push the block all the way in and sink into the water. Get to the end of the hallway and resurface up. There happens to be a crystal switch here. 😉 Hit it and a pillar of water will rise. Jump onto it and jump to the other side. You should see a giant pool of water in here that’s spinning rapidly. There is a crystal switch underwater, so let’s go get it. 😉 Get your Kokiri boots on and go with the current until you reach a ramp like thing underwater. Put on your iron boots and get your hookshot out. Aim at the crystal switch in the dragon’s mouth and shoot it with your hookshot. The gate will open for a limited time! Hookshot on the target and get to the other end of this small hallway. Float up and head through the door. There are some shell blades in here. Kill them and float up to the small area. Open the chest for a small key. Hit the crystal switch, get out of this room, and head back to the room with the big pillar. You should have 2 keys by now. Enter the locked door at the center pillar. This place has the next Triforce symbol. Run forward, turn around, and hookshot onto the target closest to you. There is another Triforce symbol here. Play Zelda’s Lullaby and the water level will go to halfway. This is where most gamers, even me, get stumped. There is a block that floats up and there is another entrance in here. This is where people just move on and not get the key in here. Sink down and head down the hole where the block was. Head around the corner and you will find a crystal switch. Be careful! After you hit it, shell blades and spikes will come down and attack you. Hit the crystal switch from a distance. Kill all the enemies and head up through the gate that opens. Then you will find a chest. Open it for a key. Head back to the room where you changed the water level, float up, and head through the door. Head through the east entrance (it’s the one with the jars), and kill the enemies. Hookshot onto the target from the spikes (not the enemies), then hookshot the target closest to a platform. Shoot the crystal switch or bomb it and stay by the chest. Open it quickly for the the compass. Head back to the room with the big pillar. Jump into the water and sink down. Head into the room where you saw Ruto and float up. There is a mysterious cracked wall here. Bomb it and open the chest for a key. Head back to the room with the big pillar. You should have 3 keys by now. Head through the locked door on the west side. There is a tektite on the platform above the water pillar. Stand on the short pillar and when the tektite comes down, sick him! 😀 Shoot the crystal switch while your on the pillar. When you get to the top platform, head through the door. There is another Triforce symbol and it should look like this.
Play Zelda’s Lullaby and the water level will go back to the highest water level. You should have 2 keys right now. If you don’t, change the water levels so you can get those keys. Once you’re done, head through the door on the west. There are some keese and a gold skulltula here. Kill the keese, but we can’t get the gold skulltula at the moment. Jump onto the platform that is right below you. Jump onto the moving platform and try to hookshot to the other platforms. Then keep hookshotting on the platforms and you’ll make it to the door. Head through the door. There is a crystal switch in the middle. Shoot the crystal switch to get the water level to rise and try to lure tektites into your trap. Hookshot onto the target on the statue and shoot the crystal switch. Hookshot onto the target on the wall and climb over the statue head. Shoot the crystal switch and hookshot onto the target on the statue. Shoot the crystal switch, climb on the head of the statue, shoot the crystal switch from there and stay on the statue until you get to the top platform. Get on the platform and kill the enemies here. Kill the Like-Like with your arrows or you can spin attack. Hookshot onto the target on the ceiling and head through the door. The miniboss is ahead. This room has reflective water. You will see your reflection in the water. As you pass the mysterious tree in the middle, your reflection will disappear! 😉 Once you turn around, you will see something by the tree. Get closer and face your miniboss. . . Dark Link.
Dark Link is back in 3-D! To kill him, you can use Din’s Fire, the Biggoron’s Sword, or the Megaton Hammer. I recommend stabbing him with the Biggoron’s Sword. Kill him with either of these weapons and he will die. The door at the other side will open and the room will go back to an average room in the Water Temple. Scary! 😉 Head through the door and open the big chest for the dungeon item: . . . . THE LONGSHOT! This is an upgraded hookshot that goes farther than your average hookshot! 😀 Head by the time blocks behind the chest and play the Song of Time. Fall down the hole to the water vortex room. This place has billions of vortexes! Try not to get sucked in. Put on the iron boots and follow the path to your right. Move against the left wall to avoid the vortex. Move away from the vortex and look up at the wall. There is a gold skulltula here. Kill it and get the token with the longshot. Dodge the vortexes you pass by moving close to the right or left walls. Once you find a wall with an eye switch, longshot onto the target above the small platform. Shoot the eye switch with the bow and longshot onto the chest. Open the chest for a key. Jump down into the spinning water and head back to the room with the giant pillar. We can’t get to the boss room yet, and we still have some gold skulltulas to get. Head back through the west door at the highest water level and you will be back in the room with the moving platforms. Kill the gold skulltula with the longshot and get the token with the longshot. Head back to the room with the big pillar and sink down to the room where you saw Ruto. Float up to the top and play Zelda’s Lullaby by the Triforce symbol to lower the water level. Head back down and enter the door on the pillar. Longshot up to the Triforce symbol, kill the gold skulltula, and get the token with the longshot. Play Zelda’s Lullaby by the Triforce symbol. Head through the door and get back onto the pillar. Face the south entrance on this level and be sure to kill the tektites before you do this. Shoot the eye switch and longshot to the other platform. Head down the hall and you’ll find the red block that we pushed earlier. Push it into the hole and head through the entrance on the right. Open the chest for a key. Head down the hall and longshot onto the target to get out of here. Return to the room with the pillar. Sink down to the bottom level and head through the north entrance. Get on the platform without spikes and longshot to the locked door. Head through the door. Try to kill all the tektites, put on your iron boots, and head to the door. Head through the locked door. There are some stingers in this room. Kill them and jump down to the platforms. Bomb both of the mysterious walls and push the block around until you get to the side with the switch in the water. Push it into the water and the water level will rise. Enter the next door. There are 3 water pillars in this room. Try to avoid or kill the tektites. Step on the switch and jump the pillars fast and head through the door. The door will be caged if you just sit there doing nothing. This is where the boulders come from. Go to your right, kill the gold skulltula and get the token with your longshot. Sink down the hole and around the corner, there is a shell blade. Kill it and float up to the platform at the end of the hall. Enter the door and open the blue chest for the boss key. Sweet! 😀 Retrace your steps and get back to the room where the boulders come. Follow the current and you will be back in the room with the 6 tektites. Get to the entrance that you first came in through and head through the door. Head back to the room with the big pillar. Finally! We can go to the boss room. Make sure the water is at the highest level and head through the north entrance. Longshot onto the statue and head through the door. There are some blade traps here. Try to dodge them without your iron boots by staying close to either one of the walls. Then when your ready, enter the boss door. Head onto one of the middle platforms and Navi will point out that this isn’t natural water. Well, that’s comforting. 😀 Then the boss will come out. . . Morpha.
Get onto the edge platform and when Morpha tries to grab you, back up and longshot the little thing on him. Then slash it like crazy. Repeat this process and eventually, he will split into 2 tentacles. Unfair! 🙁 Repeat the same process then the little thing will explode. The water will drain away and a drop will fall down. Jump down and go grab the heart container. Go into the blue light and meet the Water Sage.
Zoras can read your mind so she knows your looking for Zelda. She will call off the engagement between you two. Then she will yap on about how awesome you are and she will give you the Water Medallion.
Ruto will ask you to give Sheik your thanks. You will appear back at Lake Hylia. The water is coming back! Sheik will be there. He will tell you about how you saved this lake and he will disappear into the water. Get onto the like platform nearby and shoot the sun with your bow. Then the Fire Arrows will come down on a platform. Swim over to them and claim them. Yay! Now we can shoot fire! 😀 Play the Sun’s Song to make it night and longshot onto the tree. Get to the top of the tree and on the tree is a gold skulltula. Kill it and get the token with the longshot. Jump down and get to the fishing pond. Talk to the dude and he will let you fish. Go to the pond and the biggest fish starts in the middle. Get a fish that weighs 14 pounds or more. Go talk to the dude and ask him to weigh your fish. He will give you the golden scale. This will let you dive 9 units underwater. Go to the Lakeside Laboratory and jump into the pool here. Dive underwater without the iron boots and touch the ground. Talk to the old guy and he will give you a heart piece. Yay! Now, let’s head to our next dungeon.
Bottom of the Well
Exit Lake Hylia and head over to Kakariko Village. Enter Kakariko and. . . oh no. . . the village is on fire! 🙁 You will find Sheik here. He will tell you to get back. Then the wooden part of the well will fly off. The Shadow spirit will come out and attack Sheik. He will aim for you now. Sadly, you can’t fight him yet. Sheik will tell you that Impa sealed that monster at the bottom of the well. That’s a great place to seal a monster. . . in your drinking water. 🙂 I wonder what that tastes like. Sheik will tell you that Impa is one of the 6 sages! Sheik will teach you the warping song to get here. The Nocturne of Shadow.
Now, we have some errands before we can check out the well. Go enter the windmill and talk to the guy in here. He is mad because a kid with an ocarina (hint, hint) came in here and played a song that made his windmill go crazy. Pull out your ocarina and he will teach you the Song of Storms.
Now, you have learned the Song of Storms. This will come in handy. There are a couple more heart pieces we need to get. Go to the graveyard and head into Dampe`’s grave. Race with him and follow him until you get to the ramp place that is the final room. Longshot onto the torch and head through the door. You should beat him. Talk to him and he will give you a heart piece. Get out of here and head to the house with the guy on the roof. Longshot onto the roof and talk to the guy. He will give you a heart piece. Now, play the Prelude of Light and put the Master Sword back in the Pedestal of Time. There is some stuff we can get as a child. Head to Hyrule Castle and get past the guards until you reach the tree at the end of the moat. Play the Song of Storms by it and a hole will pop up. Fall in the hole. Bomb the wall to your left, kill the gold skulltula, and get the token with the boomerang if necessary. Get out of this place and exit Hyrule Castle. Head to the Zora’s River. At the place where the tektites pop up, there are some logs sticking out of the water. Get on the log close to land and stand on the flat surface. Get your ocarina out and play the Song of Storms for the frogs. They will give you a heart piece. Get your ocarina out again and play the regular songs that don’t warp. They are the first 5 songs you learned. Then the frogs will grow. Get your ocarina out and they will want to play a game with you. Press the correct buttons so they can hop up and get the bugs. The pattern is different from mine so try your best. After you give them their bugs, they will give you a heart piece. Now, let’s see what’s in that well.
First, we need to drain it. Go to the windmill and play the Song of Storms for the guy and the water in the well will drain. Fall down the well and enter the doorway here. The new enemy here is a gibdo. They are kinda like redeads, only stronger and their screams are strong too. Crawl through the hole here and head down the ladder. There is a big skulltula here. Kill it and head through the wall. It is fake. There are fake floors and fake walls here, so be careful. This is the main room. There is also a green bubble here. Wait for it to come by and shoot it when the fire is distinguished. Follow the path of water and you will get to a head that is flooding the place. Get on the Triforce symbol and play Zelda’s Lullaby. Return to the place where you entered through the fake wall. Jump into the pit and open the chest for bombs. Crawl through the hole down here and kill the big skulltula. Head through the door and you will find some creepy hands coming out of the floor. As you get closer to the hands, they will grab you and the miniboss will come out: Deadhand. He reminds me of a chicken. Try to press any buttons to get out of the hands’ grasp and when he bends his head down, slash his head. He will disappear. 😕 Go up to the hands again and Deadhand will come out again. Repeat this process until he dies. Go open that chest over there to get:. . . the Lens of Truth! 😀 Now, we can see where fake walls and floors are. 🙂 The Lens of Truth looks like this.
Head back to the main room. This part is completely optional. We’re going to get the map, compass, and 3 gold skulltulas. There are also some keys here to get to the gold skulltulas. There is a hole in the middle of the main room. It is below the X like thing. You can see the hole with the lens of truth. Fall down the hole. This room has 4 paths. Take the one on the right with the torches. There is a redead here. Kill it and open the chest for the map. Well, bomb the boulders first, then kill the redead. Go back to the place with the acid. Get all the silver rupees and climb up the ladder and head through the door to get out of this room. Go to the center room in the main room and slap on your lens of truth. You will see the big chest is blocked by a pit. Walk around the alcove and you will find the side wall is fake. Go through it and open the chest for the compass. Head back the safe way. Let’s go get some keys. There are only 3 keys so don’t worry. 😉 In the main room, head to the west side. Jump down the pit with the cage, climb up the vines, head through the door. There is a gibdo in here. These can also be stunned with the Sun’s Song. Kill the gibdo and light all the torches. These will make the coffins open. There are keese in these coffins and there is a key in one of the coffins. It is in the coffin in the southwest corner. Go get it and return to the main room. On your map, you will see that there are a couple of chests in here. Go to their locations and put on the lens of truth. Go in both of the alcoves and open both of the chests for keys. Head to the center of the main room. There are 2 locked doors. Enter the one on the left. Kill the deku baba, kill the gold skulltula, and get the token with the boomerang. Exit this room. Enter the door on the right this time. Be careful and kill the keese at a distance. There is a fake wall here. Put on your lens of truth and get the gold skulltula. Head back to the main room. In the northeast corner, there is a hole. Crawl through it and head through the door. Kill the enemies in here to get to the other side. Go through the door and quickly kill the Like-Like before it eats you! 🙂 Get the gold skulltula and exit the well. There are more chests in here but they contain bombchus, bombs, and deku nuts.
Shadow Temple
There is one more heart piece we can get right now. Go to the Market and make sure it is nighttime. Enter the Treasure Chest shop. Talk to the guy and he will let you play a game. Pay him 10 rupees and head through the door. We’re going to cheat on this. 😉 Put on the lens of truth and you can tell which one has the key and which one doesn’t. Open the chest with the key and keep the lens of truth on to see which chest has the key. When you get to the end, open the big chest to get the heart piece. Go to the Temple of Time and get the Master Sword. Play the Nocturne of Shadow. We are now going to enter the Shadow Temple. This is one of the scariest temples. Go down the steps behind you and you will find a place that looks like this.
Yes, you have to use Din’s Fire to light all the torches at once. Or you can use the fire arrows we got recently. The entrance to the Shadow Temple should look like this.
When you feel ready, go inside the door to enter the Shadow Temple.
The new enemy here is the eye switch, like a regular eye switch, only it shoots fire at you and you have to shoot its eye. As you go around the corner, there is a pit. Longshot across and head through the fake wall. Turn left and use your lens of truth to find another fake wall. This place has a lot of hidden things here and the gold skulltulas are kinda hard to find. Head through the door. Head through the fake wall and ignore the voices here. Follow the wall on the right and you will find a door. Head through it and you will find a redead and some keese. Kill the redead and the keese and open the chest for a key. Exit this room and follow the wall on the right again. Head through the corridor in between the 2 jars. Follow the wall on the right and head through the door that you come across. You should see that this room rings a bell. Of course, it’s the room with the Deadhand. Yes, he returns to haunt you. Just do what you did before, but slash him with the Biggoron’s Sword.
Once he dies, open the chest for the Hover Boots! 😀 You can float for a short time now! 😀 Head back to the entrance room. Not the one with the pit. Put on the lens of truth and go to the giant statue thing surrounded by skulls. There is a thing you can push. Push the thing so it points at the real skull that you can see with the lens of truth. The gate will open. Put on your hover boots and walk over to the door. You will float for a short time but you will make it. Head down the hallway and you will find a big beamos. You have to bomb it twice to kill it. Head through the fake wall on the right. Kill the gibdos and open the chest for the compass. Exit this room and head through the fake wall on the left and head through the door. There is an invisible thing in here that will cut you. Get the silver rupees without getting sliced and head through the gate and open the chest to get a key. Head back to the room with the beamos. Bomb the top wall and head through the locked door. This is my least favorite part of the dungeon. Very slowly go down the ramp because there are big skulltulas in the ceiling that are waiting in ambush. At the end, you will find some guillotines. Run through them and try not to get chopped. Kill the skulltula and run through the second guillotine without getting chopped. Turn the corner and there are some more guillotines. Run through them because they go faster. Get to the platform at the end. A stalfos will fall down. Kill it and put on your lens of truth. Turn left and you will find some platforms. Go across them and enter the door. There is another thing in here that will slice you. Kill every single enemy you can find in here and go through the gate that opens. There are 2 chests with some items in them. Kill the gold skulltula in here and get the token. Head back to the room before and jump the platforms to get to where you saw the stalfos. Wait for the elevator to come by. When it lowers, go on it. Wait for it to rise and float off onto the other platform. Kill the beamos and dodge the blade traps. Get all the silver rupees and head through the opening. Pull out the lens of truth and you will find a block. Pull it out and push it under the 2 spike things. Head to the left area and kill the gold skulltula and get the token. Go behind the block and pull it to the end of the path. Climb up the block and get onto the upper platform. Get on the spikes and jump to the other side. Step on the switch and jump to the platform with the chest that fell down. Open the chest for a key. Head back to the room with the guillotines. Put on the lens of truth and look over to where you see a lone guillotine. There are some platforms. Jump across them and head through the door at the end. There are some invisible spikes in here along with some redeads. Kill all the redeads and put on the lens of truth so you can see the spikes. Get all the silver rupees. Head through the door on the left. There is a giant skull here. Kill the keese, get to the platform above the skull and throw a bomb in the skull. It will leave a key and a gold skulltula. Get the key, kill the gold skulltula, and get the token. Head back to the previous room. Use the lens of truth to see a target on the ceiling. Longshot to the other platform. Head through the door. There are fans here that will turn on and off occasionally. The iron boots will help you get across. Kill the skulltula and longshot onto the wooden thing to get to the other side. Fall down to the next area. The eye switch is in here. Wait for it to open fire, then shoot it. There is a fake wall on one side of the room. Use your hover boots to get across to it. Enter the door. There are some gibdos here and some blade traps. Bomb the mysterious pile of dirt on the right side and use the lens of truth to see a chest. Open it to get a key. Go through the door at the other end of this room. Turn left, pull back the block and then push it to the ladder. Climb up the ladder and get onto the boat. Look to your left. When Navi turns green, play the Scarecrow’s Song and longshot onto the scarecrow. Kill the gold skulltula here and get the token. Jump down and get back on the boat. Stand on the Triforce symbol and play Zelda’s Lullaby. The boat will move. A stalfos will fall down. Kill it and another one will fall down. Kill that one and wait for the cue to get off. Once you get to the end, Navi will tell you that you need to abandon ship and get onto a safe platform. Enter the door on your right. There is a maze here. There are a lot of invisible walls here along with floormasters. Get to the south door and head through it. There is an invisible floormaster. Kill it while the lens of truth is equipped and open the chest for a key. Go back to the previous room and head through the west door. Get on the steps and longshot the gold skulltula to kill it and get the token. Return to the previous room and head through the north door. There are 2 wooden spike traps in here that will try to crush you. Use Din’s Fire to burn away the walls. There are 2 redeads in here. Kill them and open the blue chest to get the boss key. Return to the room where you got off the boat. Stand between the 2 jars and shoot the bomb flowers at the other side. This will cause a statue to fall down to create a bridge for you. Head across and enter the locked door over here. You are now across from the boss room. Put on the lens of truth and go on the platforms to get to the other side. Enter the boss door. Put on your hover boots, you’ll need them. Fall down the hole here and you will land on a giant bongo drum. Then you’ll meet your boss: Bongo-Bongo.
What you have to do is shoot his hands with arrows and put on your lens of truth and shoot his eye. Slash his eye and repeat this process until he dies. The boss will melt into shadow goo. 😕 Weird. . .:? Get the heart container and go into the blue light. You will meet the Shadow Sage.
Impa the Shadow Sage will tell you about how all that crap happened and she’ll tell you that Zelda is safe and sound in a special place. She will also tell you that you will meet face-to-face with Zelda and she will explain everything. Then she will give you the Shadow Medallion.
Impa will ask you to please look out for Zelda.
Spirit Temple
Our next destination is Gerudo Valley. You should remember how to get there. Use Epona to make the trip faster. Once you get there, the bridge appears to be. . . uh. . . broken. 🙁 Well, that sucks! 🙁 Talk to the ugly dude and he will tell you that the gerudo ladies broke the bridge and he wants to fix it but his carpenters wanted to join the gerudo. Gee, I wonder why. . . 🙂 Play the Sun’s Song. There are a couple of gold skulltulas here. There is one behind the tent. Kill it and get the token. There is one on the pillar near the tent. Kill it and get the token. Play the Sun’s Song and get to the Gerudo Fortress. Go purposely get caught by the guards and they will throw you in prison. Longshot onto the wood part of the window and you will get out. You can knock out the gerudo guards by shooting them with an arrow. Jump down and enter the door right next to you. Head around the corner and speak to the guy in the cell. He will tell you what happened, then a gerudo thief will attack you! Don’t worry, they’re easy. Just equip the Biggoron Sword, target it, and slash it like there’s no tomorrow. Back up when they do the spin attack, these will defeat you and you’ll be thrown in prison. After you beat her up, she’ll drop a key. Get it and unlock the cell. Talk to the dude and he will go back to his tent. Head through the next opening and head through the next door. Stun the guards and head right and straight through the opening. Target and get close to a wall. You will find another gerudo guard. Shoot her, jump up the ledge, and head through the door. Talk to the guy in the cell and another gerudo thief will come by. Beat her up, get the key, open the cell, and talk to the dude. After he runs away, head through the other opening, climb down the vines, and head through that door. Talk to the dude and beat up the gerudo thief. Get the key, open the cell, and talk to the dude. He will run off. Exit this place the way you came in. Go in the door on the left, longshot through this room, and longshot to the wooden parts and head through the opening. Don’t climb up the ledge, instead, turn the other way and jump down that ledge. Head through the door. There is a guard in here. Lie in wait for her to come by and shoot her. Head down the hallway and talk to the guy in the cell. Kill the gerudo thief, get the key, open the cell, and talk to the dude. Then the girl in charge comes by. She’ll go on about the gerudo thing and she’ll give you the Gerudo Membership card. Sweet! Now, we can get past the guards without them knowing. 😉 Exit this place and play the Sun’s Song. Climb up to the top part of the fortress and jump down the big gap between you and the chest. Kill the gold skulltula here and get the token. Get back on the top platform and play the Scarecrow’s Song. Longshot onto the scarecrow and open the chest for a heart piece! 😀 Play the Sun’s Song and play Epona’s Song. Make your way through the fortress on Epona and get to the ramp. Talk to the girl with the horse and she will let you play a game. This is a shooting game on Epona. Shoot the jars first, then shoot the targets. Once you get 1000 points, she’ll give you a heart piece. If you get 1500 points, she’ll give you the 50 arrow upgrade! 😀 Play the Sun’s Song and go to the far left target here. Kill the gold skulltula and get the token. Play the Sun’s Song and head to the place with the huge gate. Climb up the ladder and speak to the gerudo girl here. She’ll open the gate for you and talk about the 2 trials. Jump down and head through the open gate to the Haunted Wasteland.
You can barely see here! 🙁 Run forward and jump on the box. Don’t go in the quicksand or you’ll lose health! 🙁 Longshot across the quicksand and follow the flags until you find a stone building. There is an opening here. Head in it and fall down the hole. There is a gold skulltula here. Kill it and get the token. Head back out of this place and use the lens of truth to see a poe. This one is friendly and will help you cross. Follow it and you will come to the Desert Colossus. Enter the temple straight ahead. This is the Spirit Temple. Unfortunately, you can’t get through this place. If you talk to one of the statues, it will stay you must return here as a kid. Well that sucks! 🙁 Head back outside and you’ll find Sheik.
Sheik will tell you stuff and he will teach you the Requiem of Spirit. This will warp you here anytime you want. 🙂 There are a few gold skulltulas we need before we go. Play the Prelude of Light and put the Master Sword back in the Pedestal of Time. Then play the Nocturne of Shadow. Go near the entrance to the graveyard and lift a rock for some bugs. Play the Requiem of Spirit and drop the bugs on the soft soil at the entrance to the temple. Kill the gold skulltula and get the token. Plant the Magic Bean. Play the Prelude of Light and go grab the Master Sword. Play the Requiem of Spirit and fly the magic bean. Play the Sun’s Song first and then ride the magic bean. You should have planted it as a kid. 😉 Ride it to a platform and kill the gold skulltula and get the token. There is another one near the fairy oasis. There is a platform nearby. Jump on it and play the Song of Storms on the platform. There are some trees here. The gold skulltula is on one of the trees. Kill it and get the token with the longshot. Ride the magic bean to the arch thing and jump on it to get your last heart piece. 😀 Go to the wall where there are 2 mysterious palm trees. Bomb the wall here and enter the opening. There is a Great Fairy’s Fountain here. Play Zelda’s Lullaby on the Triforce symbol and the great fairy will come out. She will give you Nayru’s Love. This will create a shield around you and you are invincible. 😀 Play the Prelude of Light and put the Master Sword back. Play the Requiem of Spirit and go inside the Spirit Temple.
Head up the stairs and turn left to find. . . Hey! Talk to the pretty gerudo girl and she will tell you about the temple and what her name is. . . Nabooru. That’s a pretty name. She will ask you if you are one of Ganondorf’s followers. Either way will work. You’re both on the same side so don’t worry. First of all you also need to tell her that you’re not doing anything. Then she’ll ask you to go through this hole and get the Silver Gauntlets. Say yes and she’ll move out of the way for you. Crawl through the hole. I should tell you some info about the enemies here: there’s the Anubis (kill them with fire), and the white bubble (kill when not in light). This is my favorite dungeon because of the puzzles and stuff that are so cool! 🙂 Be sure to have your Hylian Shield equipped because there are fire keese around here. Kill the keese and the armos in here and enter the door on the left. A stalfos will fall down. Kill it and then kill the green bubble. Use your boomerang to hit the crystal switch on the other side. There is an anubis nearby. Kill it with Din’s Fire. Get to the other side of the room and head through the door. Kill all the enemies in here, including the wallmaster. Get the silver rupees and cross the bridge. Kill the keese and kill the gold skulltula and get the token. Either use a deku stick to light the torches or use Din’s Fire. Once done, open the chest to get a key. Head through the door. Does this room ring a bell? 😉 Crawl through the hole at the north side of the room and head through the door. Turn right, kill the skullwalltulas, and climb up the wall. Turn around and kill the gold skulltula here and get the token. Wander around this room and you will find some lizalfos. Kill them and use a bombchu to hit that wall with the skullwalltulas on it. A beam of light will come out and shine on the sun on the floor. Head through the door. There is nothing we can do here at the moment, so push the statue off the platform, head up the stairs and head through the door. Head around the stairs and head through the door. This is a puzzle. First, you need to kill the beamos in here. Now, collect the silver rupees and a torch will light up. We need to light the torches around the room in a specific order. You have to light them clockwise or they will go out. An idea to dodge the blade traps is to move one of the blocks without a sun on it next to the blade trap. Go open the chest that appears and you will get a key. Pull the block with the sunface on it, into the sunlight. Go through the door at the far side of the room. This is only a set of stairs, but turn around. There is a gold skulltula above the door. Kill it and get the token with the boomerang. Head into the next room. This room has your miniboss: The ironknuckle. Nayru’s Love can come in handy for this fight. Use Nayru’s Love, then smack the creature on the throne and you will wake it up. Just keep slashing it and try not to get hurt, because these guys are deadly! 🙁 After you kill it, head through the door and head through the opening. You are outside of the temple. Oh no, not him again! 🙂 The owl has returned to tell you about the boss of this temple. Open the chest here for the first dungeon item. . . the Silver Gauntlets! 😀 But, they’re too big on a kid and you promised Nabooru that you’d give them to her. Just then, you here a scream. Oh no! Nabooru is being kidnapped by 2 witches! They are the boss, just keep that in mind. After Nabooru disappears, play the Prelude of Light. Go grab the Master Sword and play the Requiem of Spirit. If you haven’t noticed, you are now wearing the Silver Gauntlets. We need these to save Nabooru, so don’t worry, she won’t get mad or anything. Head back into the Spirit Temple.
Now we can do something about that block in the way. You are stronger with the Silver Gauntlets. Head up the stairs and head right. Push the block out of the way and you will find a beamos and a blade trap. Right above them is a crystal switch. Lonshot it or shoot it with an arrow. Both doors will open. Take the left one. Walk forward and kill the wolfos in here. Stand on the Triforce symbol and play Zelda’s Lullaby. A big chest will appear. Longshot to it and open it to get the compass. Exit this room and take the door on the right. Get all the silver rupees in here. First, go to the time block and play the Song of Time. It will move and head in the little place where the time block was. There is a gold skulltula in here. Kill it and get the token. Go through the door that has opened for you. There is a chest in here, but WAIT! A Like-Like falls from the ceiling. Kill it and open the chest for a key. Head back to the room where you hit the crystal switch to get here. Head through the north door this time. There is another like-like that falls from the ceiling in here. Kill it and climb up the wall. In this next room, there is an invisible floormaster. Kill it and there is a mirror here that you need to push. You need to push it on the 3rd sunface. The others will make 2 chests appear and a wallmaster appear. The chests are a recovery heart and one freezes you. Head through the door that opens. Welcome back to the main room of the dungeon. Don’t touch the armos, this one lives. Head up the stairs and you will find a Triforce symbol on the hand. Get on the Triforce symbol and play Zelda’s Lullaby. A chest will appear at the other hand. Longshot to it and open the chest for a key. Jump down and you will find 2 unlit torches. Light them with Din’s Fire or use the new and improved Fire arrows we got. This will make a big chest appear. Open it for the map. Get to the west side of the room where we came here as a child. Climb up the wall and head back up the stairs. There is a gold skulltula that is too far for us. Play the Scarecrow’s Song and longshot to the scarecrow. Kill the gold skulltula and get the token. Head back down and head through the door that was barred before. Push the huge blocks out of the way and pound the rusty switch with your hammer. This elevator will take you down to the entrance room. Sweet. Head back to the previous room. Head to the side with the real armos and make your way to the top. Head through the locked door. Either kill the beamos or avoid them and head through the door. Kill the beamos and shoot the Anubis with your fire arrows. Head through the door. This is tricky. Stand by the barred door and longshot an armos so it will jump onto the switch. Quickly run through the door. Head up the stairs and enter the room. Oh no! It’s another iron knuckle. Don’t worry, you have a better sword. Put on Nayru’s Love and wake up the iron knuckle. Kill the iron knuckle. When it dies, head through the door and head through the opening so you’re back outside. Open the chest for. . . THE MIRROR SHIELD! This can come in handy when reflecting light! 😀 Head back to the room with the 4 armos. Now, get your mirror shield out and reflect the sunlight onto the sunface. Go through the door. Don’t worry, this room isn’t a trap. Open the chest for a key and head back to the room with the Anubis. There is a locked door here so head through it. Kill the beamos and kill the skullwalltulas. The wall is moving, but longshot to the top part of it that isn’t moving. Get on top of the platform and head through the door. Play Zelda’s Lullaby on the Triforce symbol and head through the door straight ahead from you. There are some torch slugs in here. Kill them and pound all the fake doors. One of them has an eye switch under it. Shoot the eye switch and longshot onto the ice. Jump onto the next platform and step on the switch. Jump down and open the blue chest for the boss key! 😀 Return to the previous room and head through the door on your right. Hit the crystal switch behind the bars and head through the door. Walk forward and kill the lizalfos. Shine some light on the sunface above the arch and a small chest will appear and it has bombs inside it. There are some white bubbles in the next area. Kill them and you should see another opening nearby. Bomb the weird wall and push the mirror onto the other mirror. Push the other mirror, so it faces through the bars. Head back to the previous room and jump down to the lower level. Get in the light and use your mirror shield to reflect light onto the nearby sunface. You will lower. Reflect light onto the face of the statue and it will fall apart. Longshot onto the bars and head through the boss door. This isn’t the boss room, sadly. You will find the witches Kotake and Koume. There is also an iron knuckle. There is something weird about this one. Even Navi thinks so. Kill it and when the armor comes off. GASP! It’s Nabooru! She will come back to her senses and not remember what happened. Kotake and Koume will come back and kidnap Nabooru again! 🙁 Head through the door and climb up the wall. Here’s the real boss fight. Here is your boss: Twinorva.
Be sure you have the mirror shield equipped. Just remember, Koume=fire, and Kotake=ice. When Koume shoots fire, take out your mirror shield and reflect the beam at Kotake. When Kotake shoots ice, take out your mirror shield and reflect the beam at Koume. Repeat this process, then they will turn into their combined form, Twinorva. What you have to do is target her and she’ll shoot either fire or ice at you. You need to fire 3 times or ice 3 times in your mirror shield. It depends which one you block first. The power will go in your shield and you can easily kill Twinorva. You have to reflect the fire or ice at Twinorva, then run over and slash her. Repeat this process and then Twinorva will die. This is the most hilarious scene. Kotake and Koume will plan to attack you more and they will argue about their age and that their dead and stuff. After they die, go grab the heart container on one of the platforms and step into the big blue light. You will appear back in the Temple of Light. The Sage of Spirit will come out.
Nabooru will say how awesome you are and she wants to get revenge on Ganondorf for doing this to her. 😀 She will give you the Spirit Medallion instead of keeping the promise she made 7 years ago.
Final Showdown
After Nabooru talks to you, Rauru will come up and tell you about someone waiting for you at the Temple of Time. 🙂 Play the Prelude of Light and you will find someone at the Temple of Time. It’s Sheik. He tells you that if the evil person touches the Triforce it will spilt into 3 parts: Power, Wisdom, and Courage. The Triforce of Power went to Ganondorf. 🙁 Link has the Triforce of Courage and the Triforce of Wisdom went to Sheik, also known as. . .
Sheik was Princess Zelda the whole time! 😀 😀 😀 😀 😀 😀 Zelda explains that she had to hide from Ganondorf to avoid getting captured. She will apologize for the disguise and explains everything. She will then tell you about the arrows of light.
Then Zelda will give you the Arrows of Light that will help you kill Ganondorf. Then an earthquake happens! 🙁 Then this happens.
Then Zelda will vanish! It’s so sad isn’t it? 🙁 But, we have some errands to run before we go save Zelda. First of all, we need to go get the last gold skulltula. Head to the Zora’s Fountain and play the Sun’s Song. Head over to the island with the silver block. Lift it up and you will find a hole. Kill the invisible big skulltulas, climb up the ladder, turn left, and kill the gold skulltula and get the token. Head back to Kakariko and go get your prize. The person will give you. . . 200 rupees. That’s pretty dumb. That really would have been handy if we had this before! 😀 Let’s head to Gerudo Fortress. There is a training ground here and there is a huge prize at the end. There is a girl by a gate. Talk to her and pay her 10 rupees to enter the Gerudo Training Grounds. Head through the left door. You have 1 minute to kill 2 stalfos. Once they are dead, open the chest for a key. There are 9 keys in this place, but if you cheat, you can only use 7 keys. Head through the door. Run forward, head left, head left, head right, duck into the side, head through the middle to the right side, head clockwise around the corner, longshot the target on the ceiling, and head through the door. Kill the white wolfos, and use the lens of truth to see a hidden area. longshot up to it to get on a switch, jump down, push the huge block in all the way, enter the door, kill the like-likes and there is a chest in here that is invisible. Open it to get a key. Head back to the hidden platform. Head through the door. Stand next to the barred door, and play the Scarecrow’s Song. Jump down and shoot the eyes of the statue. Longshot to the chest and open it for a key. Longshot to the target and longshot to the scarecrow. Head through the door, open the chest for a key, and head through the other door. Kill the fire keese and the fire slugs. Use the hammer at the top right corner, step on the switch, and quickly get to the middle and open the chest for a key. Shoot the eye switch to open the door, now head through the door. This room has silver rupees and a key in here. How you get the key is that you need to get on the platform to your left and play the Song of Time. Climb up the time blocks and get the key at the top. Jump off and start collecting silver rupees. Go through the east door, once you have all the rupees. There are some time blocks in here. Put on your Zora Tunic and iron boots because we’re going in water here. Play the Song of Time by the time blocks and jump into the water. There are some silver rupees here. Collect them all and head back to surface. Open the chest that appeared for a key. Head back to the previous room. Head through the door on your left. There is a beamos and 2 dinalfols in here. Kill the beamos and the dinalfols and open the chest for a key. Head back to the entrance room. Now, head through the center room. Head through the left door, use the lens of truth to look above you. Longshot up to get to a chest. Open it for a key. Head back down and head through the left door, head through the door straight ahead of you, through the door ahead of you, the door on your right, through the bottom door, then head through the left door. Open the chest here for the ice arrows. You can freeze enemies with this guy. This is very helpful when fighting stalfos. Now we are ready to take on Ganondorf the king of evil. Be sure you have 2 fairies and 2 blue potions. Head to Ganon’s Castle, it should look like this.
As you approach the castle, you will notice there is no bridge. Rauru will call you and he and the six sages will make a bridge for you. Here’s what should happen.
Cross the bridge and enter Ganon’s Castle.
This dungeon is a little complicated because of the six evil barriers you have to get through to get to Ganondorf. As you enter this dungeon, run down the steps and head through the door. This is the main room, but we can’t get through the center tower because of the barriers. We’ll fix that in a jiffy. The center tower should look like this.
It doesn’t matter which order you do the barriers in, but let’s start with the Shadow Barrier. You’ll see why later. The Shadow Barrier has a purple symbol above it. Head into it. Shoot the unlit torch to your right with a fire arrow. Run across the ice blocks and get to the safe platform. Kill the like-like and if the ice blocks are gone, shoot another fire arrow at the torch. Head to the other platform and step on the switch close to you. This will make a chest appear. Longshot onto it and open it to get the Golden Gauntlets. These are stronger than the Silver Gauntlets. 😀 You can carry heavier things now. 😉 Put on your lens of truth to see the pathway in front of you. Follow it to the rusty switch and pound the rusty switch to open the door. Follow the invisible path to the door and head through the door. There is a gold sphere here around purple light. Shoot it with a light arrow and Impa will appear. She will tell you to save Zelda. As if we didn’t know that. . . 😀 She will make you appear at the entrance to the barrier and the shadow energy that goes to the tower will disappear. There is one more Great Fairy we need to find. She is right outside Ganon’s Castle. Exit Ganon’s Castle and head left. There are rocks here. Maneuver around them until you find a huge wall. Hmm. . . how about we try lifting it up with our new and improved gauntlets? Do that and there is a doorway here. Head through it and play Zelda’s Lullaby on the Triforce symbol and the Great Fairy of Courage will come out. She will give you a defense upgrade! 😀 That’s awesome! 😀 Exit the fairy’s fountain and head back into Ganon’s Castle. Let’s head to the Forest Barrier now. It has a green sign above it. There are some torches in here. Kill the wolfos and light the torches in here with Din’s Fire. Then shoot a fire arrow at the torch above the door. Head through the door. There are some silver rupees here as well as some fans. Collect all the silver rupees in any strategy you can think of and longshot to the door and head through the door. There is a gold sphere surrounded by green light. Shoot it with a light arrow and Saria will appear. She will tell you to hurry up with the job. 🙂 Saria will take you back to the main room now. The forest energy to the center tower will disappear. Head to the Fire barrier. It has a red symbol above it. You need the Goron Tunic for this one. There are some silver rupees in here. There is a sinking platform in the middle of the room. Put on the hover boots and it will stay up. Note that there is one silver rupees under that huge wall like thing that we can lift up. Once you manage to get all the rupees, head through the door. There will be another sphere surrounded by red light. Shoot it with a light arrow and Darunia will come out and tell you to hurry up. Then the fire energy going to the tower will disappear. Head into the Water Barrier. That is the door with the blue sign above it. We don’t need to go underwater or anything, so don’t worry. We need some blue fire for this place. Once you head through the door, it will be waiting for you. There are some freezards around here. Kill them and get some blue fire. Melt the red ice next to you and get some more blue fire. Head through the door. There are some more ice blocks in here. One needs to be pushed into the hole. It’s the one farthest from the door. Now, you do the rest with the other block. Once you come across some red ice, melt it and hit the rusty switch ahead of you. You have 2 minutes. Once you’re done, head through the door and you will find a sphere with a blue light around it. Shoot the sphere with a light arrow and the Sage of Water Ruto will appear. She will tell you to hurry up. Then she’ll use her powers to bring you back to the entrance to the Water Barrier. The water energy to the tower will disappear. Let’s head to the Spirit Barrier now. It has an orange sign above it. Head through the door. There are some blade traps along with some armos statues that aren’t alive. Move the statues in front of the blade traps so you don’t hurt yourself while getting the silver rupees. Head through the door. In here is a crystal switch and some bars. You can hit the switch closest to you that makes a chest appear with some bombchus. Kill the torch slugs first of all. 😉 Get a bombchu out and after 2 glows, release it. It should get to the ceiling, through the top part of the bars, and straight to the crystal switch. Head through the door and head left. There are some sun faces here. Where’s the sunlight? 😕 There are some webs on the ceiling above you. Shoot them with a fire arrow and reflect sunlight onto the sun face in the corner that is the closest to where you came from. Head through the door. There is a sphere surrounded by an orange light. Shoot it with a light arrow and the Sage of Spirit Nabooru will come out. She will tell you to hurry up. Then she will launch you back to the entrance to the Spirit Barrier. The spirit energy to the tower will disappear. Almost done! 🙂 If you haven’t noticed, there is no Light Barrier! :! There is a giant wall thing nearby. Go lift it up and there’s the Light Barrier. Head through the door to the Light Barrier. There are invisible enemies in here. Take out your lens of truth and kill all the enemies. Open the chest that appeared. The other chests are traps. 🙁 This chest will give you a key. Head through the door. Play Zelda’s Lullaby on the Triforce symbol and head through the door. There are some silver rupees in here. To get to one of them, is to longshot up onto the platform and get it. Head through the door that opens. Where’s the sphere? 😕 Go put on the lens of truth and head through the opening. Shoot the sphere surrounded by yellow light with a light arrow. Rauru will come out and tell you to hurry up. Now, let’s head to the center tower. Once you get back to the main room, head through the center tower. Head through the hallway, while ignoring the fire keese. Head through the door. There are some Dinalfols in here. Kill them and head through the door. In here are some stalfos. Kill the stalfos and open the blue chest for the boss key. 🙂 Head through the door. In here are some iron knuckles. Put on Nayru’s Love and kill the iron knuckles. Head through the door and head up the stairs. After all of the rooms is a staircase. Head up the staircase and head through the boss door. In here, this is the boss room, just at a lower level. Don’t get to the jars yet, we need the stuff for the boss fight. 🙂 Head through the next door. Head up the stairs and you will find another door. This is the real boss fight, enter the door. 🙂 You will find Ganondorf playing the organ and Zelda is still trapped in her shield. Then this happens.
Unfortunately, you can’t use Navi for this fight, so it’s just luck for this fight. :! Ganondorf will rise into the air and here is your boss.
Quickly get to one of the corners and stay there until I tell you to! 🙂 Ganondorf will shoot a beam at you. Slash at it and it will turn into a game of ping-pong. When Ganondorf misses, shoot him with a light arrow. Then head to the center platform and slash the heck out of him! 🙂 The Master Sword is best for this fight. It will take more time if you use the Biggoron Sword. Repeat this process. When Ganondorf shoots a green beam at you, you can either shoot him with a light arrow, or when he releases it, spin attack it, then shoot him. Either way, do that and then slash the heck out of him! Repeat this process until he dies. Then Ganondorf will either cough up blood or throw up. This depends on what version your playing this game. Then Ganondorf will die. Zelda will come down and then an earthquake happens! :! The castle is going to blow! :! Follow Zelda anywhere! You are timed for 3 minutes to get out of here! Once you come across a room with some stalfos, kill them and move on. Zelda can open the cages so be sure to follow her. If you come across a redead, ignore it and move on! :! Once you are out, the castle will collapse. It’s all over. Then Link hears a noise. Run over to it and a ring of fire will surround you! :! Then Ganondorf will come out! HOW?! 🙁 He will do this.
Then he will turn into your real final boss: Ganon.
He will knock the Master Sword out of your hand! Be thankful it didn’t land on Zelda! 🙂 Ganon’s weak point is his tail. Get out the Biggoron’s Sword and kill him with that sword instead. You can roll in between his legs and do it. After a certain amount of hits, the ring of fire will cease. Go get the Master Sword and kill Ganon with that. Slash his tail repeatedly. 🙂 Then Zelda will try to help you kill Ganon. Go slash him. Then this will happen, the six sages will come out and make a vacuum like this.
Then Ganondorf will curse you, the sages, and Zelda and will promise to destroy your descendants as long as the Triforce of Power is in his hand. Then you will be floating in midair. Zelda will talk to you about things and this will happen.
Now, enjoy the most romantic ending ever! 🙂 Congrats peeps, you just beat one of the hardest Zelda games in history. 😉
Special thanks to www.zeldadungeon.net for inspiring me to make this walkthrough and to help me beat this game. Thanks to google images for giving me the pictures that are absolutely necessary. And a very special thanks to Nintendo for making The Legend of Zelda games. 🙂

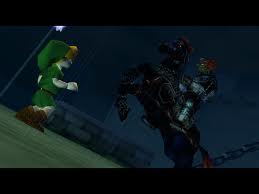
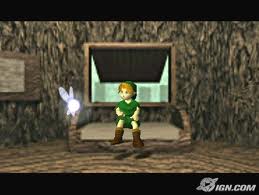
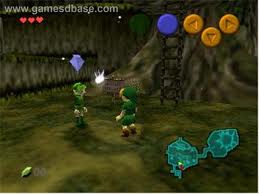
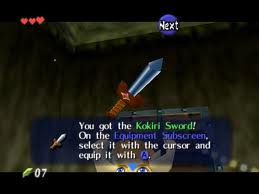
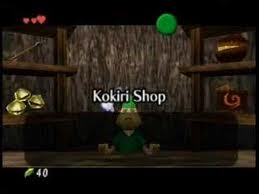
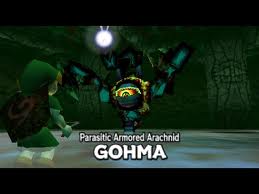
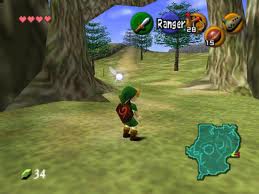

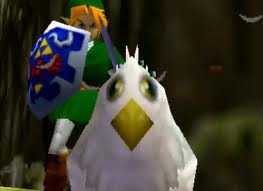
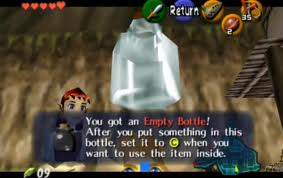
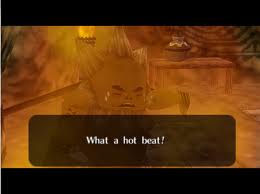
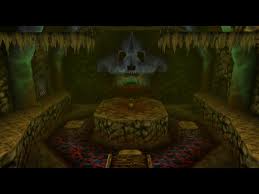
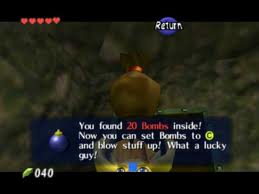
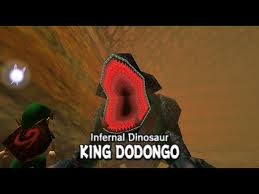
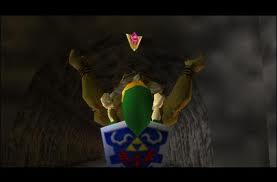
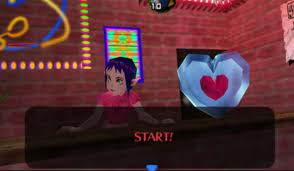
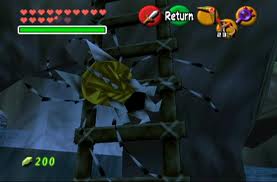
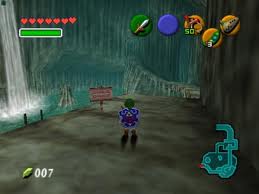
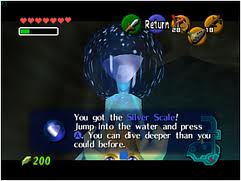
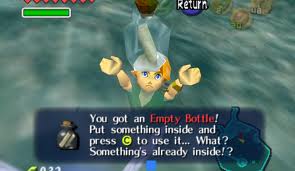
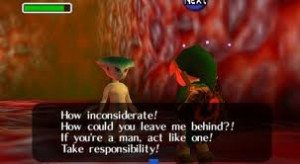

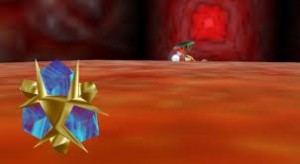
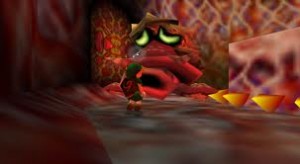
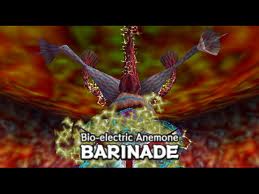
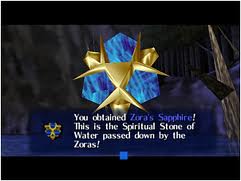
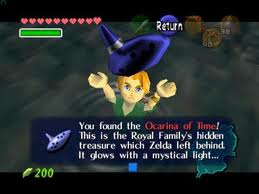

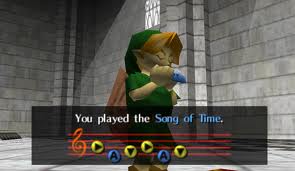
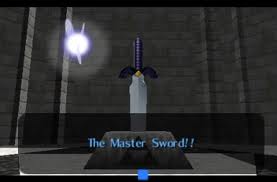
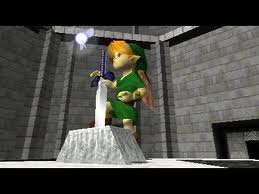
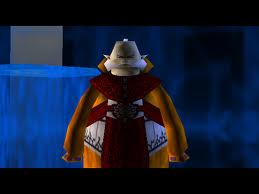
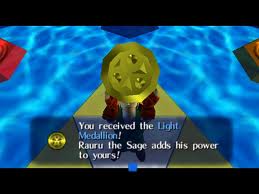
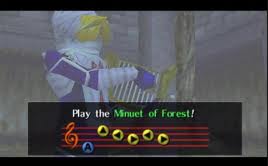

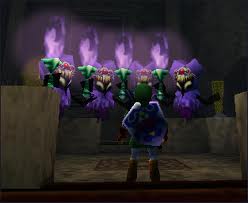
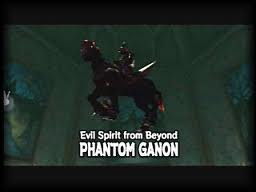
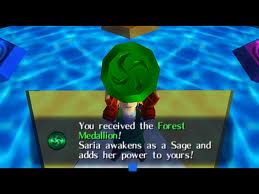
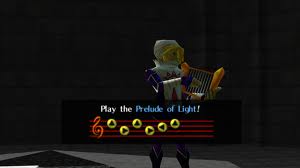
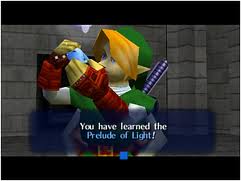

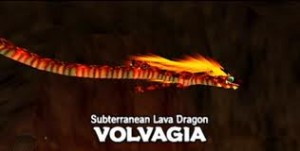
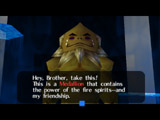
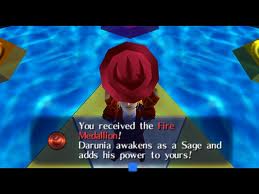
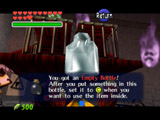
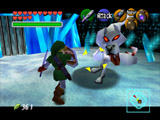
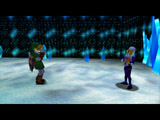
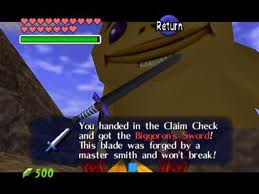
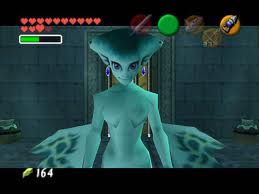
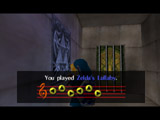
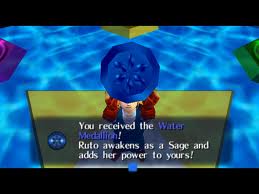
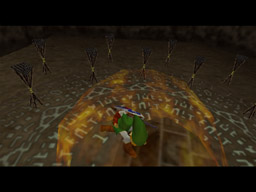
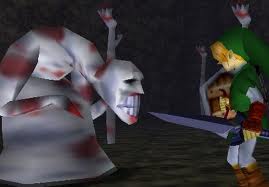
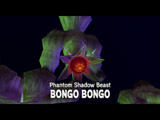

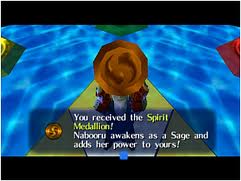
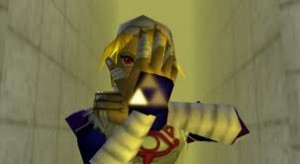
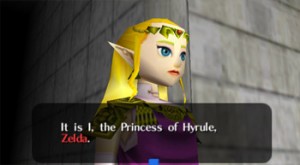
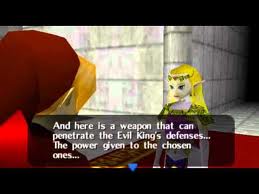


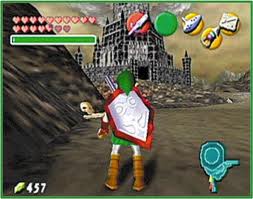
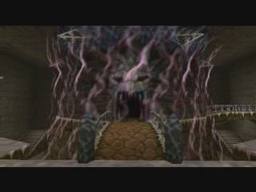


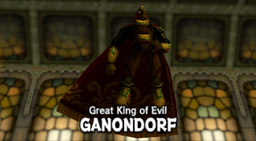
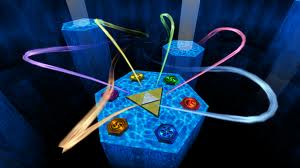


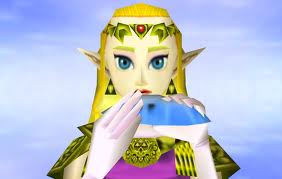
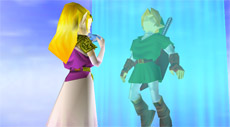
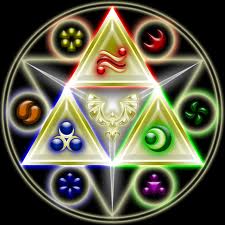
This is the BESTEST GAME EVAR!!! 😀 😀 😀
I do accept as true with all of the ideas you have presented on your submit. They’re incredibly convincing and can unquestionably get the job done. Nonetheless, the blogposts are too quick for newbies. Could you be sure to prolong them a bit from subsequent time? Thanks to the submit.