Welcome to The Legend of Zelda Oracle of Seasons walkthrough. This walkthrough will cover all of the heart pieces, items, and even the trading sequence (sorry, this won’t involve the Moblin’s Keep). It starts when Link goes to the temple and sees the Triforce combining and he finds himself in a land called Holodrum. Basically, Link is trying to save Din, the oracle of seasons, from the shadow general Onox. Here’s the first chapter.
Snake’s Remains
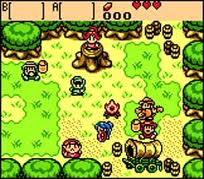
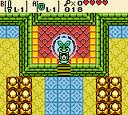
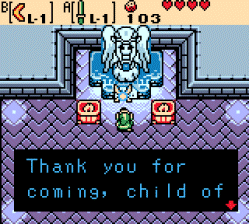
Link will pop up in Holodrum after Zelda tells you to accept his quest. You’ll fall in some grass and Din will come by and take you to her camp. You’ll wake up. Head right a screen and you’ll find everybody else. Talk to Din and then talk to everybody else and then talk to Din again. The scene should look like this.
If you talk to Din you’ll start dancing with her. After the dance, you’ll see lightning strike down and the General of Darkness Onox will come by in a tornado! NOOO! He blows everybody else away and as Link tries to protect Din, you’ll still get blown away and Onox will kidnap Din. Then a scene will appear like this.
And this. . . . .
Yes, Link was apparently unconscious throughout the whole scene. He appears in a field of grass and it appears to be winter. 😕 How did that happen? Impa will rush by and tell you that she is actually Princess Zelda’s attendant. She will also tell you that Din is the Oracle of Seasons and without her, the seasons are in chaos! She will tell you to go to Horon Village. That means go south a screen. Since we are at a good place, how you save is that you press Start to go to the pause screen, there are 3 menus, go to the third menu and move the box outline to the word SAVE and press the A button. Go west 2 screens and go south until you come across a beach. Head east and you should find a cave. Go into the cave. Welcome to the Hero’s Cave. You’ll have to ignore the enemies for a little while and move on, because you have no weapons. 🙁 Head right a screen, push the block up, go up a screen, push the block up and go follow this path here. Be careful of the places where the floor is cracked, because if you stay on there for too long, then you will fall into a hole. Go into the next room. When you get to 2 blocks, push the left one down and the right one to the side. Head into the next room, step on the switch on the far side of this room and open the chest that appears for a small key. Now, retrace your steps to the room with the block in the middle. Push the block yet again and head south this time and head through the locked door on the right. Step on the switch and head through the door. Head up the stairs to find. . . . A NEW SWORD!!!! Unfortunately this is the LVL 1 sword, so it won’t do all the damage it should do. 🙁
Onward! You are automatically transported out of the Hero’s Cave. Now, it’s time to visit the Maku Tree. Head north to get back to Horon. Follow the path to the gate to the Maku Tree. The sign says that you must show a sign of courage to get in. Well, get out your sword and see what happens. THE GATE OPENS!!! :! Head through the gate and you’ll find the sleeping Maku Tree. Pop his snot bubble and he’ll talk to you about stuff and he’ll give you the Gnarled Key. That’s where you can get to the Gnarled Root Dungeon. That’s our next destination, but right now you can do some sidequests. You can go to Bipin and Blossom’s house in Horon and name their baby. You can go to the shop and buy a shield and bombs if you have enough rupees. You can talk to the villagers for some important info. You can go to the house with all of those birds and learn some of the game basics. You can also go to the ring shop and get your very first Ring Box and a ring. You can also go to the shop and buy a wooden shield for 30 rupees. Head back to where you found Impa and head north a screen. Head east a screen and then north a screen. You’ll find some bushes. Cut them and head through the entrance that you see. You’ll find a mysterious root with a keyhole in it. 😕 Well, open it to find your first dungeon. Gnarled Root Dungeon.
Welcome to the Gnarled Root Dungeon! 🙂 Head up a screen. Move the top right block to the right and the doors will open. Head through the path to the right. Kill all of the enemies in here and get the key. Go to the previous room and use the key on the door to the left in this room. Kill all the enemies and open the chest for the dungeon map. To use your map, press SELECT on your gameboy. Head up a screen and kill the enemies in here. Don’t panic if the zols split into gels, just kill the gels and they won’t split. After you kill them… apparently the only door that opens is the one you just came through. But WAIT there’s a minecart in the front of the room! 😉 That’s really convenient. Go up to the minecart and you will automatically jump into it. You’ll ride through the room and you can use your sword in the minecart to kill the bats in here. When the track ends, go to the left in this room and you’ll find some moblins. Simply kill them with your sword and continue to go left. You’ll see a couple of blade traps here. Just try not to get chopped by them and you’ll be fine. But push the block by the blade traps to open the door to the left. Head into that particular room. There is a Gasha Seed in this room. We need those to plant Gasha nuts in soft patches of soil. That is one of the requirements for a heart piece, but we’ll get to that later. There is a block puzzle in here. Push the second block to the left down, go into the spot that you can get into, push the block next to you to the left. Go over that block and push the second block to down left. Push the block next to you, down. Head up the stairs and claim the Gasha Seed. Head back to the previous room and head up the stairs by the minecart. Follow the path to the end and you’ll find the compass. A tone will sound if a key is in the room. There is also a lever on this path. Go to it and slash it with your sword. Head back to the minecart and hop in. WHAT?! You changed the track. 😀 When the minecart comes to a stop, head left a screen and open the chest for some bombs. Don’t use them all at once, because you can only carry ten. Head right a screen and head up the stairs. Head right a screen and head down the stairs. OH NO!!! This blade trap will stalk you to the ends of the earth! 😉 Just kidding, but they do stalk you. So, don’t get to close to it and head to the switch and press it. Head north and get the small key in the chest. Go back the way you came, but don’t take the stairs down. Head to the left and you’ll find a cracked wall. Bomb it and head into the next room. There are lots of blade traps in here. Just remember, blue traps are slow, green traps are a little faster, red traps will stalk you, and yellow traps go really fast. Get to the north side of the room and you’ll face your first miniboss. These are the Goriya Brothers. Just avoid their boomerangs and focus on slashing one of them. That will kill both of them and a portal will come to take you to the entrance if you ever have to save and reset. Head into the next room. If you’ve played the first Legend of Zelda, you’ll recognize these kinds. You simply have to avoid the traps and push the block on the left side of the stairs up and head down the stairs. Go down the ladder and head up the other ladder to get. . . . . . THE SEED SATCHEL!! 🙂
This is useful. It has 20 ember seeds inside. There are 5 seed trees all over Holodrum. Ember seeds light things on fire. Head back to the miniboss room and head into the portal. Head back to the room with the minecart. There are some torches in this room to the left. Light them with your new ember seeds and head through the door. Kill the moblins and open the chest for the boss key. Head back to the room where you got the dungeon map. Light the torches in the north and head through the door. Be careful here, there are floormasters that will take you back to the entrance. You can kill them. You’ll find a chest here and inside is the Discovery ring. You can get it appraised for some rupees at the shop in Horon. Get to the end of the maze, take a deep breath and you’ll face your first boss. Those who have played the first Legend of Zelda will recognize this guy.
Be extremely careful when facing Aquamentus! All you have to do is slash his horn without hurting yourself. When you kill him, get the heart container and head right a screen. You’ll find your very first essence of nature. The Fertile Soil.
The Maku Tree will tell you that he dreamt of a place where the Temple of Seasons is. 😉 Then you’ll be transported out of the Gnarled Root Dungeon.
Now, we are going to go back to Horon. You may encounter a witch there. She looks like this.
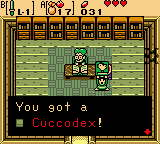
This is Maple the witch. She will appear after you beat 30 monsters. When you bump into her, she’ll yell at you for dropping both hers and your items. Then you have a race to see who can reclaim their items faster. She will claim your items as well. She will occasionally drop a heart piece, a ring called Maple’s Ring that if equipped Maple will appear after you kill 15 monsters, a Gasha Seed and some magic potions. The potions work like the fairy in the Zelda games with fairies. After you die, you will come back to life with the help of the Magic Potions. So anyways, since you have the ember seeds you can burn small trees. If you are still in the area where you should first meet Maple, burn the left tree and a staircase will appear. Go down it and you’ll meet up with a sage that will give you 100 rupees. There are many sages like this all over Holodrum. Note that there are also fake ones that will take money instead of giving you money. We’re going to pay Dr. Left a visit. He lives in Horon Village at the southeast. If it is winter, you can go inside and bomb the cracked wall inside, go through the exit in the room and cross the ice to get to the chest to get 20 rupees. Right now, we are going to focus on burning the middle tree in front of Dr. Left’s house. Downstairs is a sage that will give you 100 rupees. Go inside Dr. Left’s house and put an ember seed on the torch. He will thank you and give you the Cuccodex. It should look like this.
You’ll know why you need this in a few minutes. There is a trading sequence in this game and getting the Cuccodex starts it. There is a big surprise at the end of the trading sequence. 😉 No, it is not a ring or a gasha seed or even a heart piece, this is even better. 😉 If you want to know what it is, continue reading this walkthrough. Have you seen the place where there were some small trees blocking the way to a heart piece? Now, that you have the ember seeds, burn the trees and go claim your heart piece. Go east of there to the mayor’s house. Go in and talk to the mayor to get a Gasha Seed. Bomb the wall next to the mayor and you’ll find a Gasha Seed. Exit the house and you will find a patch of soft soil in front of the mayor’s house. You can plant Gasha Seeds by going up to the soft soil and pressing the A button. After a while you’ll have a Gasha Nut. You have to keep planting to get a heart piece. That will make your life easier. So, head east from the Gnarled Root Dungeon and head north. You’ll find Malon and Talon’s house. Talk to Malon and she’ll want your Cuccodex. Give her the Cuccodex (and all of your rupees. . . just kidding :D) and she will give you a Lon Lon Egg. This next part of the trading sequence involves Maple. Beat up 30 monsters (unless you have the Maple Ring on then you have to beat up 15) and bump into Maple. She’ll want your Lon Lon Egg and she’ll give you the Ghastly Doll. This will be used later. 😉 Now, head back to Horon and head south from the Maku Tree. Burn the small tree and Sokra the wandering prophet will tell you some stuff. Head east after you talk to him. If you planted any Gasha Seeds, go get the nuts to get your prizes. Head east until you find a stump, then head north and you’ll meet a Subrosian (people from Subrosia) named Rosa. She will panic about a mysterious temple landing in Subrosia. I wonder what the temple is? 😉 You will have to follow her. Try not to be seen when following her, just hide behind trees and stuff. When you get to another stump, she will return and see if anyone is there. When she really goes west, follow her and cut the grass where she vanished. You’ll find a portal to Subrosia. This place is full of lava. A temple has fallen here to the east. First we need to go down the west stairs. Follow the path until you see a pool of lava with some Subrosians in it. Head south from there and you’ll come to the Subrosian Dance Hall down the stairs. You have to follow the Subrosian in the middle. The buttons you can use are left, right, and A. Pay close attention, because it goes faster as you go. On your first try you’ll win a boomerang. You can also win ore chunks (currency in Subrosia), Gasha Seeds, and a Strange Flute for an animal buddy later in the game. From the portal, take the east stairs and keep going east until you see the Temple of Seasons. Go north and the spirits of the seasons will tell you to come in. Go north and enter the temple. Go north onto the pedestal and the spirits will give you the Rod of Seasons. This will change the seasons to spring, summer, autumn, and winter. Get out of the north entrance. Go to the southwest entrance to the Temple of Seasons and you’ll find that you are surrounded by lava. Throw the boomerang at the switch in front of you and a bridge will appear. Cross it and head up the stairs. Head up the other stairs and head forward. You’ll meet the spirit of winter.
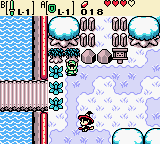
Exit the tower and you’ll hear the Maku Tree. Take the portal back to Holodrum and head east from the portal. You’ll see Sokra and he’ll tell you to use the Rod of Seasons on a stump. Note that you need the other spirit’s power to control all the seasons. You can only use winter now. So, you can only change the season to winter. Get onto the stump and use the Rod of Seasons to change the season to winter. Head east across the frozen water and keep going until you see a heart piece behind a rock. You can’t get that now. By now you should have 1, 2, or 3 heart pieces total, depending on if you got a prize from the Gasha Nut or if Maple dropped it and you got it. Go north from there until you find a house. Read the sign and it says that Santa is welcome. Head west, get on the stump and change the season to winter. Go up the stairs and head east. Well what do you know? The snow piled up. Get on it and follow it on top of the roof of the house. Go down the chimney and talk to the girl. She’ll give you a shovel. Get out of her house and you’ll see tiny piles of snow. You can shovel them. Head south and keep going until you reach another stump. Change the season to winter and head left a screen and up a screen. Dig up the snow and head east. This is a Mystery Seed Tree. If you’re wondering where the Ember Seed Tree is, it is in south Horon and they bloom in the winter. Slash the Mystery Seed Tree and you’ll get Mystery Seeds. If you put these on owl statues, they’ll give you hints. Head north and head west to find your second dungeon: Snake’s Remains. Enter it.
That’s a great question that I can’t answer. 😉 First objection is to light the torches in this room. Equip the ember seeds and light the torches. Head left and then north. Kill the snakes to get a small key. Get it and head back to the entrance. Head north then east and push the block on the right to the right and a chest will appear. Open it for the compass. Head left and then north. Kill the enemies and bomb the wall on the left side of the room. Go in the room and you’ll find an entire stash of rupees. Get them all and head back right. Head north. These annoying enemies here are called hardhat beetles. They are extremely annoying! What you have to do is slash them into the pits to kill them, but they keep coming back! 🙁 After you get rid of the hardhat beetles, head left. Now, you have to kill the enemies with your bombs. So, throw your bombs at them to kill them. When they die, open the chest for the dungeon item. . . THE POWER BRACELET!!!! 🙂 You can pick up jars now. Equip it and head back right. Now, kill the hardhat beetles if they reformed, then pick up the jars around the chest and open the chest for the dungeon map. Head back to the room before all of those rupees and head right. Kill the enemies and move the block on the right to the right. Head into the next room on the right. Watch out for those gigantic blade traps. Follow the pathway and open the chest for a key. Head into the room to the south and push the rollers with your power bracelet. When you get to the end, head down the stairs. Get the Gasha Seed in the chest and take the stairs to the left down. You are now in one of the hardest parts of the dungeon. Kill the enemies and proceed. In this room is a business scrub that will sell you bombs. Head north. You have to bomb a pathway really quickly to get to the chest before it disappears. In the chest is a key. Get it and exit this part of the dungeon. Head back down the stairs to the right. Head back to the room with the gigantic blade traps and take the door on the right. Bomb the cracked blocks and head down the stairs. Head left while avoiding thwomps and thwimps along the way. Head up the ladder at the end and push the rollers with the power bracelet and head right. Now, be careful around the cracked floors. They will break when you step on them and you’ll fall into a hole. If you have the Roc’s Feather, you don’t have to worry, just roll the things and head south. Be sure you have a stock on bombs because we are about to face the miniboss that most Link’s Awakening players will recognize.
You guys remember Facade? Well he’s back as a miniboss. If you remember how to kill him, then cruise right along. If you have no idea what I’m talking about, here’s how you kill him. When he comes up, bomb the face. Keep doing this and then he’ll die leaving another portal to the entrance. Get the fairy and head right. Head right and unlock the locked block. Kill the sparks with the boomerang to get fairies. Head right and then down and ride the green platforms to get to the right side of the room. Head right and head up the stairs and open the chest for the boss key. Jump off the platform and head left to the room right after the room where you beat Facade. Pick up the jar and bomb the cracked wall. Head in there and you’ll find some Pols voices. Kill them with either the strange flute (if you have it) or bombs. Head right and get on the spinner thing. It will point you south. Go south and go across the green platforms and kill the snakes. Then take a deep breath and go into the boss door.
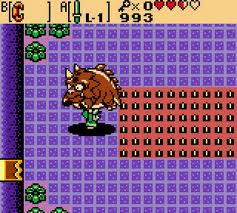
Yep, the Dodongo strikes back. How many times will this guy try to ruin your life? 😕 Anyways, throw bombs into his mouth when he opens it, then pick him up with the power bracelet and toss him onto the spikes. Repeat this process until he dies. When he dies, get the heart container and head south. Go up the stairs and grab your next essence. The Gift of Time.
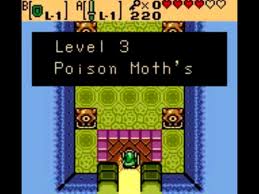
Poison Moth’s Lair
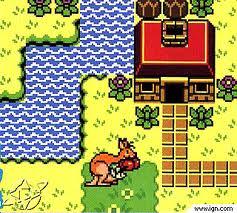
This is where it gets tricky. You’ll be transported out of the Snake’s Remains and the Maku Tree will tell you he had a dream of Spool Swamp. Well, let’s get down to business. Go find any Gasha Nuts that you planted previously and open them. If you STILL don’t have a heart piece from a Gasha Nut or Maple, just keep digging, you’ll find them eventually. 😉 Get to Horon and exit Horon from the north side. Keep heading north and right by the bridge to the Gnarled Root Dungeon is a north exit that’s blocked with rocks. Now that we have the Power Bracelet, we can easily lift the rocks out of the way. Now, continue north until you see another seed tree. These are Scent Seeds. They attract monsters. Head east and head south. Enter the building here and challenge Blaino to a boxing match. How did that get into Zelda? 😕 You can’t use your weapons, so you’ll have to press A or B and knock him out of the ring. You’ll win Ricky’s Gloves. Leave and remember to equip yourself when you leave. Head to the Scent Tree and head south and then west. Follow the path across the bridge and at the end of the path, head north and you’ll find Ricky’s place. Ricky should look like this.
This is after you get him. Give Ricky his gloves and he’ll help you get to Spool Swamp, which is his backyard. Why he has that as his backyard I don’t know. 😕 If you didn’t buy the strange flute from the Horon Shop or win it at the Subrosian Dance Hall, Ricky will give you a flute that will call him and he’s now officially your animal buddy. If you have either one of those strange flutes that you either bought or won, then Ricky will be with you until you get to Spool Swamp. Get in Ricky and hop south over the pits and at the end you need to head west. When you see a house, go in and talk to the lady here. She needs something to send chills down her spine. Give her the Ghastly Doll and she’ll give you the Iron Pot. Head north, then Ricky will jump up the cliff then leave you. Unless you have Ricky’s Flute. There are 3 animal buddies you can have. There’s Ricky the kangaroo, Moosh the flying bear, and Dimitri the red lizard. I usually use Dimitri, but this walkthrough will be based on using all of the animals, so don’t worry. 😉 Head north and then west and you’ll find a Pegasus Seed tree. These are like the Pegasus Boots in the previous Zelda games. Except you don’t have to hold down the button to make Link go faster. Just simply tap the button with the Pegasus Seeds equipped and you’ll be cruising along. 😉 Now, head south, west, north, and head east when you get to the end. Head into the house and this is the Floodgate Keeper. He apparently “lost” his key to the Floodgate. K, seriously you lost it? 😉 Hit the switch in here and the water will drain. And you’ll find the Floodgate Key right there on the floor. Get it and head outside. The little pond by his house dried up and there will be a staircase. Head down it. Use the Pegasus Seeds to get across the bridge and push the blocks in the correct order and head downstairs. Follow the path and you’ll be outside. Head south until you can’t go south, then head east. There is a mysterious keyhole here. Go up to it and the gate will let the water out. Head back through the cave and when you get out, head west from the house and get into the shallow water. Head south. If your animal buddy is Ricky, call him and start jumping ledges. If you have the strange flute from the Subrosian Dance Hall, get to the northeast corner of this place and you’ll find Dimitri being attacked. Talk to the moblins and pay them 80 rupees to let Dimitri go. If you bought the strange flute, head north and you’ll find Moosh under attack. The moblins will run away and then come back. Kill them and Moosh will be your animal buddy. Dimitri is good at swimming and Ricky is good at hopping and Moosh can fly. Whichever you choose, we have to find a portal to Subrosia. Start swimming south and then head west. Then head north. You’ll have to move the rock and you’ll find another portal to Subrosia. Get in it.
Head west and then south. You’ll find a beach here. If you talk to a Subrosian, he’ll say that a Star-Shaped Ore is somewhere around here. Get out your shovel and start digging all over the beach. The location changes every time, so I can’t help you. When you find it, head north to the trees and then head west. You’ll find a shop here. Go in and buy the ribbon for the Star-Shaped Ore. You can also buy a heart piece here for 30 ore chunks and 10 ember seeds. There is also a bigger bomb bag, some Gasha Seeds, and a ring. Buy the membership card as well. Get back to the beach and head to the lower right corner. You’ll find Rosa here. Talk to her and give her the ribbon. She will thank you and want to date you. Link already has a girlfriend is this necessary? Rosa has a key, that will unlock any door. Go north of the market and unlock the door. Head to the Temple of Seasons and go into the northwest tower. Unlock the door and use the power bracelet and lift the rocks out of the way. Get up the stairs and go pay the Spirit of Summer a visit. All of the spirits look the same, only with different colors. You can now change the season to summer with the Rod of Seasons. Get out of Subrosia and back to Holodrum.
Go past the Floodgate Keeper’s house and go west. You’ll find an entrance you can’t get to. Get on a stump and change the season to summer. Climb the vines up to the next dungeon. Poison Moth’s Lair.
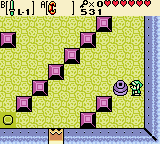
Welcome to your 3rd dungeon. This is a tricky dungeon, but it’s not as tricky as the final dungeon. 😉 From the entrance head up a screen and be sure you have your shield up to get the spiked beetles and flip them over. Then you can slash them. You can use the jars for supplies. 😉 Go up, kill the enemies and head right. Kill those stupid beetles and continue right. There are some wallmasters in here, so be careful. You can kill them by slashing them. Get through this part, but destroy all of the jars EXCEPT this one.
Unlike OoT and MM, you can’t pick up the jar and set it down gently. You have to push the jar on top of the button. So, push it on to the button. If you mess up, exit and reenter the room and all of the jars will come back. Head through the now open door when you get to it. Head left. Don’t push the button here and head down, because if you do, the floor will fall apart. If only you could jump. 😉 We’ll get something like that eventually. Use the power bracelet to push the rollers away and get to the chest with the key. Push the block in the corner out of the way and head up and right. Head down the stairs. Kill the Pols Voices with either any flute you have or a jar. 😉 Push the upper block up and head north. Kill the enemies here and open the chest for 10 bombs. Randomly tap the wall with your sword to see if you hear a weird tone. If you do, bomb that part of the wall. Enter into the room and open the chest for the dungeon map. Head back down and push the block by the upper block to go back into your box. Push 2 of the leftmost blocks left and up or down, then head left. You have to make the statues look like the ones on the top. Push all of the statues down except for the 2 statues out of place. Move the red statue out of place to the left. Then push the purple statue out of place into its spot. Then push the red statue into its spot. Head left. Head left 2 more screens and slash the hardhat beetles into the pit. Kill the stupid things to make a chest appear. This contains. . . . . THE ROC’S FEATHER!!!! 😀 With this, you can jump anywhere you please. 😀 Head down. Jump to the moving platform and down the pit. Get on the stairs and head to the right. You’ll have to jump onto thwomps and jump to the ladders. You should now be in a room with a trampoline and an owl statue. Push the trampoline onto the top most purple square. Jump onto the trampoline and be sure not to fall. Go open the chest for the compass and head back down. Push the trampoline onto the other purple square and jump onto it. Head right. You’ll need the Power Bracelet and the Roc’s Feather for this one. Push the rollers and jump over the spikes. Make your way to the right and take the stairs. Push the trampoline in here onto the orange square. Jump onto it and open the chest for the key. Jump back down and take the stairs going down. Make your way left and up the ladder. Hop onto the moving platform and jump across the pit. Head right and you’ll find yourself in the room with the jars and the wallmasters. Open the door again like last time and head down. Kill the doofuses and head left. This time in particular, jump over the button onto the brown floor. Head left. You can head up the stairs for a Gasha Seed. You can also open the door on the left as well. In here is your miniboss, Calamareye. When they come out of the water, pick one up with the Power Bracelet and keep it out of the water and throw it on land. Slash it constantly. Repeat this process with the other ones without falling into deep water and you’ll unlock a portal to the entrance along with a fairy. Head up the stairs. Get to the pit and head down it. Avoid the gigantic spike. Push the 4th block down, into the pit. Jump over and grab the Boss Key. Push the lower block out of the way and jump down. Head right and down. Take the portal at the entrance back to the room with the miniboss. Head back up the stairs and use the other jumping path. Get into the door to face your boss: Mothula.
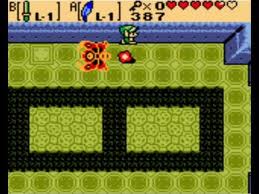
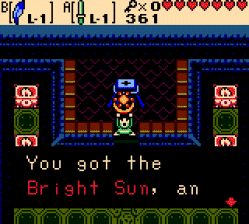
Yes, this is a giant killer butterfly. Try not to get knocked into the pit. You’ll have to push the trampoline in the correct place and Mothula will regain all of his health back. Get onto one of the floating platforms and slash the crap out of him. When he dies, get the heart container and head downstairs. Head through the door and pick up the next essence of nature. . . the Bright Sun.
You’ll hear the Maku Tree say something about Sunken City. We have a few errands to run before we go to Sunken City. 😉
Dancing Dragon Dungeon
We are going to visit Sunken City and Mt. Cucco. Get to North Horon and jump across the pit and through the log. If you have Ricky, jump across the pits and destroy the buzz blobs. If you have Moosh, you must fly over the long pits. If you have Dimitri, swim to the Sunken City. Throw Dimitri over the pit and jump over there with him. Either way with any animal, you’ll meet up with the Great Moblin. Avoid this doofus for now and east. This is Sunken City. You’ll need Dimitri for this one. If you have any other animal besides Dimitri, then they will leave, because of the smell of medicine. Can’t they handle it for 5 seconds? If you don’t have Dimitri, follow the shallow water south and you’ll find some kids picking on Dimitri. Give them your bombs and they’ll leave Dimitri alone. Head around this part of Sunken City and you’ll eventually find a Gale Seed Tree. Gale Seeds will warp you to any tree in Holodrum. 😀 Swim up the waterfalls with Dimitri until you come across 2 waterfalls. Take the one on the right and you’ll find an old man here. Talk to him and he’ll say that he needs the Master Plaque. Get out of here and use Dimitri to go up the left waterfall. In here you’ll find some statues. Push them in the correct place so they look like this.
You have to spin attack them all at once and then a chest will appear. Open it for the Master’s Plaque. Get back on Dimitri and go visit the old man in the waterfall on the right. Give it to the dude and he’ll give you the Zora’s Flippers. You can swim in deep water now. You won’t need Dimitri, unless you need to go up some waterfalls. Get to the northwest side of Sunken City and you’ll find Ingo’s house. We’ll get to him later. 😉 Get to a spot by the rocks by Ingo’s house and dive under one of the piles of rocks. You’ll be in an underwater passage. Head left and up and you’ll appear on Mt. Cucco. Now, head left and keep going until the season changes. You’ll find a wall that you can blow up. Blow it up and head in. When you come to a fork in the cave, take the passage on the right and it should lead you to a goron that will be so happy you visited him and he’ll give you a bigger ring box. 🙂 Get back to Mt. Cucco and go to an area where you climb up the vines. Head east and go up the huge stairs. Jump off the first ledge and you’ll land on a portal to Subrosia.
Now, jump to the other side and. . . HEY! Those 2 Subrosians stole your Roc’s Feather!! 🙁 They gave you a Fool’s Ore for it. This will not do! Let’s go show them who’s boss!! 😉 Head west and enter their house. Follow them west and out the door. Now, this is like the scenario with Rosa, only there are 2 Subrosians. Just hide behind the trees and stalk them without being seen. If you are seen, it will start over. This might take a few tries. When you see the place where they bury it, go dig it up and you’ll get your Roc’s Feather back and you’ll put the Fool’s Ore in there. Head east from the portal and jump to the staircase here. Go through the cave and you’ll pop up right in front of the Spring Tower. Note that there’s also a Gasha Seed in that tunnel you went through. Enter the Tower of Spring and get through the obstacle course here. Go up the stairs and talk with the Spirit of Spring. The Rod of Seasons can now change the season to spring. In the spring, rock flowers bloom and the water rises higher. Exit the Tower of Spring and get back through the cave. Now, we have a few errands to run here. Near the portal leading to the Woods of Winter, is a pit. Jump over it and head west. Keep going until you see a house that looks like this.
Head inside and talk to the Subrosian in here. He says he wants to make Lava Soup, but he needs a pot. Give him your Iron Pot and he’ll give you some Lava Soup. There are 2 Gasha Seeds around here too. One is in a cave to the northwest of the Chef’s home and the other is directly north behind a locked door. Use Rosa to unlock the door. When your done running errands, use the portal leading back to Mt. Cucco. When you find a stump, change the season to spring, and head east. You’ll find Moosh here. He looks like this.

Moosh: do me a favor and get me a spring banana. Link: i don't see why he can't get it himself but okay. 😉
Notice the purple flowers next to you are rock flowers and it’s spring so they’re blooming. Cut them down and head north. Remember that this is completely optional if you already have Moosh. Pick up the cucco with the Power Bracelet and repeatedly tap A and the cucco will fly you to the ledge. Get through the cave and when you get to the top, cut the tree and you’ll get a Spring Banana. Give it to Moosh and he’ll help you. Get to the entrance to Goron Mountain, which is where the season changes. Head north and fly on Moosh over to the Dragon Key. Get it and fly back Goron Mountain. Talk to Biggoron and give him the Lava Soup. He’ll give you a Goron Vase. Get to Sunken City and go to Ingo’s house. Give him the Goron Vase and he’ll give you a fish. Warp to the Ember Seed Tree with the Gale Seeds. Go to the dude in north Horon with the megaphone and give him the fish. He’ll give you the Megaphone. Get back to Mt. Cucco using the secret entrance in Sunken City and change the season to spring. Use the spring flower to get onto the ledge and go into the cave in the north. You’ll find Talon here. Wake him up with the Megaphone and he’ll give you a mushroom. Get the ring in here and head out. Head east and jump down by the stump to get a heart piece. Head back up and change the season to winter. Head west and jump onto the snow pile and into the cave. Make your way to the top and use the flying cucco to get you across the ledge. Put the Dragon Key in the mysterious keyhole and the waterfall will drain revealing your next dungeon. Jump down and change the season to summer. Get into the water and climb the vines into the Dancing Dragon Dungeon.
This is your next dungeon. It’s a little tricky because you can’t use your sword while swimming in deep water. Swim into the upper door, kill the enemies and open the chest for some bombs. Ride in the minecart and be sure to hit the switch on your way out. Kill the enemies and blow up the wall on the right. This is a hard puzzle. Throw away the 2 middle jars and push the other jars onto the buttons. When all of them are on, you get on the last one and a key will fall from the sky. Get it and head back into the cart. Be sure that you already hit the switch so you can head right. Push the blue statue onto the button and head through the door. Move the blocks in the upper left hand corner and head down the stairs. Make your way around, killing anything in your path and head to either lower door. Make your way around again and take the door on the right. Go get the Dungeon Map. 😉 Head back and take the stairs in the corner. Make your way to the right and get up the ladder. This is a dark room. Light the torches with your ember seeds and run/jump to the chest. Open it for a key. Get back on the stairs and head left up the ladder. Head up and make your way to the stairs going up. Get back to the entrance and unlock the door on the right. Jump across the spikes and blow up the wall on the right. Go in and kill the enemies and push the block. Open the chest for the compass. Get back to the spike room and head up, dive under the rollers and get through the upper door. Put on the Roc’s Ring if you have it so you can simply get on the cracked floor and jump there safely. Jump to the west and get in the cart. Get in the cart again and hit the switch on your way out. Kill the enemies in here to make a key fall in the water. Dive into the water to get it and get in the cart again. Unlock the block and kill the enemies to make a staircase appear. Head up it and use the Pegasus Seeds and the Roc’s Feather to jump across the long gaps. Get to the other stairs and get down to the other minecart. Get the small key on the ledge when you stop and head down. Hop across the spikes and head into the lower door. If you’ve visited all of the walkthroughs, then you’ll know this guy. This is your miniboss: Agahnim. Will this guy ever stop trying to ruin your life? 😉 If you remember, you have to deflect his magic against him. WRONG! This time, equip your ember seeds and light the torches. Agahnim will split in three and if you light the torches with the ember seeds, you’ll see the real Agahnim has a shadow under him. That’s when you go up to him and slash him. Repeat this process until you have killed the doofus. Head down and hop into the cart. Unlock the door on the left when you finish your ride. 😉 Head left and push the statue onto the switch. Prepare yourself before you do this. Equip the Pegasus Seeds and run as fast as you can to the staircase and up the stairs, because the cracked floors will fall after you push the statue onto the switch. Open the chest for a Slingshot. 😀 😀 😀 😀 😀 😀 THAT’S SO AWESOME! Now you can randomly shoot things for no apparent reason. Jump back down, head right and head back into the cart. Get back into the cart when you stop and shoot the switches along the way. Head into the next room while using the Pegasus Seeds and the Roc’s Feather to do long jumps. Unlock the block and head up. Kill the monsters in here and the Boss Key will fall down into the square of water on the right. Dive under there and go get it. Get back in the cart and when you stop, head up across the spikes and get in another cart. Shoot the torches with ember seeds using your slingshot. Head back to the spike room and up the stairs to go open the chest for a small key. Head down, past the miniboss room and get into the room with the cart, some stalfos, and a blade trap. Kill the stalfos and push the block to the right diagonally to the blade trap, down and go to the right. You’ll notice a big pit and a switch. Shoot the switch with your slingshot and get into the cart. Kill the enemies and head up. Unlock the block and head down the stairs. Kil the enemies and shoot the torches with ember seeds to make a bridge appear. Cross it, head through the door and head north. Get on the moving platform and randomly slash until you stop. Get in the boss door to face a classic Zelda boss: Gohma.
I guess Nintendo really likes this boss. What you have to do is slash off the claw without getting picked up and thrown across the room. Then you have to shoot its eye with your slingshot. Then it will die. Get the heart container and head east. You’ll get the next essence of nature: The Soothing Rain. 😉
Unicorn’s Cave
Now, we still have some errands to do before we get to the next dungeon. If you want you can pay the Maku Tree a visit and he’ll now look like this.
In the Maku Tree, you’ll meet Farore, The Oracle of Secrets. You can talk to her any time you feel like it. 😉 Anyways, head to Sunken City and change the season to winter. Head south and when you get to a close place you’ll see a dead tree that looks like this.
Inside, you’ll meet the great witch Syrup. She needs a mushroom, but Maple isn’t here yet. Give her the mushroom and she’ll give you a wooden bird. Get to Horon and get into the house with a clock on it. Head inside and give the wooden bird to the dude for some Engine Grease. Go to the Eastern Suburbs and head into the cave. Head up the stairs and when you get to the top, talk to the guy with the phonograph and give him the Engine Grease. He’ll give you a phonograph. We’ll deal with this stuff later. 😉 Just thought I’d tell you that you’re almost done with the trading sequence. Apparently, you’ll have to wait until after this stupid dungeon to get to the big surprise! 😉 If you scroll down this walkthrough to find out the surprise, well, YOU ARE A JERK!!! Just kidding. 😉 If you already know the surprise, DON’T TELL ANYONE OR THIS WALKTHROUGH WILL SELF-DESTRUCT! 😉 You know that won’t happen, I’m kidding. 😉
Anyways, onward to the Unicorn’s Cave! 🙂 Head to North Horon and keep the season at winter. Head east from the Gnarled Root Dungeon and head south. Jump over the pit and into the water. Head south and turn around and head up the stairs to find a portal to Subrosia. Get in it and Welcome to Subrosia! Again. 😉
Let’s go get the next season for the rod! 😀 Now, promise me, that you’ll follow this walkthrough carefully if you want to control all of the seasons and not leave Din trapped with Onox. If you have kept this promise go on youtube and look up Darth Maul is Awesome. That will be my opinion on you. If you have not kept this promise. YOU’RE A JERK!! just kidding you guys aren’t jerks (unless you post links on my comments) you’re all awesome! Anyways, head south and you’ll find the sign man’s house. If you break 100 signs, then the sign man will give you a ring to make you stop. Head south and hop across the lava to the west and keep jumping until you get to a place with a mysterious plant. Lift it up with the Power Bracelet and it is a bomb flower. These are not like the bomb flowers in OoT and MM. This will stay with you until you give it to a Subrosian that is guarding the Temple of Seasons. Make your way to the Temple of Seasons and to the northeast tower. This is the Tower of Autumn. A couple Subrosians are blocking it because of the rocks. Give the Subrosian with a hat on the bomb flower and he’ll blow up the entrance for you. Enter the tower and head up the stairs a few times and talk to the Spirit of Autumn. Now you can control all of the seasons! 😀 😀 😀 😀 😀 Exit the tower. If you bought the membership card from the Subrosian Market, then you can head back to the shop in Horon and buy a bigger seed satchel along with some other stuff. Leave Subrosia from the portal you came in through and head north. Change the season to autumn and seriously, right now would be a good time to run around and plant some Gasha Seeds. Head to the northwest of the stump at Eyeglass Lake. This is where our next dungeon is. This is the Unicorn’s Cave. Pick the mushrooms and head into your next dungeon.
This is a tricky dungeon. There’s one part in particular where you will not like at all and might get stuck. It took me a while to get past the dang part! Head up and then right. Kill the enemies in here and get into the one that is closest to the right. Really quickly, hit the switch on the right to switch the tracks to make you go up. In this room, get the small key from the chest and get back into that mine cart. Hit the switch again on your way and get back in the mine cart again. Let it take you to the right and head down the stairs. Head to the left. Look out for the flames and use the thwomps to get you to the ladder. You can blow up those blocks to get to a second ladder, but I wouldn’t suggest doing that yet. Head up the ladder and head right. Kill the enemies and open the chest for the dungeon map. Head left 2 screens and then head up. Head around, jump off the edge, unlock the door to the left, and open the chest for the Magnet Gloves. These are handy with using those blocks that have N and S on them. Remember when working with magnets, opposites attract. So if you see a block that has an N on it, be sure that your Magnet Gloves are at S. If it’s the other way around, and the block has an S on it, then be sure your Magnet Gloves are at N. If you haven’t noticed, your only exit is closed. With your Magnet Gloves set at S, you can move the N ball onto the button to open the door. Once you do that, head right. Head down, push the blocks out of the way, make your way right and head down the stairs. You can get to the incredibly difficult part now. Blow up the blocks and continue to head left. You’ll see these statues that shoot fire at you. Be EXTREMELY careful, because this is the hardest part of the entire dungeon! 🙁 Hop onto the moving platforms without touching the spikes and you’ll make it. Head up the ladder and you’ll find an armos. Push it down 3 times, left twice, and up once to open the door. Head down then left and kill the gibdo. Get your 100 rupees and head up. Kill the enemies. If you have trouble with the iron masks, use the Magnet Glove to take them off, then you can kill them. Head left. This is a little tricky, kill the armos one at a time and remember the order you killed them in. 4 chests will appear. Open them in the order you killed the armos in for a rupee, 10 bombs, 4 ember seeds, and a small key. Head right and then down, use the Magnet Glove to move the N block and head down. Kill the enemies and head left. There are moving floors here. Stay close to the wall and jump to the middle and open the chest for the compass. If you want, you can save the trouble of jumping back over there and falling off the cliff to get back to the entrance of this room. If you have nearly no hearts, then don’t do this. Head down 2 screens and stand on a yellow square. Use the Magnet Glove when it’s set at N and use it to latch yourself onto the S block. Head up and get the small key. To get back across the pit, the Magnet Gloves should be set at S. Face the S block and use the Magnet Gloves to push you away from the block and across the pit. Head left and you’re back in the entrance room. Head up and right and get into the first cart to a room with an S pole spinning in the center of a pit. Time to test your thumbs to see if you are quick enough to do this. Latch yourself onto the pole with the glove set at N, when it rotates to the part where you want to go, quickly let go and press the button again with the glove now set at S. Get into the cart and flip the switch on the way. Get into cart. When you stop, head left and kill the enemies. Push the block to make an N ball appear. Push it on top of the button and exit the room. Get back in the cart and backtrack all the way to the stairs. Make your way to the right and up the ladder. Push yourself away from the S block to a cart that will take you to a small key. Get into the cart and when you stop, head right. Unlock the door to face your miniboss: Syger. He’s not too hard actually. Just spin attack his tail. When Syger rolls into a ball, jump over it and when he’s through, spin attack his tail. Repeat this process until he dies. Get the fairy and head up. Head right and press the button, head up and then left. Ah, these guys. Use the opposite setting of them to take them towards you. Then slash them. Head left. Move the N ball to a spot near the lower block wall and just in front of the fire. Get to the room after Syger and use the N ball to shield yourself from the fire. Head up and get down the stairs. Use the Magnet Gloves to pull yourself to a higher level and jump the platforms along the way. Head down the ladder at the end. Head right and get the boss key. Head back to the room after Syger and unlock the block. Head downstairs and make your way left and up the ladder. Use the Magnet Gloves to take you to the room with the boss. You won’t recognize him, but I’ll tell you his name. . .
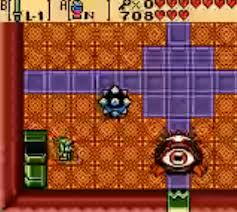
Yep, return of the one-eyed circle who hates music. Digdogger is not like he was before. You have to use your Magnet Gloves on the spiky ball and make sure the spiky ball hits Digdogger. Then he will split. Hurry up and move the spiky ball on them or they will fuse into a bigger Digdogger. Repeat this process until he dies. Get the heart container and go into the next room to get the Nurturing Warmth.
Ancient (or Tarm) Ruins
We have some errands to run before we go get to the next dungeon. Now that you have your trusty new Magnet Gloves, head to Subrosia and on the map you should be at 5-A. Use your Magnet Gloves on the S poles (while their set at N) and head right to get a blue ore. If you make your way to the lower right corner of 5-A, dig on that red square to get a ring. Once you get the blue ore, head to 6-I on the map and use the Magnet Gloves to get you across the pit. Go in the cave and up the stairs to find a chest with red ore in it. Head to the great furnace (on the map it should be 5-J) and talk to the chief and have him fuse your red and blue ores to make hard ore. Get to 4-D on the map and talk to the Subrosian Smithy. Talk to the manager and tell him to “Do Whatever” and he’ll make you an iron shield out of your hard ore.
Onward! Get back into Holodrum. If you have the Membership Card, head to the Horon Shop and buy a Treasure Map. If you are reading this walkthrough, you won’t need it. Although, it can be helpful at times. Head south of the Hero’s Cave and shoot an ember seed at the torch to make a bridge appear. Head south and put a mystery seed on the bones. Kill the moldorm here and you’ll get the X-shaped jewel. Get to Mt. Cucco and change the season to spring. Head west to the flower to reach the Dancing Dragon Dungeon. Don’t go in and dive into the spot on the top right corner to get the Pyramid Jewel. Get to Holodrum Plain and head south from Ricky’s home and into the water. Climb the ladder and get into the house in the tree. Talk to the guy here and he’ll give you a Round Jewel. Get to Spool Swamp and change the season to winter. Head south to 8-A on the map and bomb the wall here. Get into the cave and you’ll find the Square Jewel. Warp to the entrance of Spool Swamp (via gale seeds) and head east and north. Put the jewels in their place and the Lost Woods will be opened. Head north.
Change the season to summer and climb up the vines. Head west, then down the vines, push the statue to make some stairs appear. They are out of reach for now, so head back to the stump and change the season to winter. Head west, get on the snow pile, and head up stairs. Push the 2 bottom armos onto the ice and change the season to autumn. Head east and into the cave with the mushrooms in front of it. Deflect the seeds of the Deku Scrub and listen to its words. Get to the water and head north, pull all of the mushrooms, head west, go south 2 screens and burn the shrub. Play the Phonograph for the Deku Scrub and he’ll tell you how to get to his secret spot. Head out and go north and west. Change the season to winter, head west, then change it to autumn, head west, then change it to spring, head west, and change the season to summer. You should see the Noble Sword. Get it! That was your big surprise! A NEW AND IMPROVED SWORD!! Get back to the middle stump and change the season to winter and head west. Change the season to autumn and head south. Change the season to spring and head east. Change the season to summer and head north. This will take you to the Tarm Ruins. Head east and kill the enemies. Change the season to winter and head south, east, and north. Head west, push the lower armos out of the way and jump down. Change the season to spring and use the flower to shoot yourself back up. Head west across the bridge and you’ll meet a mysterious person telling you that if you rescue Din, then the Evil King will be revived. Okay, what is with this guy? Although, he may be onto something. For those of you who played Link’s Awakening, remember when one of the bosses said something about Koholint being a dream and it was? Anyways, we have more important business to do, head into the Ancient Ruins.
This is your next dungeon. Once you enter head up 2 screens and you’ll come across a spinner. Go on it and it will take you to the right. Head right and kill the enemies. Be sure to have the Roc’s Ring equipped so you can step on cracked floors and not fall. Kill the enemies and head down. If you bomb the lower wall, you’ll have access to a rupee room. Go get them and head back up and head left, back to the room before the spinner. Head back to the spinner and it will take you left this time. Go left and head up from there. Kill the enemies and use the Magnet Gloves to pull the N ball over the pit. When you have it on the lower side, push it over the pit on the right and get it onto the button. Get the small key that falls. Head down 2 screens, climb the ledge to the left, and head up to get the dungeon map. Head down and push the lone block to open the door. Open the locked block and it will take you to the spinner room again. Go on it and it will take you to your right. Go right and make your way around like last time and go to the room with the N ball. Use it to open the door on the left this time. Head left and head up and right. You should be in the room with the spinner again. It will take you up this time. Head up and in here, kill the enemies and pull the N ball with the Magnetic Gloves set to S onto the button and some stairs will appear. Head up them and really quickly, jump over the spikes and make your way to the bottom door. Head down. Get the small key and return down the stairs. Use the spinner thing to go left. Head left and head down and kill the snakes here. Push the block, head right, head up, and the spinner will make you head left, so head left. Make the same loop to the spinner and it will take you to the right this time. Head right and unlock the door heading up. Make your way to the upper left corner to get the compass. Get back to the lower door and get on the moving platform heading right. In the next room, push the button and use the pegasus seeds to get through the upper left door. Head up the stairs. Grab the bombs and blow up the lower wall. Ignore the chest and head left. Kill the spiked beetles and push the trampoline onto the purple square. Jump on it and you’ll land safely onto the next floor. Kill the enemies, head down, kill the enemy here, and head right and all the way to a chest with the magic boomerang! 😀 😀 😀 😀 😀 This is the upgraded version of the boomerang! Now it can go farther! You can also control where the boomerang goes if you hole the button. SHOOT!! The armos come to life and trap you there! 🙁 🙁 🙁 Use the magic boomerang twice to kill an armos and head left and jump down the pit in the corner. This will take you near the entrance. Head left, up the ledge, and head left to the chest. Make your way to the button to open the upper door. Use the magic boomerang ability to guide it to the switch. Head up the stairs that appear. Head down and use the boomerang to hit the moving switch. Equip your new and improved shield and head down to the lower door while blocking the arrows. Jump down the pit, head down, and around and shoot ember seeds at the torches with your slingshot and head up the stairs that are now revealed. I know I haven’t told you this earlier, but with your Noble Sword, you can destroy jars with it. 😉 Get some pegasus seeds and head right. Equip the pegasus seeds and the roc’s feather to do this job. Grab the rupee and the walls will start to close in. Now I’m getting claustrophobic! 🙁 Run right and around to the lower left door and get the boss key when you get there. Head right and up the stairs. Kill the enemies and push the upper left block to open the door. Jump down the hole and go around to get the small key. Get back up the trampoline and unlock the door to face your miniboss: Vire. Do you remember him as a Link’s Awakening enemy? Well, he’s a miniboss now and he’s very easy! 🙂 Now that you have the Noble Sword, he’ll be a piece of cake! Now, when he swoops down, ready a spin attack and then get him. Repeat this process until he splits in 2. Kill his 2 parts the same way and he’ll die. Get the fairy and head right. Use the pegasus seeds to dodge the arrows. Make your way around the rollers and push the button in the corner. Head down and you’ll see 2 buttons. One of them reveals a stairway, but the game sets the buttons at random to reveal which one, so I can’t help you with this one. Just choose wisely. 😉 Head up the stairs, kill the enemies and head up. Use the N ball to kill the hardhat beetles and head left. Use your magic boomerang to make all of the switches red and head down. Kill the enemies and push the trampoline down 2 times and right 4 times. Jump on the trampoline, land safely, and use the magic boomerang on the switch. Jump down the pit, head up the stairs, and push the right most block to the right. Slash the blocks for fairies and head into the boss room. You may not recognize this guy, but he’s been in the first Zelda game.
Yep, Mahandla is back and he’s really tough. Throw the magic boomerang at it’s mouths and when they’re gone, throw the magic boomerang at the main section of it’s body repeatedly, until a crystal appears. Slash the crystal and repeat this process until he dies. Get the heart container and get another essence of nature. The Blowing Wind.
Explorer’s Crypt
We have some errands to run, before we get to the next dungeon. You must be getting pretty sick of these errands, aren’t you? Once you exit the Ancient Ruins, go collect any Gasha Nuts necessary. Head to Horon and head down the stairs at 16-H on the map. Make the magic boomerang go to the switch to make a bridge appear to the portal. Go into the portal to Subrosia. Head down the stairs twice and talk to the captain. He will ask you to find his bell. Because you are so sweet and generous, you are going to go find it for him. Head up the stairs and talk to the pirate on the right. Remember the order he opens the cabinets in. Get back to Horon through the portal and head to the Eastern Suburbs. Head south and then east. Talk to the pirate and he’ll leave you alone. If you remember the order of the cabinets opened, then you should do fine. If you don’t, I’ll get you in there. 😉 Press the 3rd block twice, the 2nd block once, 1st block twice, and the 4th block 3 times. This will open the way to the Samasa Desert. This place is pretty tough and a quicksand ring would be helpful at this point. Head to 15-O on the map and enter the ship, and talk to the ghost. He died in a sandstorm while looking for the bell. He wants you to find his skull and he’ll help you. Head northeast and past the quicksand to find his skull at 12-P on the map. Talk to it and then pick it up with the power bracelet. There are a few places where the bell could be, but they’re under quicksand. Take off the quicksand ring and enter the quicksand without falling. If the skull starts blabbing at you, fall down that hole and the bell should be there. Get it and the skull will disappear, exit the cave and head to Subrosia (via portal in Horon) and go visit the Subrosian Smithy. Talk to him and ask him to polish the bell. Tell him “Do It!” and he will do it all right. 😉 Take the bell to the captain and he will take you to his ship. This will take you onto the seas of Holodrum and breaks through the invisible barriers. The pirates all get seasick, so they port on the western coast. There’s one more thing we need to do before we get to level 7. 😉 Head to North Horon and change the season to summer. Go to the Gnarled Root and head down the stairs. Head down the other stairs and talk to the dude here. He will tell you to slay 4 golden beasts and he will give you his power. Warp to the Woods of Winter and change the season to autumn. Go to the entrance to the Snake’s Remains and you’ll find a gold moblin. These guys take FOREVER to kill! So, kill it and warp to Tarm Ruins and go to the Lost Woods. Get to 5-C on the map and change the season to winter. Head to 5-D on the map and kill the gold centaur here. Warp to Spool Swamp and head to 13-A on the map and you’ll find a gold octorok. Kill it and deflect it’s attacks with the iron shield and you should be fine. Warp to Horon and go to the Western Coast. From the pirate ship, head north and through the house to the stump. Change the season to spring. Head directly east from the Hero’s Cave to 14-F on the map. You should find a gold soldier here. Kill it and go back to the guy by the Gnarled Root. He will give you a ring. Get it appraised IMMEDIATELY! This is a red ring. Equip it and get to the Western Coast and change the season to summer. Head west, climb the vines, head north and get into the Explorer’s Crypt. Second to last dungeon. 😉
There are millions of ghosts here, so be careful. 😉 From the entrance head up and then left. Go around and take the door going up. The room should be dark, but don’t worry about that yet, just head up. In this room, you have to get out of here before the torches go out. Equip your pegasus seeds and blow up the lower left wall. Exit the room and go back in, go through the left wall to get the compass. Head back to the cursed room and head down. Go back and head right. Kill the enemies to get a key. Head back to the room after the entrance and unlock the locked door on the right. Kill the enemies to get a ring. Go up the ladder and light the torches. And in comes the ghost. Step out of the way and spin attack it. The curse on the north room before the dark room is now lifted. Push the rollers with the power bracelet and head down the stairs. Head left and push the button for a trampoline. Push it down twice, jump on it, and land to the left where the button is and a small key will drop. Go down and get it. Head back to the right and kill the armos in here until you find a fake one. Push it onto the button and head down. Take the stairs in here and ride the platform. Be sure your Magnet Gloves are set at S. When you get to a block, use it to push you to the other side. Be sure your shield is equipped. Head up and hold it up as you cross the bridge. Once you cross, head left. This part is pretty tricky. You have to line up the statues so they circle around the blue square. To do that, press the lower side button, the left bottom button, the upper side button, and the right bottom button. This will cause a key to fall down. Go get it and head back right, down across the bridge, and make your way to the stairs and up them again. Unlock the bottom door and push the left and right blocks away and push the trampoline 3 spaces left and 1 space up. Jump on it and head left to get the dungeon map. Get down and unlock the door to the right. Use a pegasus seed and quickly light the torches. A ghost will appear. Go kill it with a spin attack and head west 2 screens. Dive under the rollers to the stairs. Head left from here and kill the soldier on the right and use the Magnet Gloves to pull the others into the pit. Cross the bridge and head up. Hit the switch to get the poles to spin and hop from pole to pole with the Magnet Gloves and head to the platform with the trampolines. Jump on the blue one and kill the stalfos. Get back down and jump onto the red one. Head through the door and hop onto the platform. Hop to the middle to receive the Roc’s Cape. This will allow you to glide 3 spaces when you hold down the button. This is the upgraded version of the Roc’s Feather. Get back and jump down either pit. Head down and right to the stairs. Head under the rollers while going right and up. Get on the stairs and get on the platform and use the Magnet Gloves. Cross the bridge and use the Roc’s Cape to get across the pits to the right. Kill the enemies here and a trampoline will appear. Push it 3 spaces up and jump on it. Land on the platform and use the Magnet Gloves to push the N ball onto a button to make a chest appear. Open it for a small key. Head left and push the armos on the button, head down 2 screens, then left, swim under the rollers to the stairs. Let the blocks destroy themselves before unlocking the block. Glide from one block to the next and onto a platform and head down. Head down and around to the moldorm pit. Equip the Roc’s Ring and kill the enemies and head down. Use a pegasus seed and the Roc’s Cape to jump the platform to a button. This will open the door. Move the block and head right. Your miniboss is the 2 ghosts that you fought. Just try to kill them without letting the torches go out. Keep at least 2 torches lit. If all of the torches go out, you’ll be warped to the entrance of this dungeon. Kill the ghosts with this process and get the fairy. Head right and kill the enemies before you go anywhere. Take the upper set of stairs at the door. Then the next set, and at the 3rd set, take the lower right one. Go to 3 more sets of stairs and when you get to the 3rd set, take the one on the right. Take the left one and follow to the upper right corner of the bottom floor. Head up and use the Magnet Gloves to get to the platform. Jump across the pit, head up, kill the enemies, and get the small key. Head back down and across the pit. Take the platform, head right, push the last upper block into the pit, head up, and unlock the door. Head around to the middle and when you come to the pit, use a pegasus seed to jump to the last button. Wait for it to wear off and then jump to the top one. Jump to the middle one to make a platform appear. Head up and push the button to make a trampoline appear. Jump on the trampoline and land on the platform. Head to the left side and down the stairs. Slash both crystals and head up. Take the stairs on the right and be sure that both crystals are red. This will open the door. Glide to it, kill the enemies, and get the boss key. Get back to the maze of stairs, go until you come to a set of 3 stairs, take the bottom one and make your way to the boss room. You might recognize this guy.
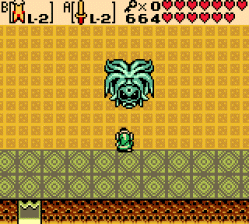
Yes, Gleeok is back. You have to slash its heads to beat him. Be careful, they reform in a certain amount of time. When both heads are gone, be sure to glide, because he will cause a tremor in the floor that will stun you. Slash it constantly. Repeat this process until he dies. Go get the heart container and head into the next room to get the Seed of Life. That’s all of the dungeons besides the last one, so be prepared. 😉
The Sword and Shield Maze
I was just kidding! There is one more dungeon we have to go through! 🙁 Collect your Gasha Nuts and head to the Temple Remains on 5-E on the map. Head up and jump across the pit to the right. Kill the enemies and head up at the entrance. Head west and up. When you get to a huge pit, use the pegasus seeds and the roc’s cape to jump over it. This may take a few tries. Head around once you’re there and be sure the season is winter. Cross the snow and get into the portal to Subrosia. Head north and into the cave. You’ll see a Subrosian, throwing things into the lava. He says he can’t make fireworks. Well, throw a bomb in the lava and head back to Holodrum. Change the season to summer and head to the southeast corner. Kill the enemies and climb up the vines. Hop across the lava and head west. Enter the cave and get through here. Head west and enter another one. Keep going until you enter a building. Head in and take the portal to Subrosia. Head directly north and enter the Sword and Shield Maze.
This is literally the last level. 😉 Sorry about that inconvenience, I haven’t played this game in a long time. 🙂 From the entrance, head up and then right. Shoot the eye with a seed and make your way to a small key. Head left and up. Head up and ignore the 3 statues for now. Kill the enemies to open the door. Blow up the cracked blocks and use the N ball to kill the hardhat beetle. Get the small key and head right. Head right until you get to a locked block. Unlock it and head down the stairs. Get to the lower door and enter. Jump over the rollers and head down the stairs at the lower right part of the room. This part is a little hard. Jump over to the platforms without hurting yourself. Continue left and up the ladder. Avoid the rollers and the lava pit and get to the bottom door. Jump over the large spikes and kill the enemies. Press the button on the right wall and head through the lower right door. Head up the stairs and kill the enemies carefully (you’re on ice). Get the compass in the chest and get back down the stairs and unlock the door on the right. Get on the spinner and head up. Head left and back to the spinner room and get on the spinner and let it take you down and head down. Whatever you do DON’T KILL ANYTHING! Wait for the armos to live, then kill it. Kill everything else and take the stairs that was behind the armos. Make your way right and get the dungeon map. Pull the N ball near the edge of the lava. Now, push it against the wall and onto the button. This will create a bridge. Head up the stairs and go right. Head down the stairs here. Head left, kill the armos, and open the chest for the hyper slingshot. Head right, jump to the bridge, and head up the stairs. Head up and across the ledge. Head left to the spinner and it will take you right. Head right. Get the key in here and head back to the spinner. It should take you up so head up. Head right and down the ladder, use the Magnet Gloves to pull you over the lava, and head right. Use the hyper slingshot to shoot the 3 statues at once and head up the staircase that appeared. Blow up the cracked blocks and make your way left. Kill the enemies and blow up the front corner blocks. Push the block to the side and get the small key. Head down the stairs and unlock the door to the right. Now you will face your miniboss: Frypolar. He is pretty easy. Watch out for his fire and ice attacks. Now, shoot him with a mystery seed and wait for a moment and he will shoot ice at you. Shoot the ice and Frypolar with a mystery seed and use the power bracelet to pick up the ice and throw it at him. Repeat this process until he dies. Get the fairy. We can get another ring if you wish. Get on the warp point and head to 3-A on the map. Shoot the 3 eyes with the hyper slingshot to reveal a chest with it in it. Warp back to Frypolar’s room and head up from there. Shoot the side torches with an ember seed and then shoot the middle one to reveal a staircase. Head up and you’ll be in a room full of ice. Push the bottom ice to the right and have it land on the tan squares. Push the middle block down, right, then up. Push the top block left, down, right, up, and then right. Push the last block to the right to solve this puzzle. Head down the staircase. Make your way left and climb the ladder (beware of the ice blocks along the way). Press the button to reveal a bridge and head right 2 screens. Use the magic boomerang to flip the switch. Head down, slash one of the edge jars, and push the middle one onto the button. Get to the lower right door, kill the enemy to make a chest appear on the left side. Head back and kill all of the enemies to open the next door. Head down and get the boss key. Head down and enter the ice puzzle room. Unlock the door on the left and go through it. Bomb the upper wall at the room with the cart. Follow the ghost’s movements exactly to make a key fall. Go get it and head down. Get a block of ice and go through the door going down. Throw it into the pit and watch the lava harden. 😉 Head down the stairs and get the key. Head up, get another block of ice, and get in the cart. Unlock the block when you stop and throw the ice in. The lava will harden. Get back in the cart. Get another block of ice and get in the cart. Drop the ice and flip the switch when you stop. Get in the cart and when you stop, throw the ice in the pit. Head back and unlock the door heading down and go through it. Take the stairs to the right and follow down and right to another set of stairs. Follow right and get the key at the end. Get back to the lower level and head down and left. Get the bombs in the chest and take the stairs nearby. Get in the cart and head up when you stop. Flip the switch so the cart will take you to the upper right door. Get in the cart and get some more ice. Get in the cart and get in another cart to the south when you stop. When you stop, throw the ice in the pit and the lava will harden. Head down the stairs, head up all the way, and unlock the block. Head right. Be sure to have your sword and cape equipped, because this boss battle is going to be tricky. Unlock the boss door to face your boss.
I have no idea what its name is. 🙁 But this guy isn’t too hard. 😉 Just dodge the attacks he does when he’s in the middle and spits stuff at you that turns you to stone. 🙁 When you’re close enough, spin attack him. He will reappear in a different spot. Repeat this process until he dies. Get the heart container, go into the next room and get the Essence of Changing Seasons. Well, now let’s go save the Oracle of Seasons! 😉
The Fight for the Seasons
Go pay the Maku Tree a visit. He is fully awake now and won’t have any more dreams. He will give you a huge Maku Seed. This will penetrate darkness. The scene will go to Onox and he is tempting you to go face him. Be sure you have all of the heart pieces and be sure that you have any ring equipped that would be really useful. You should also have a potion ready in case you die. Head to the entrance of the Temple Remains. Don’t jump over the pit, instead, head left and up. You’ll see a cool scene in which the essences and the Maku Seed will penetrate the darkness. Then this old dude will come and turn into Twinorva (for those of you who don’t know who that is, look at the Ocarina of Time walkthrough). They will say that the evil king is returning. We’ll get to that in a moment. 😉 Head up and enter Onox’s Castle.
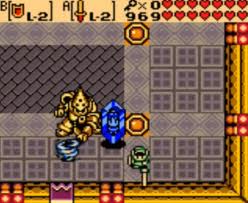
Ready for this? I hope so, because Din is counting on you. 😉 We just need to remind Link that he already has a girlfriend so he doesn’t get too mushy on Din. 😉 Anyways, head up from the entrance. Remember that if you take either side door, it will take you to a fairy place. Kill the enemies until you hear a dinging. Head up. Kill the enemies again until you hear a dinging. Head up again. Equip your bombs and you’ll meet Facade again. Kill him like you did last time (if you don’t remember, scroll up to the Snake’s Remains section and read about it). Head up and grab any hearts necessary. Head up and you’ll see Din, then she’ll disappear. 🙁 Onox will come and he’ll sound anxious to beat you up. Now, only spin attacks can hurt Onox, but watch out! He has a mace! 🙁 Be sure you have the Red Ring equipped as well. Kill him, but he’s not done yet, he’ll do this instead.
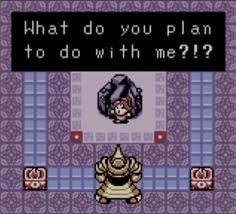
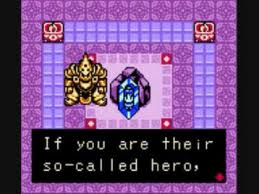
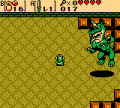
Don’t hit Din with your sword or you’ll take damage. Hit Din with the Rod of Seasons and then kill Onox the same way you did last time. Onox and Din will disappear after you beat up Onox. YOU BEAT THE GAME! Oh wait, what’s that shaking? Fall down the floor and Onox will turn into a dragon. SHOOT! He should look like this now.
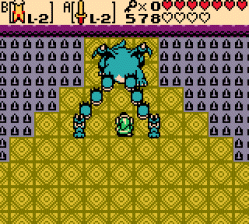
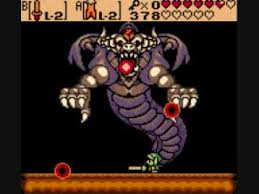
He will say that he was summoned by Twinorva. 🙁 He will start to attack now. He will try to grab you. When he does, jump on his claws and spin attack the crystal on his forehead. Repeat this process until he dies. Congrats, you just beat Oracle of Season! Be sure to watch the full credits! There’s a code on here that will come of use in Oracle of Ages. 😉 Write down the code at the end of the credits. If you didn’t you can open the game and get the code from Vasu. 😉 Now, let’s get to the sequel shall we?


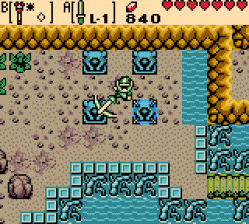
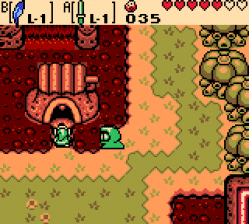
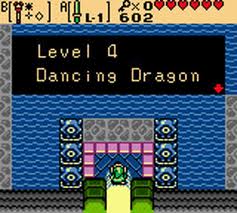

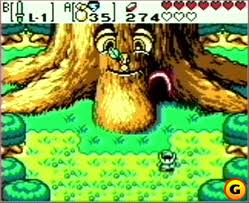


sooo awesome!!! 🙂