Welcome to the Legend of Zelda Majora’s Mask walkthrough. This game has the most sidequests, heart pieces, and more. There are 52 heart pieces! 🙁 That’s going to take some time. The dungeons in this game aren’t necessarily hard, but there are only 4. What Link is trying to do, is bring the Majora’s Mask back to the Happy Mask Salesman in 3 days tops. That really sucks. Here’s how it all started.
First Three Days
After a short little thing about Link looking for a lost friend, you will see Link on Epona. I think Link is looking for Navi because she left him after Link beat Ganondorf in OoT. Then you will see 2 fairies. One’s white and one’s purple. They will scare Epona and knock out Link. A Skull Kid will come by and he’s wearing a mask. Here’s what it should look like.
Skull Kid takes the ocarina of time and starts playing on it. Great! Now we’ll never want to play on it again for fear of getting infected by his spit. 😀 Link will wake up and Skull Kid will get scared. He jumps on Epona and runs off. Link grabs on after him. Then he falls off. Hey! We won that horse fair and square! 🙁 Follow that Skull Kid! 🙂 You have gained control now. Press B to slash things with your sword. You can slash the grass if you want some rupees right now. There are gold skulltulas in this game, they are in certain houses instead, not all over the place. If you’re wondering how to jump, just run forward and Link will jump automatically for you. Head through the opening and jump up through the other opening. Oh no! A cliff! You will land on a pink flower and Skull Kid. . . HE DID WHAT TO EPONA?! Well, that sucks. Skull Kid will get out his magic spells and do this to you.
It’s the horrible truth! Skull Kid turned you into a Deku Scrub! 🙁 Now we can’t use our sword. 🙁 As you try to follow Skull Kid, Tatl will try to stop you. Tael is stuck behind the door. This is Link and Tatl meeting.
Tatl will follow you now. Open the door for her and start following that Skull Kid. Tatl knows where the Skull Kid went. Head to the end of the hall and you will find an entrance to somewhere. Head inside and you will find one of those mysterious pink flowers. Stand on them and press A to dive under and let go of A to release Link so he can fly. Fly to the door and head through it. Fly on your flower to the platform ahead of you. Then turn left and fly across the 2 other platforms to get to a big chest. Open it for your first item. Deku nuts. Fly back over the 2 platforms and fly to the opening this time. Head through the opening. You will now find yourself inside a clock tower. Walk up the stairs and you will find a familiar face here.
He stalked you here and he tells you that you need to get the ocarina of time for him to change you back to your normal form. In return, you must give him a mask that was stolen from him. Head through the door and here’s the next place that isn’t Hyrule. Welcome to Termina. Right now, you are in a place in the middle of Termina called Clock Town. You may find some familiar faces here if you have played Ocarina of Time. The guy tells you that you should go see the Great Fairy. Head through the north opening to get to North Clock Town. There is a guy in green here. Talk to him and he’ll sell you a map of Clock Town for 5 rupees. Buy it and here’s your map of the place. The guy in green is named Tingle. He is very very creepy. He usually flies around on a big red balloon (which gives us an excuse to abuse him). Head to your left and you will find an opening. Head through it and you will find the Great Fairy’s Fountain. It turns out, Skull Kid chopped her in pieces and the stray fairy is somewhere in Clock Town. I know where it is! It’s at the Laundry Pool here. The Laundry Pool is at the southwest side of Clock Town. In the daytime, it’s here, at night, it’s at East Clock Town. It’s floating above the Laundry Pool. Deku Link can’t go in water, but he can jump on it for 6 seconds. Go get it and bring it back to the Great Fairy’s Fountain. The Great Fairy will give you a magic meter! 😀 She will also suggest that you go visit the scientist person at East Clock Town. Unfortunately, these kids called it their clubhouse and won’t let anybody through unless they know the code. You’ll find out the code after you do this. You have to find all 5 of the kids and stop them. First, there is a balloon with a Majora’s Mask sign on it. Since we have a magic meter, we can now shoot bubbles. Shoot a bubble at the balloon and talk to the kid that was trying to shoot it. He will let you play hide and seek with him and his buddies. Here are their locations: One is at North Clock Town and he’s behind the slide in the northeast corner, one is also at North Clock Town and he’s behind the tree in the southwest corner, one is in West Clock Town and he’s hanging in the middle of the street at the top of this part, one is in East Clock Town and he’s on top of the overhang by the Stock Pot Inn, and the other one is also in East Clock Town and he’s on the rooftop of the Latte Milk Bar. Once you catch them all, they will teach you their code. WRITE IT DOWN! The code is different for every file so it will be different from mine. 🙁 Head to East Clock Town and get to the top part of it. You will find a kid here blocking the entrance to the observatory. Tell him the code you wrote down and he will let you by. Head in. In here, hop from platform to platform until you hit solid ground, then you will find a skulltula. These will spin as soon as you get close to them. Wait for him to turn around and shoot a bubble at him. Follow the passage and you will find a balloon blocking a ladder. Pop it with a bubble and head up the ladder. Here’s the observatory. There is a scarecrow here, but I wouldn’t suggest dancing with him. Head up the stairs and talk to the guy here. Say yes when he asks you to look through his telescope. Aim it at the top of the clock tower and zoom in, you will find Skull Kid up there. You will automatically look up at the moon and it will cry like this.
After Skull Kid does his little dance, stop looking through the telescope and head through the door here. This is Termina Field. There are no enemies out here because you can’t even get out here and explore. Get the mysterious glowing object that fell down. This is the moon’s tear. Head back into the observatory and get out of here and head to South Clock Town. You will find a yellow flower here. A Business Scrub will come by, talk to him and show him the moon’s tear. This is different from Ocarina of Time. How you show them things is that you have to talk to them and wait until they say to press pause and equip an item using the C buttons or the C stick depending on the version your playing. The scrub will give you the Land Title Deed. It is very useless at this moment. You can go on the flower and fly to your first heart piece. There are some stairs here, but they do not open until the final day at midnight. 🙁 You might need something to pass the time, you can go talk to the scarecrow and dance with him, or you can try an optional glitch to get into Termina Field. Stand near the guard at East Clock Town and face the square. Target and head backwards. You will slowly inch past the guard. 🙂 Go cut some grass and when your wallet is full (99 rupees) head to West Clock Town and talk to the banker at the east wall. Turn in all your cash and he will tell you that if you deposit 200 rupees, you get something good. You can go ahead and collect rupees up to 200 and you will get the Adult’s Wallet. 🙂 When it’s the final night, fly up to the place where you got your first heart piece and wait patiently for midnight. Head up the stairs here and you will confront Skull Kid. Tael will explain that you need to free the spirits of swamp, mountain, ocean, and canyon. Then Skull Kid will make time go faster. Shoot Skull Kid with a bubble and quickly grab the Ocarina of Time. It will go to another scene where Link has a memory of Zelda teaching him the Song of Time.
You will learn the Song of Time. This song is very nifty in this game. You’ll see why in a minute. Once the memories head back to you, get out the ocarina and play the Song of Time. Notice that you have another instrument called Deku Pipes, it works the same way as the ocarina of time. You can only use the Deku Pipes in your Deku form. Play the Song of Time and you will return back to the first day. 😕 How, is that possible? Tatl will apologize for being rude and she will suggest that we go visit the mask salesman. He’s back where we left him. Talk to him and he will teach you the next song.
He will teach you the Song of Healing. This song is so pretty that I almost cried when I first heard this song. Play it and you will return back to normal! 😀 Yay! 🙂
The mask salesman will say that this song heals dark magic and turns them into masks. Grab the mask in front of you and you will get the Deku Mask. You will be able to shoot bubbles again so don’t worry. There are also some hidden songs with the Song of Time. There’s the Inverted Song of Time which is the Song of Time played backwards and it slows down time. And the Song of Double Time which will make time go faster, the keys are right right A A down down. The mask salesman wanted the Majora’s Mask as well and we didn’t bother to get it. 🙁 He will pull out the angry eyes at you.
Once the mask salesman is done bugging you about it, head out of the clock tower. Play the inverted Song of Time to make time go slower, because we have some errands to run before the first dungeon. 🙂
The mysterious Southern Swamp
As you exit the clock tower, Tatl will say that the swamp is at the Southern Gate. We could go there, but we have some very important errands to run first. First, go grab the stray fairy in the Laundry Pool and go visit the Great Fairy. The Great Fairy will give you the Great Fairy Mask for any stray fairy in any dungeon. There are other Great Fairies around that have lost some of their pieces in the dungeons. The mask looks like this.
Exit the Great Fairy’s Fountain. There is a heart piece in North Clock Town that we could not reach earlier. Climb up to the slide, turn to face a tree, jump to it and get your 2nd heart piece. Jump down and head to East Clock Town. Let’s head back to the observatory and get ourselves the moon’s tear. 🙂 We need the Land Title Deed for something important later on. 🙂 Head to East Clock Town, tell the guy the code you wrote down and head to the observatory. Say yes you will look through the telescope and get the moon’s tear outside. Head back to the entrance WITHOUT being in your Deku form and the leader of the bombers will give you the Bombers Notebook. Really useless, but it helps us keep track of who we helped out. Show the Business Scrub the moon’s tear and you will get the Land Title Deed. If you don’t have the Adult’s Wallet, you can talk to the guard by the gate in your Hylian form and he will let you go into Termina Field. There are some enemies here that are: Chuchus, dodongos, blue bubbles, eenos, and there’s the Takkuri, but let’s ignore him for now. 🙂 Run around and get some rupees and once you’re full, turn them all into the bank. Repeat this process until you have 200 rupees in the bank. The banker will give you the Adult Wallet. Here are some things you should know about going back to the first day. The permanent things you keep are the bottles, bow, what items you have, and all the masks and the bomber’s notebook and the rupees you put in the bank. What you lose is, all the stray fairies, dungeon bosses come back to life, the number of items you had before, and the rupees in your pocket. There’s more, but I’ll explain them later. 😉 You just got to be back in Clock Town before 12:00 a.m. Head to North Clock Town at 12:00 AM and you will find an old lady coming out of the entrance. Then a thief comes by and steals her bombs! 🙂
You have to go to the thief and slash him to get the bombs back. 🙂
Then the old lady will give you the Blast Mask. This is helpful since you don’t have any bombs yet. 🙂 It should be 1:00 AM by now. Head through the gate and head to the north part of Termina Field. Run over to the mushroom like thing that’s farthest to the west. Jump on it and talk to the guy. He looks like this.
Talk to the dude and his name is Kamaro. He is dead and he needs something to heal his soul. Whip out your ocarina and play the Song of Healing.
Kamaro will be so happy, that he’ll give you the Kamaro Mask. If you wear it and press B, you’ll do a creepy dance. 🙂 Head over to East Clock Town and head to the Stock Pot Inn. Unfortunately, it is closed. Put on your Deku Mask and fly on top of the roof by using the nearby flower. There is a door here. Head through it. Head down the stairs and follow the left wall and you’ll find the bathroom. There’s a mysterious. . . hand in the toilet. . . 😕 That is so weird. He’s in dire need of paper. Give him the Land Title Deed and he will give you a heart piece! 😀 Head to the Laundry Pool. It should still be nighttime. You’ll find Guru-Guru here. Talk to him and he’ll tell you what happened a million years ago and he’ll give you the Bremen Mask. Once you put it on you can press B and you’ll march around the place. Head to West Clock Town. At the top, there are 2 girls here. Put on the Kamaro’s Mask, face them, and start dancing. They will give you your 4th heart piece! 😀 You should have 4 hearts by now! 🙂 Play the Song of Double Time to make it the 2nd day. We need 100 rupees. Go ahead and pull it out of the bank if you want to. Head to the Bomb Shop in West Clock Town, talk to the lady, and then talk to the guy and buy the Big Bomb Bag. You will now have 30 bombs! 🙂 There is a door at the far north part of West Clock Town and this is the Sword’s Training Center. Talk to the guy here and pay him 10 rupees to do the advanced mode. You have to jump slash while targeting the logs and you need to get all of them. You will get 30 points if you do it all. Then you will be rewarded with a heart piece. 🙂 Head over to Termina Field. Head to northern snowy part of it and head to one of the bigger mushrooms. There is a hole by the stem. Drop down the hole and you will find 2 dodongos. Throw bombs at them while targeting with Z or L depending on the version your playing this. 🙂 Once you’ve killed them, a chest will appear. Open it and you will find a heart piece! 🙂 Head out of here and head to the patch of grass by the Milk Road. There are some butterflies here. Head to the place where is butterflies are and head down the hole. There is a peahat in the hole. Get closer and slash the thing below his propellers. Kill him and open the chest for a heart piece. 🙂 Get out of the hole and head to the Milk Road. Shoot Tingle out of his balloon with a bubble and buy the map of Romani Ranch from him.
There is an owl statue here as well. Slash it with your sword. This will make life 10 times easier when saving your game. Just talk to it and you’ll be able to save right where you left off by the owl statue. There is also one in South Clock Town by one of the entrances to West Clock Town. Play the Song of Double Time to make it the Final Day. There will be a guy with a pickaxe destroying the rock. He finally made it. Head through the opening to get to Romani Ranch. Go to the back part of the ranch and head through the shack with cuccos painted on it. There is a dude here along with 10 chicks. He will tell you that he won’t be able to see these chicks as full grown cuccos. Put on the Bremen Mask and march around with all of the chicks. Then the aging process will increase.
Then talk to the dude and he will give you the Bunny Hood. This will make you go run faster than before. Head back to Clock Town and be sure to slash that owl statue by the entrance to West Clock Town. Go turn all of your rupees into the bank and play the Song of Time.
Our next destination is the Southern Swamp which is south of Termina Field. Talk to the guard to make you pass. He does this every time you talk to him.
Here’s a map of all of Termina.
Play the Inverted Song of Time first to make time go slower. We’ll need all the time we can to get to the Southern Swamp. Go around opening treasure chests and breaking a guy’s leg by rolling into the tree by the observatory to get some money and head to the Southern Swamp. There is a hollow log here. Head through it and you’ll find a tree. Tatl will tell you memories of how she and Tael met Skull Kid. Now head through the entrance behind the tree to get to the Southern Swamp area. Tingle is here. Shoot him down and by a map of Woodfall. There are some bad bats here as well. They are not keese. The keese will turn up later. Shoot the bad bats and climb up the tree they were on. At the top you will find a heart piece. Get it and you should have 5 hearts now. 🙂 Head to the next place. Now, welcome to the Southern Swamp. 🙂 There’s an owl statue here by the entrance. Slash it and bounce across the lily pads in your Deku form. Follow the path as soon as you come across dry land. Follow the path and you will find a shop. This will come in handy later. Head to your left and you will find the Woods of Mystery. Follow the monkey as soon as you enter. At the end, you will find. . . Koume?! I guess she’s sorry for being so mean after we kicked her trash.
Talk to her and she needs a red potion. Get out of the Woods of Mystery and head up to the shop. Talk to Kotake and she will give you the red potion along with your first bottle. 🙂
Head back to the Woods of Mystery and follow the monkey. Talk to Koume and give her the red potion. You get your bottle back! 🙂 Exit the Woods of Mystery. You will be confronted by monkeys. There is purple water later on that is poisonous. Don’t think about swimming when we get there. Head back to the Swamp Tourist center near the entrance to the swamp and head in. Talk to Koume and she will give you the pictograph box and a free boat ride. 🙂 Ride on the boat to the Deku Palace. Follow the monkey inside. This is my favorite place in Majora’s Mask, mostly because the music here is kinda catchy. Put on your Deku Mask and talk to the guards here.
The guards will tell you that the monkey “kidnapped” the Deku Princess. He didn’t, he just wanted to see what was causing the poison water, so he took the Deku Princess with him to the Woodfall Temple to get in. Then the Deku Princess was kidnapped by a horrible monster. The monkey made it back and the Deku King doesn’t believe that monkey. 🙂 Enter the Deku Palace throne room and talk to the king. He looks like this.
Exit this part of the palace and head through the entrance to your right. Avoid the guards while your at it and make to the end and you will get a heart piece. 😀 Exit this part and head through the other opening. Get to the end and fall down the hole. There is a dude here selling magic beans. In this one, we don’t have to wait 7 years for the dumb thing to grow. We can simply water it with fresh spring water. There is some fresh spring water nearby. Go bottle some and get a magic bean from the guy. Go test it out by planting it on the soft soil. Water it and fly it up to the chest here. Open the chest for 20 rupees. Head back down and buy another magic bean and get some more fresh spring water. Exit this place and head back to the entrance to the Deku Palace. Hop across the poison water on the left side and plant a magic bean on the soft soil here. Fly up and head through the opening. You’ll need your Deku form for this. You have to fly from platform to platform while killing mad scrubs along the way. When you get to the end, go on the platform that goes up and head through the opening. When you’re inside, you’ll be in the monkey’s prison. Talk to the monkey while in your Hylian form and he will ask you to try to chop the ropes. Try and it won’t work. Change back into your Deku form and take out your Deku Pipes.
The monkey will teach you the Sonata of Awakening. Play it and the Deku King and the guards will throw you out of the palace and won’t let you in until you prove that you can bring back the Deku Princess. There is a shortcut to Woodfall to the east. Jump to the land and fly up through the opening. Kill the dragonflies as you fly from mushroom to mushroom. Then you’ll meet up with the annoying owl Kaepora Gaebora. Read the tablet here to learn the Song of Soaring. This will help you warp to places where the owl statues are open. Keep following the path to an opening to Woodfall. Welcome to Woodfall. There is a heart piece here. Follow the path clockwise and you will get to a chest. Open it to get a heart piece. Head to the center platform and smack the owl statue with your sword. Play the Song of Soaring and warp to Clock Town. Go turn your rupees into the bank and play the Song of Time. We need as much time as possible to beat the Woodfall Temple. Play the Inverted Song of Time and play the Song of Soaring and warp to Woodfall. Slash one of the jars to get find a fairy. Swipe it up with your bottle. Put on your Deku Mask and stand on the platform here. Play the Sonata of Awakening and the Woodfall Temple will come out. You ready? Welcome to your first dungeon.
Woodfall Temple
There are some new enemies here called Black Boes. They appear in dark places and can easily be killed. As soon as you enter the temple, you’ll find your first stray fairy. There are 15 stray fairies in each temple. Put on the Great Fairy mask and the stray fairy will come to you. Get on the flower and fly to the platform to the east. Over here is a chest. Open it and you will find your 2nd stray fairy. Fly to the next platform and head through the door here while avoiding the skulltulas. Kill the withered Deku Baba and get the Deku Stick it leaves behind. Head down the ramp and kill the Deku Baba here. It will leave behind your 3rd stray fairy. Get it and hop to the other platform with your Deku form. Break the jars and you will find your 4th stray fairy. 🙂 There are vicious flowers here that will eat you when your in your Hylian form, so go near the with your Deku form. Enter the door at the other end. Hop to the flower in the middle and fly to the other door. There will be 3 snappers in here. Go in the flower and wait for them to go over you, then release the button and they will die. Kill all of them and open the chest for the map. Exit this room and fly to the chest on the other platform. Open the chest for a key. On your left there is a beehive. Shoot the hive with a bubble and it will fall down and release a stray fairy. Put on the Great Fairy mask and the fairy will come to you. Head through the door to exit this room and hop across to the locked door. Be sure you have some Deku Sticks, because we’ll need some. Head through the locked door and push the block forward. Head to the right and you will find a skulltula. Kill it and get your 6th stray fairy. There are moths here as well. They are by the torch. You have to destroy them with bombs or the blast mask. Destroy the moths. Push the block so it blocks the exit and get a stick out, light it and run with it over to the torch by the door. Head through the door. In here are some dragonflies. Kill them all and open the chest for the compass. 🙂 Exit this room. You slash your sword to stop using the Deku Stick. Destroy the moths and light the torch by the door again. Stop using the stick and light the stick again, climb up the platform, jump from platform to platform with the bunny hood and jump to the web. Burn the web and stop using the Deku Stick. Head up the stairs here. This room is dark. Kill all the black boes in here and a chest will appear. This will be easier if you spin while in your Deku form and you’ll easily kill them all. Open the chest for the 7th stray fairy. Light a Deku Stick on the torch in the middle of the room and run around and light the other torches. Head through the door that opens. Fly from platform to platform until you reach some stairs. Head down the stairs. You will be back in the main room. Run straight forward and step on the switch. This will create a shortcut to the second level of this temple. Head through the door to your right. Head south and head through the door there. Here’s you miniboss: Dinofol. He basically a giant lizard that shoots fire at you. Just target him and slash the heck out of him. When he dies, open the chest for the bow! 😀 😀 😀 😀 Now, we can shoot arrows at people! 🙂 Return to the previous room. There’s an eye switch in here. Shoot it with our new arrow and use the flowers to fly to the other side. Enter the door here. There’s another miniboss in here: Gekko. At first, he’ll just jump around all over the place and you have to slash him. Then he’ll call a snapper. Kill the snapper with your Deku form, then shoot Gekko with your bow and arrows. Go into the door that opens and in here, is a blue chest. Open it for the boss key! 🙂 Fly over to the room on your right and you’ll be back in the main room. There is a torch here that needs to be lit. Go stand by the switch and you’ll be targeting an unlit torch. There is a lit torch that’s nearby. Shoot an arrow through the flames and it should go to the unlit torch. Jump onto the spinning platform and stand next to the torch. Thankfully, we cleaned out the poison water. Now, we can go swimming in the water here at the Woodfall Temple. There are some more stray fairies in here. We’ll get to them in a minute, so don’t worry. The 8th stray fairy is by the door with the 2 pillars. It is back there in a bubble. Break the bubble and get it. The 9th one is on the platform with another unlit torch and a switch. Light the torch and the door will open. Fly over to the platform and step on the switch. Then a chest will appear. Open it for your 9th stray fairy. Head through the west door. It’s the door by the Deku Baba. We’re in the room with the block again. Push the block forward and look up with your bow. There is a beehive here. Shoot it down to get your 10th stray fairy. Head near the door by the torch. Under the bridge part is a stray fairy trapped in a bubble in the water. I wonder how it survived all that poison water recently? 🙂 You can either shoot the bubble with an arrow and get it, or you can go down under the bridge in the water and get it. Head back to the main room. Let’s head through the north door this time. In here is the way to the boss room. Don’t go in the boss door yet! There are 4 stray fairies in here that we need to get. Shoot down the dragonflies first. There are some alcoves to your right with 2 stray fairies. Get on a flower and head to the first alcove. There is a stray fairy here that’s trapped in a bubble. Get it and head up a couple more alcoves. You will find your 13th stray fairy here. Pop the bubble and get it out. Get the fairy. There were also some alcoves to your left from the entrance to this room. Head up all of the alcoves and get the 14th stray fairy. The 15th stray fairy is surrounded by fire and it’s trapped in a bubble. The easiest way is to put on the Great Fairy mask, shoot the bubble so it pops, and the fairy will come to you. That’s all of the stray fairies. 🙂 Shoot the crystal switch and fly up to the platforms before the fire comes back! 😀 Now, let’s head through the boss door. You will now meet your boss: Odolwa.
This guy is pretty creepy in my opinion. 😉 What you have to do is you need to avoid getting touched by his sword. You have to target him, shoot him with an arrow to stun him, and then slash him like there’s no tomorrow! Repeat this process. He will eventually bring out walls of fire, bugs, and moths to kill you. Kill the moths with your blast mask. Then kill Odolwa. When he dies, grab the heart container and head into the big blue light. You will find Odolwa’s remains here. These will come in handy later on. You cannot equip them as masks, but you need them because of the spirits in those remains. You will be in a place that is kinda weird. A giant will come by and teach you a melody. Tatl will translate it for you. This is the Oath to Order. This calls the giants by so we can kill Skull Kid once we have all of the giants. Tatl will translate the giant saying “Call us.” Congrats, you beat your first dungeon.
Errands before we go to Snowhead
You will see a cool scene of the water going back to normal. Sweet! Now we can go swimming any time we want! 🙂 You will land at another entrance to the Woodfall Temple. Tatl will tell you that the people Tael talked about might be the spirit sealed in the remains. Then she will complement you and will apologize for doing the bad thing to Epona. Slash the vines behind you to reveal. . . . 🙂
Hi, Deku Princess! 🙂 She was here the whole time! She won’t hurt you for being a Hylian. Then she will beg you to put her in something. 🙂 Get your bottle out and be sure it’s empty, then swipe her inside. 🙂 How in the world does she fit in there?! 😕 Exit the Woodfall Temple. We need to take a shortcut before we go to the Deku Palace. Fly clockwise in your Deku form to a big cave in the wall. In here is the Great Fairy’s Fountain. 🙂 For every 15 stray fairies in each dungeon is a Great Fairy’s Fountain. Over here, the Great Fairy of Power will come out and give you an awesome spin attack! 🙂 It is really awesome. Now, exit the fountain and let’s head to the Deku Palace. Talk to the guards in your Deku form and head in. Head up to the Deku King and dump the Deku Princess out in front of the king. A hilarious scenario will come out like this.
You saved the monkey! 🙂 Because you saved the Deku Princess, the Deku Butler will give you a special reward in the Deku Shrine. Head back to the entrance to the Deku Palace and hop to the left of the entrance to get to a cave where the Deku Shrine is. Talk to the Deku Butler and stalk him around. There are some Mad Scrubs in here, but they won’t hurt you. When you get to the finish line, talk to the Deku Butler and he will give you the Mask of Scents. 🙂 Let’s exit the Deku Palace. If it is the Final Day and it’s close to midnight, turn all your rupees in the bank and play the Song of Time. Head back to the Woodfall Temple. When you have the boss’s remains, a portal will appear at the entrance to the temple and take you to the boss. Go do that and kill Odolwa once more. Save Koume first, we’ll need a heart piece from her. Go save Koume and talk to her at the tourist center. She will say that since the poison is clear, you can go target shooting with her. The record is 19 targets. We need to shoot 20 or more targets in the limited time. You have endless arrows, but you are timed for these. Don’t hit Koume a lot or you will have to start over again. Koume will reward you with a heart piece. 🙂 Turn all your rupees into the bank and play the Song of Time. Head back to the Southern Swamp and talk to the dude here. There is a pictograph contest. You need to give the guy a pictograph of Tingle or the Deku King to get the prize. Show either one to him and he will give you a heart piece. Take a picture of a big octo and show it to the guy. You will get an easy 20 rupees. Go talk to the Business Scrub near the center in your Deku form and buy 2 magic beans from him. We will use these later. 🙂 Get to the part of the Swamp where the poison water starts and head to the mysterious house on the lower level of this swamp and it looks like a beehive. There is a web blocking the entrance. Shoot the web with a fire arrow from the torch nearby and head through the entrance. There is a guy here. . . that happens to have turned into a skulltula. 😕 Well that’s lame! 🙁 But the gold skulltulas are in the house, not in the dungeons and stuff. 🙂 Head through the door. We need 30 gold skulltula tokens to save the dude. 🙂 That’s not too bad. 🙂 Here are the locations. 1. at the bottom of the ramp, circling around the center pillar. 2. at the bottom of the ramp, turn right, it’s going up and down on the left side of the pillar. 3. in a jar at the southeast corner of the room. 4. use bugs on the soft soil on the west wall (get bugs in a bottle under a rock at the entrance). 5. use bugs on the soft soil on the east wall, get some spring water in a bottle and enter the left door. 6/7. roll into the crates in this room. 8. it’s against the wall, you need to use a magic bean and spring water, the soft soil is under a boulder. 9. on top of the tombstone thing in the center of the room. 10. in the upper corner near the door behind the torch, go in the door on the 2nd level. 11. after coming out, turn left, it’s behind the last pillar. 12. against the far north wall, shoot it with an arrow/Deku bubble, use the Deku flower to reach the one in the middle, use that to reach it, head through the door. 13/14. shoot the beehives on the ceiling. 15/16. roll into the giant jars. 17. slash the jars. slash the grassy veil, go into the alcove and get it. 19. it’s going up and down on the far northern wall. There is a Deku Scrub here, play the Sonata of Awakening for him and use the flower to get up there. Get it and head through the left door. 20. release bugs on the soil on the southern wall, jump down to get spring water and enter the north door. 21. in a beehive on the ceiling. 22. going up and down the pillar on the right. 23. on the ladder. 24. use the magic bean/spring water, it is against the northern wall, use the magic bean to get to the northern door, enter the door. 25. in beehives on the ceiling. 26-28. roll into the tree and kill them. 29/30. crawling back and forth in the tall grass. Return back to the entrance and talk to the dude. He will give you the Mask of Truth. 😀 You can read the minds of animals with this baby! 😀 Head back to Clock Town and stalk the mailman. When it’s 3:00 pm, go talk to the mailman with the Bunny Hood. He is training. What you have to do is stop the timer at EXACTLY 10.00. This might take one or two tries. I got it my first time, but not everybody is lucky that way. When you’re done, you’ll get a heart piece. Let’s head out to Termina Field. There are some Gossip Stones that want to be the same color. Near the west entrance from Clock Town to Termina Field, is a boulder. Bomb it and fall down the hole. What you have to do is get into your Deku form and play the Sonata of Awakening on the Deku Pipes. Then the Gossip Stone will turn green. The other songs can change the color, but we don’t have those songs yet. Get out of the hole and near the north entrance, near the ramp is a hole. Fall down the hole and play the Sonata of Awakening on the Deku Pipes. Between the entrance to the Milk Road and the Southern Swamp, is the hole where the Gossip Stones are. Turn them green again and the 4th hole is to the left of the Astral Observatory, jump down it and turn the stones green, there is your 14th heart piece. 🙂 🙂 🙂 So close to getting another heart container. Head to the Milk Road and play the Song of Double Time so the rock is gone. Head in and head to the shed with the picture of the dog on it. Head inside and you will find Mamamu Yan’s race track. Slap on the mask of truth, and talk to Mamamu Yan. Go grab a dog. Make sure it has the thoughts of “My paws feel lighter than air” “There’s no way I’ll lose” and “I feel unstoppable.” Something close to that, pick it up and show it to Mamamu Yan. Then the dog should win. Bet 50 rupees and you’ll get 150 rupees if you get 1st place. And Mamamu Yan will give you a heart piece. Turn all of your rupees into the bank and play the Song of Time. Go to the Town Shooting Gallery in East Clock Town. It has a huge octorok above the door. Head in and talk to the dude. Be sure you have 20 rupees on you. Pay him the money and you have to shoot the red octoroks within the limited time. The pattern is different from mine. If you get over 40 octoroks, you’ll get the large quiver with 40 arrows! 😀 The blue octoroks decrease your time. 🙁 So don’t shoot them! 😀 If you get a perfect 50 then you’ll get heart piece 16!!! 😀 You should have 8 hearts by now!! 😀 Head to the pathway in between the Southern Swamp and Termina Field. Head to the east path now and you’ll find another shooting gallery. Pay the dude 20 rupees and randomly shoot everything here. You need to get a perfect 2120, then the dude will give you a heart piece. And the quiver upgrade of 50 arrows!! 😀 If it is still the first day, then don’t worry about it. If it is past the first day, turn all of your rupees into the bank and play the Song of Time. Get into your Deku form and head down the little hole in North Clock Town by the Great Fairy’s Fountain. It is behind the fence there. Talk to the Deku scrub here and pay him some rupees. This is the Deku Playground. You have to fly from your flower to all of the flowers and the rupees. Beat the record and the deku scrub will give you 50 rupees. You have to beat the record for the 3 days and if you do that, you’ll get a heart piece! 😀 Turn all your rupees into the bank and play the Song of Time. Head back to East Clock Town and head into the shop that kinda looks like a face. This is the Honey & Darling shop. Talk to them and you will have to do 3 things for 3 days in a row. First is bombchu bowling. Hit the targets on the wall. On the 2nd day, you have to throw bombs into baskets. On the 3rd day, you have to shoot the targets. If you beat the records 3 days in a row, they will give you a heart piece! 😀 Whew! Glad that’s over! 😀 On to Snowhead! Turn your rupees into the bank and play the Song of Time. 😀
The Mountainous Land of Snowhead
Head over to Termina Field and head to the snowy part of it. Climb up the ramp of this place and there is a thing that Tatl is targeting at. Shoot it. The thing looks like this.
It will fall onto the ice blocking the path and break the ice. Head to the path. Continue onward and you’ll find some blue tektites. Just kill them with your sword and the world won’t end. At the “end” of the path, there are some huge snowballs. Bomb them and head up the stairs and head through the opening to the Mountain Village. 🙂 There is a goron that’s shivering nearby, but we can’t do anything to him at this moment. Cross the bridge and hit the owl statue. Follow the path behind the building. There are some blue tektites and white wolfos here. Just kill them and cross the bridges. Go shoot down Tingle and by the map of Snowhead for this much rupees.
Keep crossing the bridges and you’ll make it to Goron Village. Some gorons are inside because it is so flipping cold! 😀 If you leave Link in the cold for a while, he’ll start to shiver, then he’ll sneeze. 😀 Head to the back of Goron Village and you’ll find Kaepora Gaebora (you’re so flipping annoying!) and he will leave some feathers on invisible platforms to guide you to an opening. Jump all the platforms and head through the opening. Open the big chest here for the lens of truth! 😀 Sweet! Now we can see invisible things! 😀 Exit the shrine and put on your lens of truth and jump the platforms. When you get to the end, you’ll see a goron that looks like this.
You have to follow him to the place where the goron graveyard is. When you get to the wall, there is an invisible ladder here. Put on the lens of truth. There are paths on this ladder, so listen carefully. The pattern for the paths is right, left, right. Head through the opening and the goron will introduce yourself. He is a dead goron hero named Darmani. He needs something to heal his soul, badly! 😉 Get out your ocarina and play the Song of Healing. He will give you the Goron Mask. This mask will turn you into a goron. Sweet! 😀 Put on the goron mask and pull the gravestone back. Then some hot spring water will come out. Get some in a bottle. It won’t be hot for long, so be fast. Play the Song of Soaring and warp to Mountain Village. Put on the Bunny Hood and run to the path to Goron Village. On the 3rd island like thing, melt the ice and fall down the hole. Head to Goron Village. Get in your Goron form and talk to the goron here. He will open the Goron Shrine for you. Jump down and enter. Once you get in, you’ll hear crying! 😕 Head up the ramp and head into the room, you will find a baby goron. He looks like this.
Talk to him and he will recognize you as Darmani and he misses his dad the Goron Elder. I know where he is. Exit Goron Village and head to the island with the hole. Fall down the hole and get some hot spring water. If it’s the first day, the Goron Elder is right next to you frozen in ice. If it’s the second day, the Goron Elder is by the entrance to this part. If it’s the third day (which I hope it isn’t), the Goron Elder is in the Mountain Village by the owl statue. Go to wherever location it is, bomb the snowball, and melt him. Talk to him in your Goron form and talk to him twice. He will teach you the lullaby intro. The rest of it is somewhere else. In the Goron form, you have the Goron Drums. Head back to the Goron Shrine and play the lullaby intro to the baby and he will FINALLY shut up! 😀 He will teach you the rest of the song. You have now learned the Goron Lullaby. It will make the baby go to sleep and it will make the gorons around you fall asleep as well. 🙂 Get a Deku Stick from one of the jars nearby and put on the Bunny Hood. Light the stick and light all the torches in sight. The chandelier will light up. Get into your Goron form and head by the entrance to the baby’s room. Roll forward and jump the ramp. Hit the chandelier and pick up the rock. Take it back to the Mountain Village and throw it to the goron with the frog on his head. He will. . . eat it. . . and give you the Don Gero mask. If you have 200 rupees, head to Goron Village and head to the bottom level. There is a business scrub here. In your Goron form, talk to him and he will upgrade something for you.
He will take your big bomb bag and give you the biggest bomb bag! 😀 Now, we have 40 bombs! 😀 Head back to the Mountain Village and take the northern path. This path leads to Snowhead. There are some ice keese here. I hate these guys! 😀 Jump the ramps by curling and rolling forward, and jump to the end. Keep following the path and smack the owl statue here. Warp to Clock Town and head to East Clock Town. Head to the Treasure Chest shop. It will be 10 rupees, if you’re a zora, 20 rupees if you’re a Hylian or a Deku, and 30 rupees if you’re a goron. Be Hylian and use the Bunny Hood to get to the chest while avoiding the blocks that come out of the floor. Open the chest for heart piece 20!!! 😀 You should have 9 hearts by now. Put all your rupees in the bank and play the Song of Time. Play the Inverted Song of Time and warp to Snowhead. Put on the lens of truth and you will see a giant goron blowing ice at you. Get in your goron form and play the Goron’s Lullaby.
Then. . .
Follow the path up to the top. You can fire punch (or falcon punch) the snowballs out of the way by pressing B in your Goron form. Like this.
There is also a ramp once you get to the end of the path with the flags, you need to roll up the ramp in your Goron form, then get to the top of the mountain. Head through the opening to enter the Snowhead Temple. This dungeon is hard, and the stray fairies are sometimes hard to find. So, what are you waiting for? Enter the Snowhead Temple! 😀
Snowhead Temple
The new enemies here are white boes (same as black boes, but white and easily killed with a goron pound which is A+B), freezards (statues that shoot ice at you, have to slash them to kill them or melt them), and real bombchus (hold your shield up to let them run into it and die). As you enter, you will find some white boes. Kill them and punch down the stalagmites. There is a block here that is too big for your Hylian and Deku form. Push it with your new strength in the Goron form. Kill the white wolfos and head through the door on the right (dark blue). There are some freezards here and a big ramp. We’ll get to that in a sec. Jump off the edge. In your Goron form, you can walk on lava without getting hurt. Look at the pillar holding up the bridge, there is a hole in it and there’s a stray fairy in it. Put on the Great Fairy mask, shoot the bubble and the green stray fairy will come to you. 🙂 Head to the other end of the room on the lower level and look under the ledge. There is another stray fairy trapped in a bubble. Put on the Great Fairy mask, shoot it, and it will come to you. 🙂 Climb up the ladder in your Goron form and stand by the wall. Turn around and goron roll across the bridge and to the other side. This might take a few tries, head up the stairs on the other side. This room has a few real bombchus. Kill them and open the chest for the map. Head back downstairs. DO NOT GET THE STRAY FAIRY HERE!!! I did it once and I had to start this dungeon all over again so DON’T GET THE DANG THING!! 😀 Jump across and enter the blue door to your right. This is the main room. It is huge! 😀 Run across to the other side and enter the gold door. Slap on the Goron mask and pull back the 2 blocks stacked on top of each other. Push the blocks to the farthest edge of the snowy area. Head into the alcove and open the chest for a key! 😀 Exit this room from the way you came in. Go to the frozen red door and shoot an arrow through the torches, so the flaming arrow hits the ice and melts it. Head through the door. Hey! we’re back at the entrance room. Kill the wolfos if you wish and use the key on the cyan colored door. Kill the white wolfos in here and open the chest for the compass. 🙂 There are a few stray fairies in here, but don’t get the one that you are capable of getting! 😀 Head to the opposite side of the room and here is a cracked wall between 2 pillars. Use bombs or the blast mask to break in and head up the stairs here. This room is full of pillars. Use the hero’s bow to look up at the ceiling and shoot down the stalactites that you can shoot. The other ones will randomly try to kill you if you go under them. Start climbing up the pillars and look at the wall. There is a mysterious patch of snow next to the 3rd pillar. 😕 Slap on your lens of truth and investigate. There is a chest here. Open it and you will find your 3rd stray fairy. 😀 Make your way to the opposite side of the room and slap on the Goron Mask. Fire punch the giant snowball and open the chest for a small key. 😀 Jump down and head through the locked door. In here are some giant switches that are yellow and green. There are some white boes on the bottom level. Jump down and kill them. Look up with the lens of truth and put on the Great Fairy’s Mask. You will find a stray fairy. Shoot it and it will come to you. 😉 Head back up to the top level and hit the switches in this order with the Goron Pound (A+B). Pound the first yellow switch on the upper platform, take off the Goron Mask and jump to the other side, pound the green switch here, run back to the middle and pound the yellow switch. Take off the Goron Mask, climb the green platform, jump to the other side and head through the door. Goron roll to the opposite side and you will find some stairs blocked with ice. We’ll get back to that later. 🙂 Turn right and roll across the snowdrift in the corner. 🙂 Hope that you don’t fall all the way down there. 🙁 That would suck! 🙁 If you fall into the net-like part, then climb up the ladder and try again. Goron roll to the west side. Punch the snowballs and head through the door to meet your first miniboss.
This is a Wizrobe. These guys are EVIL!! They clone and stuff. All you have to do is get to the platform it’s on and shoot it with the hero’s bow. Eventually it will clone. If you look at your mini map, the real Wizrobe is the red dot. Repeat this process until he dies. Open the chest here for the. . . . . DA DA DA DAAAAAA!! FIRE ARROWS!!! 😀 😀 😀 Now our life is 10,000,000 times easier!! We can melt ice with these things!! 😀 Head back through the door. Roll off the edge of this room and get to the basement. You will find some red bubbles here. Find some lava that has a switch on it and step on the switch with the Goron Mask. When you’re a goron, you can walk on lava. 🙂 That’s very nifty! 😀 This creates a switch with your 5th stray fairy. 😉 Climb up the stairs and shoot the green doors. 😉 Head through the left green door. Kill all the freezards with fire arrows, jump the platforms, and open the chest to find your 6th stray fairy. 🙂 Stand on one of the middle pillars and shoot the unlit torches with the fire arrows. Jump to the platform with the light green door and head through it. Head back to the previous room and head through the green door on the right. Head through the red door. Kill the wolfos or ignore it and enter the cyan door. Kill the white wolfos and near the stairs is a crate. Blow it up with bombs or the blast mask and put on the Great Fairy Mask to get your 7th stray fairy. Melt the switch in here and step on it. Melt the block and push it up, right, and down. Jump on it and open the chest for your 8th stray fairy. Push the block left, up, and left, climb up and head through the door. Use the double blocks to get to the other side and open the chest for your 9th stray fairy. Head back to the previous room. Head back to the entrance room and head through the dark blue door. Melt that chunk of ice over there and kill all of the freezards. Roll to the chest on the bridge and open the chest for a small key. Go to the north end of the room, jump across, and head up the stairs. Turn right and grab your 10th stray fairy. Kill the real bombchu if you wish. Shoot the freezard with a fire arrow and shoot the frozen eye switch. You have now created an elevator. 🙂 Get to the top platform and look with the lens of truth towards the center of the room. You will see some invisible blocks. Jump on the path without using the Bunny Hood and you will find an alcove with a chest in it. Open it for your 11th stray fairy. Head through the door on the upper platform. Roll along the ice patch on the side and melt the ice blocking the stairs. Head up the stairs. You don’t have a net to catch you so be careful. 🙁 Roll to the other side and head through the door. There are some Eenos in here. Kill them and use the lens of truth to look at the little snowdrift on the wall. Shoot the bubble and slap on the Great Fairy Mask to get the stray fairy. Melt the ice covering the stairs and head up the stairs. There are 2 Dinofols in here. Kill both of them to get stray fairies 13 and 14. Head through the door and cross over to the other side. Head through the door and you will find your 2nd miniboss.
HOW DID HE COME BACK FROM THE DEAD?!?!?! 🙁 Repeat the same process you did on the other Wizrobe and you will kill it. Enter the north door and open the blue chest for the boss key. Exit this room. Turn right and roll forward. Go down the stairs and fire punch the blue disc-like things. Head up the stairs. Go across the snow drift to your right and punch out the blue discs. Roll clockwise to get to the very top of the pillar. We can access the new area. If you use the lens of truth to look at the snow on the wall, there is a mysterious alcove. A good way is to spin toward it with the deku mask and keep holding forward. Open the chest in here to get your 15th stray fairy. 😀 Head back to the top of the center pillar. Head to the new area. There appears to be some snowballs here. Punch them out and head up the stairs here. Roll to the boss door and punch the stalagmites if you want to recover your magic. Head into the door to confront your boss. Hey! he’s frozen! Since there is no way to just fire punch him, we have to melt him with a fire arrow. 🙁 This is your boss: Goht.
How you kill him is that you have to Goron roll and run into him while rolling. Watch out! He will try to throw bombs and pillars at you as he dies. Break all of the green jars to get magic if necessary. If you got him enough, then he will stop and you can punch the heck out of him! 😀 Repeat this process until he dies. Goht will run into wall, making a hole in it for him to return later! 🙁 Just kidding, he dies under all the rocks. 😀 Get the heart container and head into the blue light to get Goht’s Remains. You will appear in a scene with the giants again. They will tell you that they are protective guardians. Not really anything else. 🙂 2 down 2 to go.
Spring, Ranch, and Graveyard Collection
You will now notice that Snowhead is going all back to normal now. 😀 Warp to Snowhead and climb up to the base of Snowhead. The fairy’s fountain is around the side of the temple. Head inside and turn in all of the green stray fairies. The Great Fairy of Wisdom will come out and give you the magic meter upgrade! 😀 We have a couple sword upgrades we need to get. It has to be the First day or night for this to work! If it isn’t the first day or night, put all of your rupees in the bank, then play the Song of Time and go beat up Goht again. I had to fight this boss a lot for some sidequests to work! 🙁 Head to the Mountain Village and you need at least 100 rupees to get the sword upgrades! 🙁 Go get some and return to the Mountain Village. I recommend playing the Inverted Song of Time for this to work. Enter the building in Mountain Village and pay Mountain Smithy 100 rupees and hand over your Kokiri Sword. It will be like this for a while. I’ll find you something to do while we wait. Head to the northern part of Goron Village and head through the cave-like entrance that is titled “Powder Keg Shop.” Head down the ramps and speak to the Big Goron with the Goron Mask and he will give you a powder keg. You have to blow up the big rock blocking the Goron Racetrack and return to him. Toss the keg up the ramps, roll up the ramps and repeat until you exit this place. Do this with any ramp. Exit Goron Village and cross the bridges ignoring the guays and the wolfos. To your left is some ramps. Climb up them the same way you did to get out of the Powder Keg Shop and you will find the Goron Elder’s son next to a giant rock. Put the Powder Keg by the giant rock and wait for it to explode. If your impatient, then shoot it with an arrow. Head back to the Powder Keg shop and talk to the Big Goron and he will certify you with powder kegs! 😀 Head back to the road between Goron Village and the Mountain Village (where Tingle is) and head into the Goron Racetrack. Talk to the Goron Elder’s son, while wearing the goron mask, and enter the race. There are some green jars on the racetrack, so don’t worry. Race the gorons by using your Goron roll. Avoid the bomb flowers and be sure to stay on the correct path. If you bump into the gorons, the gorons fall back. You will be rewarded with your 2nd bottle with some gold dust inside. 😀 If it isn’t the 2nd day yet, head back to the Mountain Village and play the Song of Double Time to make it the 2nd day. Enter the building and talk to the dude to get the Razor Sword. 🙂 Sadly, you only have 100 swings before it loses its edge. Play with it for a while and talk to the dude again. Give him the gold dust and the razor sword. Head outside and play the Song of Double Time until it’s the 3rd day. Head inside and get your new sword.
Yep, that’s what you need the gilded sword for. 🙂 Put your rupees in the bank and play the Song of Time. Our next destination is the Great Bay. We’ll get to that later, we have to get to Romani Ranch. We need at least 50 rupees to buy a powder keg from the goron at the bomb shop in West Clock Town. There are some easy ways to get 200 rupees at once. 🙂 Put on the Bunny Hood and climb up to the roof (at East Clock Town). Jump to the platforms and get to the end. Once at the end you should be behind the Target Shooting Gallery. Head around and open the chest for a silver rupee that is worth 100 rupees. Head to the observatory and as you get to the place with water, head left. There is a cracked wall here. Blow it up and open the chest here for a silver rupee. 🙂 Head to the bomb shop at West Clock Town and buy a powder keg from the goron. 😀 Put the remaining rupees in the bank and warp to the Milk Road. You can just run outside and burn the Takkuri with your fire arrows like this.
These things can take rupees, items, even your sword or bottle! 🙁 If you kill them, you get a huge rupee that’s worth 200 rupees!!! 😀 😀 😀 Head back to the Milk Road and head over to that guy with the pickaxe. Blow up the rock with a powder keg and head in. Go up to the barn and you will find something awesome.
EPONA!!! She was here the whole time! 😀 Talk to the redhead right next to you. This is Romani. She wants your help to stop the aliens from invading and taking the cows. She’ll ask you to practice with her first. You have to shoot all of the red alien balloons while on your horse and you will get a prize! 😀 Shoot all of the balloons within 2 minutes. There are 10. Use your mini map for this. The balloons are the white dots on your mini map. Go shoot them while on Epona within 2 minutes. Romani will be happy and teach you Epona’s Song. 😀 Now we can use our horse any time! 😀 Help her later tonight at 2:00 am. You can play the Song of Double Time and run around, or you can run around and turn in all the rupees you find as soon as you reach 200. 😀 Just be sure to be back at Romani Ranch by 2:00 am. Once you make it, Romani will start to head to the barn by 2:30. Talk to her. The easiest way to kill these guys is to play the Inverted Song of Time, DO NOT use Epona, use the Bunny Hood, and shoot all of the white dots on your mini map. Shoot the closest ones first, then the farther ones. Slashing them will not work. The dog will bark at the one closest to the barn FYI. Once it’s 5:15 am, the aliens will leave you alone. Romani will exit the barn and give you bottle 3.
Bottle three has some milk in it. It works the same way it did in OoT. Head into the barn and speak with the other girl. Her name is Cremia and she is Romani’s older sister. Cremia needs an escort on the 2nd night. (hint, hint). 🙂 Exit the barn and play the Song of Double Time to make it the 2nd night.
Talk to Cremia and you will ride off into the night. The main road is blocked so you have to go through the other road. You have unlimited arrows, so don’t worry. The robbers are trying to break the milk bottles. Shoot them until you get back to Clock Town. The robbers look like this.
When you get back to Clock Town, Cremia will be happy and will reward you with the Romani Mask. This will get you into the Latte Milk Bar. Put the remaining rupees in the bank and play the Song of Time. We are going to go to Ikana, which is to the east. We aren’t supposed to go there until later. First, warp to the Southern Swamp and buy a red potion from the magic hags shop for 20 rupees. We are going to get the most useful mask ever. Warp to Clock Town and enter Termina Field. Ride Epona to the east and jump the fences as you go. At the end, dismount Epona near the circle of stones. Put on the lens of truth and you will find a guy here. Talk to him and give him the red potion. He will give you the Stone Mask. This is helpful when dodging guards. You can get close to them and they won’t notice. 🙂 Head all the way north of this area, climb the ledge, and head through to enter the graveyard. Head forward while avoiding the bats and head up to the second half of this place. Run up to the house and you will find something under the bridge. Play the Sonata of Awakening to wake it up and it will run away. This is Skull Keeta. Chase him down and shoot him to stun him, then slash the heck out of him! He will take you over to the chest that has a mask in it. Release him and jump over to the chest. As you can see, that is not possible. Put on the Bunny Hood, climb one of the ledges on the side of you, and jump to the chest. Open the chest for the Captain’s Hat! 😀 This will scare people and let us command stalchildren. Let’s run some night errands. 😀 Play the Song of Double Time to make it the First night. Talk to one of the stalchildren and tell them to open that grave there. Head into the hole. Jump across the little island and head into the area where there are tons of bad bats. Kill them all and open the chest that appeared for 50 rupees. Light the torches in here with 3 fire arrows and head through the door. There is a statue-like thing in the middle. Slash it and
AAAAAH!! This is the EVILEST OF ALL THE BAD GUYS!!! The iron knuckle has returned. 🙁 Basically, slash him like there’s no tomorrow while avoiding his axe and wearing the Bunny Hood. When he dies, the curtain will rise. There is a stone tablet here and the Composer Brother Flat will appear. 🙂 He will tell you about how all of this happened and he will disappear. Head up the steps and read the Stone tablet. You will learn the Song of Storms. Backtrack and exit the grave. Play the Song of Double Time to make it the 2nd night. Repeat the same process you did to open the grave and head in. Jump across and you will find some jars. Slash them if you want magic or rupees and put on the lens of truth. This is a fake wall. Head through and we have to work our way to the opposite side of the room. However, that is impossible! 🙁 Slap on the lens of truth and take the path that appeared. At the end of the room, turn left and bomb the wall ahead of you. 🙂 Head through the opening. Kill the iron knuckle the same way and open the big chest for a heart piece! 😀 Backtrack and exit this grave. Play the Song of Double Time until it’s the final night. You may think I’m crazy, but this is the way to get another bottle. 🙂 Talk to the stalchildren while wearing the Captain’s Hat and they will open the last grave for you. Enter it and jump down to meet up with Dampe`. He was looking for treasure, but his lantern went out. He can see you with Tatl. He moves very slowly, so don’t go too far. You have to find the 3 blue fire flames in the dirt. There are 6 diggable patches. 2 on the upper part and 4 on the lower part. There are elevators that you can lead Dampe` to to get up to the upper ones. The order of the blue fire is random, so it will be different from mine. Go dig up all 3 flames and a big poe will appear. Causing Dampe` to run away and hide. 🙁 You basically have to target them and shoot them with an arrow. Do this until it dies. Swipe it up in a bottle and open the chest to get bottle #4! 😀 This isn’t the last one. 🙂 Head up the ramp and head up the stairs to get to Dampe`’s house. Dampe` is hiding under the bed at the moment. It just bothers me why he has a huge grave thing in his basement. 😀 Warp to Clock Town and head to West Clock Town. Head into the Curiosity Shop and sell the guy your Big poe. He will pay you. Exit and turn all of your rupees into the bank and play the Song of Time.
The Tropical yet misty Great Bay
PACK YOUR BAGS LINK, CUZ WE’RE GOING TO THE BEACH!! Exit to the west and call Epona. We are going to the Great Bay. 🙂 Head over to the beach area in Termina Field and jump over the fences with Epona. There are some new enemies here called leevers. Ride to the water and swim over to where the seagulls are circling to your left. There appears to be a zora here. He wants you to push him to shore. Well, push him to shore by going up to him and holding A. He will walk a few steps, then collapse. Talk to him and he will tell you what happened. This is Mikau, the lead guitarist in the zora band. Their lead singer laid eggs and the pirates stole them. Mikau tried to bring them back, but the pirates tossed him out. Well, that’s convenient. 🙁 He says that he needs his soul healed. Play the Song of Healing and witness one of the most romantic scenes. You now have the Zora Mask! 😀 You can breathe underwater with this thing! After that, Link built a grave for Mikau and it involves a list of how to use the mask. Read it if you want to. 🙂 You press A to swim, B to punch or go underwater and stay there, hold B to do a boomerang-like thing, and press R while swimming to create an electrical barrier around you. 🙂 Put on the Zora Mask and swim to the island in the middle there. Slash the owl statue, so you can warp here, climb up the ladder and shoot down Tingle. He will sell you the map of Great Bay for 20 rupees. Buy it and live with it! 😀 Swim along the wall on the right side, with your Zora Mask on, and you will find 4 wooden doors. Swim into the one that is second from the left. Head inside the new secret entrance. Here we are, Gerudo Lagoon. There are some patrol boats marked by white dots on your mini map. Slap on the Stone Mask and hitch a ride on one of the boats. Just don’t touch the guards! 😀 Ride to the left side and climb to the far left side of your map. You’ll find a goron switch. Pound it with the goron mask and get into the water while wearing the zora mask. There are some Skullfish here that you can kill with your electric powers. 😀 Enter the passageway that you just opened. Swim forward and push or pull the block here. Turn left and break through the hole here. Rise up and swim over the wall here to get to a chest with a red rupee. There is a block here. If you pushed the first block, pull this block. If you pulled the first block, push this block. Step onto the pump here and walk forward. There are spike mines here, so be careful. Float back up and head through the door. Avoid the spike mines and open the chest at the end of the room for a red rupee. Head up the ramp and you will find a heart piece in a cage. We need to open the door first. Head up the stairs and head left to destroy the barrels by fire punching, rolling, and bombing it. Step on the switch, slap on the Bunny Hood and go get the heart piece! 😀 Step on the switch to leave this place and head up the stairs and destroy the barrels by the stairs and you will find a crystal switch on the other side. Get an arrow or your boomerang fins (Zora Mask required and hold B) and shoot it. This will cause the gate in the water to open. Jump in and swim through the gate, while avoiding the spike mines. In here, swim along the surface of the area, swimming against the right or left wall to avoid spike mines. Swim to the end of the room and climb up the ladder in the corner. Stand on the floor switch that you see and stand on the pump and boomerang the crystal switch. You will rise up. As soon as you see a platform, GET ON IT!! If not, then you will rise up to a bunch of spike mines on the ceiling. 🙁 Climb up the ladder, turn around and shoot the spike mines to reveal a crystal switch. Shoot the crystal switch and head through the door. We’re back in the Gerudo Lagoon on a higher level. 😕 DO NOT HEAD BACK DOWN!!! 🙁 Head around the corner, up the ramp, and through the doorway to enter the Pirate Fortress.
This place is full of pirates! 🙁 If you’re caught, they’ll throw you out of this place. There are 4 of Lulu’s eggs here. We need to get the eggs to avenge Mikau! 😀 First, we need to get an item that is so awesome that you’ll have to trust me! 😀 Well, slap on the stone mask so you don’t get caught by Gerudo guards. You can stun the guards too if you want to. 🙂 We need to get up the ladder in the middle. Basically, stun the guards and climb up the ladder. Stop right near the top so you don’t get caught, if you at least, touch them, they will find you. 🙁 Wait for her to turn around, then stun her. Shoot her and head to the other end of this platform. Head into the door behind the target. Run forward and you will find a giant bee. Well, that’s comforting. 🙂 Here’s why the pirates stole the eggs, because Skull Kid told them if you get all of them, they can enter the Great Bay Temple where they’ll find a lot of treasure! 🙁 Once the clip is over, shoot the beehive on the ceiling. You’ll witness a hilarious scene when the pirates run away from the bees. 😀 Go back outside and jump down to the lower platform on your right. Enter the door. This is where all of the Gerudos were. 🙂 Open that large chest in the middle and you’ll get. . . DA DA DA DAAAA!!!! THE HOOKSHOT AND BETTER THAN EVER!!! If you ever see one of those pillars with circles in them, that’s a hookshot target that you can latch onto. 😉 Before we leave this room, turn left and you’ll find a tank with a shell blade inside. Hmm. 🙂 Latch onto the wood above the tank and hop in with the Zora Mask. You can kill the shell blade if you want to, but there is an egg in here! 😀 Swipe it up with a bottle and make your life happy! 😀 Now, you can leave the room. 😉 Turn left and walk down the stairs. At the end, use the hookshot to latch onto that target above you to the far south. Open the chest here for a red rupee. Turn around and jump down. And open the chest to your right for a red rupee. Go left past the first target and hookshot the target on the far southwest corner. Enter the door that is closest to the target. There is a guard here in the middle of the barrels. Wear the stone mask and run past the guard and get to the door at the end of the room. GASP! The door shut behind you! 🙁 Walk forward a little bit and you will meet up with your first pirate. These ladies are tough. They fight like the Gerudo guards in OoT. If you have played the game, just slash the heck out of them. If you have not, then do the same thing. Once you kill her, head through the door at the other end of the room and here is another Zora egg. Go get it the same way we got the last one. 🙂 You hookshot the wooden overhang, put on the Zora Mask, dive in, and bottle up the egg. 🙂 We have 2 left to find. Now that we have 4 bottles, we can put the eggs in all of them. DO NOT LOSE THE EGGS!! 😀 Exit this room. In the middle of the northern wall, there is a low hookshot target. Hook onto it and you will be on the ledge to your left. Head through the door here. There is a pirate here. Stand far back and hookshot between the 2 barrels. Run by the Gerudo with the stone mask on and head through the door on the left side. There is another pirate in here. Kill her the same way you did last time and you will feel better. Head through the door and this tank is guarded by a Desbreko. A larger skullfish. Go get the Zora egg the same way you did before and exit this room. Head back outside and get back on the northern side. When you get to a doorway, turn and hook onto the other target here. Run to the opposite side of the bridge with the stone mask on and head through the door. There is a chest in here with a silver rupee in it. Just wear the stone mask and go get it. Enter the next door and kill the pirate. Head through the door and go get the last Zora egg here the same way we got the other ones. Head back outside and get a good pic. of a Gerudo Guard. This will come in handy later. 🙂 Soar to the Great Bay Coast and climb up the ladder to the Marine Research Lab. Get on top of the big empty tank and pull out the Zora eggs and drop them into the barred area. You will hold it out if you’re not doing it right. Put all of the eggs in and exit the lab. Head back to shore and head into the house on the right. You can talk to the fisherman and he needs a pic. of a Gerudo. (hint, hint). 🙂 Talk to the seahorse and the guy will give it to you if you give him a pic. of a Gerudo. Give him the pic. and the seahorse will journey with you in the bottle. Let’s head to Pinnacle Rock. 🙂
Swim to the northern end of Great Bay and dive down and stand in between the 2 pillars. Let the seahorse out and follow it to Pinnacle Rock. Over here are some sea snakes. Go electrocute them and that will kill them. In the caverns are 3 Zora eggs. Kill the snakes and go get them. If you kill all of them, you will save another seahorse. Go talk to the 2 seahorses and they will reward you with a heart piece. 🙂 Once you have all of the Zora eggs, get lost in the murky water purposely and exit between the 2 pillars. 😉 Head back to the Marine Research Lab and put the remaining Zora eggs in the tank. WARNING: DO NOT PUT THE ZORA EGGS INSIDE THE TANK WITH FISH! Once that happens, the eggs will hatch and will come into the form of a song. Stand in front of the doc. with the Zora Mask on and take out your guitar, you will learn New Wave Bossa Nova. We have some errands to run first, so put all of your rupees in the bank and play the Song of Time.
We need to create the Scarecrow’s Song. Head to the Trading Post in West Clock Town and talk to the scarecrow here. He loves music. Take out your ocarina and make up an eight note song that you can remember! 😀 Head out to Termina Field. Head over to the beach themed area and destroy the boulder here. Fall down the hole with the Zora Mask on and shoot the beehives here. One of them will drop a heart piece into the water. Go get the heart piece and exit the hole. Warp to Snowhead and head back a screen. Put on the Goron Mask and ramp jump over the gaps to get to the middle island. Kill the ice keese! Do you see that island in the distance? Put on the lens of truth and get to the last invisible platform. Tatl will turn blue. That means, play the Scarecrow’s Song. Hookshot onto the scarecrow and get the heart piece there. Soar to the Southern Swamp and take a pic. of the bigocto, and show it to the dude to get 20 rupees. Buy a magic bean from the Business Scrub here and head to the Magic Hags Shop and swipe up some fresh spring water. Warp to the Great Bay Coast and swim to the northern part of Great Bay and get onto land. If you look along the wall, you’ll see some small platforms. Hookshot the target on the lowest platform, plant a bean on the soft soil, and water it. Ride it to the next platform and Tatl will turn blue. Play the Scarecrow’s Song, hook onto the scarecrow and get the heart piece. Jump down and head to the fresh water pool. You will find a lot of fish! Bottle up as many as you can and soar to the Marine Research Lab. Jump on top of the tank with the 2 fish in it and drop in the fish that you bottled. You are basically feeding the fish. If it’s not big enough and you used all of your bottles, go get some more and keep feeding the fish until it is big enough that it eats the other fish in the tank. The fish will spit out a heart piece. Go get it. Swim to shore and enter the cave-like entrance here. Follow the land until you get to a waterfall. Dive underwater and kill the like-like. These things will try to eat your shield, so be careful. After you kill the like-like, you will be gifted with a heart piece. 🙂 Head up to the surface and look up. You will find some platforms with trees on them. Head to the lowest platform and hook onto the tree. Hook from tree to tree until you reach the top. Head into the cave near the waterfall and you will enter the Waterfall Rapids. Jump into the lake and talk to the beaver. He thinks that you must want a bottle. Well, yeah we do! You have to race him for it. Basically, you have to swim through 20 rings in 2:00 before the beaver does. 😉 If you skip one, you cheat and have to start over again. If you manage to get all of them, the beaver will sick his older brother on you. This time you have to get 25 rings in 2:00 before he does. Once you beat him, they will give you bottle #5! 😀 If you talk to them again, they’ll want a rematch. Same rules only it’s 1:50 instead of 2:00! If you beat him, they’ll give you a heart piece. 🙂 Now, let’s head back to the coast. 😉 This time, enter the other house to find the Oceanside Spider House. Now, to get the prize after you beat this, IT MUST BE THE FIRST DAY OR NIGHT OR YOU WON’T GET ANYTHING AFTER YOU BEAT IT!! If you absolutely have no time at all, put your rupees in the bank and play the Song of Time.
Now, enter the Oceanside Spider House. The Inverted Song of Time would be helpful in beating this place. 🙂 As you enter, blow up the wall with bombs or the blast mask. Skulltulas 1 and 2 are on the wall on the ramp, go kill them and get the tokens. The 3rd one is on the ceiling in the lower part of the room, burn the spider web with fire arrows, burn the cobwebs on the ceiling, hookshot onto the target behind it, kill it, get the token and head through the door. Roll into the first large jar, kill it and get the token. Burn the web, roll into the last large jar, kill it and get the token. The 6th one is on one of the rafters on the ceiling. Climb on the crates, kill it, and get the token with the hookshot. The 7th one is behind the mask on the wall above the stairs, wait for it to come up, kill it, and get the token with the hookshot. Head up the stairs. While standing on the stairs, look towards the opposite wall, the 8th one is along the top in the dark crevasse, kill it and get the token with the hookshot. Roll into the large jar next to a door, kill the 9th one and get the token. The 10th one is in a jar on some crates in the corner of the room. The 11th one is inside a hole in the wall. Burn the web and use the hookshot to kill it and get the token. The 12th one is behind a mask near the last door. Wait for it to come up, kill it and get the token. Burn the webs on the door near where you entered from and head inside. There are 2 stalchildren in here. Talk to them with the Captain’s Hat to get to a heart piece at the last room. One stalchild is on the desk at the left side of the room, and the other is on top of a bookshelf. Go talk to them with the Captain’s Hat and write down the information they tell you so we can use it later. On the far side of the left part, there is a bookcase, push it to the right and you will find 2 skulltulas in here. Kill them and get the tokens with the hookshot. On the right side, pull the 2 outer bookcases, push the 3rd one to either side to reveal a hole. Kill the skulltula and claim the token. On the right side of the room, climb up the bookcase with missing books. We are going to use this as a ladder. The 16th skulltula is on the right side corner of the room, behind a painting. Kill it and get the token. The 17th one is along the ceiling on the right side of the room. Go kill it and get the token. The 18th one is on top of a bookcase in the left corner of the room. Go kill it and get the token. The 19th one is behind a painting on the left side of the room, it’s in a small hole so use the hookshot to kill it and get the token. Head back to the previous room, head downstairs, head around the corner, and enter the door. There is a big skulltula here in the center of the room. Roll into the brown crate to the right of the door to find the 20th gold skulltula. Kill it and get the token. There are some canoes against the wall opposite the door, stand on the crates next to it, look behind it and you will find your 21st gold skulltula. Kill it and get the token. The 22nd one is behind a spider web on the ceiling. Kill it and get the token. Roll into the crate that is left of the door where the crates are starting to get higher. Enter the small hole and turn around. The 23rd one, is above the entrance. Kill it and get the token. Climb on top of the crates to the left of the door as far as they go, hookshot the target in the ceiling area on the right side of the room, and slash the jars. You will find your 24th gold skulltula. Kill it and get the token. Exit this room and enter the door near the stairs. In this room are 4 stalchildren around a table. Put on the Captain’s Hat and talk to them, and write down the info. they give you. You noticed that they said the order of the colored masks in here. Shoot the colored masks with your bow in the order you wrote down and head through the door to get your heart piece! 😀 Head back up the ramp and we’ll go get the last 6 gold skulltulas. Roll into the jar under the red mask to find the 25th gold skulltula. Kill it and get the token. The 26th gold skulltula is behind the painting closest to the red mask. Hookshot the painting, kill the gold skulltula and get the token. Stand on the table and the 27th gold skulltula is crawling along the dark parts of the ceiling along the walls. Kill it and get the token. Gold skulltulas 28-30 are hiding somewhere in here. Put on the Goron Mask and goron pound for them to come out. Kill them and get the tokens. Head back to the entrance. If it isn’t the 1st day or night, then he will not be here! There is a dude here. Talk to him and he was just looking for shelter from the moon. He will give you the Giant’s Wallet! 😀 Now we can carry 500 rupees!!! 😀
Head into the cave-like entrance at the Great Bay Coast. This is the Zora Cape. In the middle of the ocean is a fish-like rock. Go swim over to it and enter the underwater cave. This is where all of the Zoras are. This is the Zora Music Hall! 😀 Where the Zora Band performs. Put on the Zora Mask and head into Mikau and Tijo’s room. It is the first door on the far right. Apparently, Tijo wanted to check out Mikau’s bed and broke the ladder. Get back into your Hylian form and hookshot up there. You will find Mikau’s diary open. There will be 2 little tunes there. Here’s what they are: 1. A, v, >, A; 2. v, >, <, v. Write them down so you can remember them. Exit the room and enter the next one. This is where Japas is. Talk to him while wearing the Zora Mask and Japas will explain that Mikau (you) and him have been jamming together. Use the little bits you learned from the diary. Here’s what you to will create: 1. >, >, v, A, A, v, >, A; 2. <, <, >, v, v, >, <, v. Write this down, we need it! Japas says that the band leader Evan will be mad if they were making songs behind his back. Um, isn’t that their job? 😕 You can talk to Evan if you wish, but he will just tell you what to do with Lulu’s eggs. Take off the Zora Mask and play the song that you jammed with. You have to play them in your Hylian form for this to work. 🙂 Then Evan will extend it on his keyboard and will reward you with a heart piece. 🙂 Go through the hallway and head left, and head outside. There is an owl statue here. Slash it, so you can warp here if you want. 🙂 Lulu is here too. Soar to Clock Town, put your rupees in the bank, and play the Song of Time. Play the Inverted Song of Time, and soar to Zora Cape. Put on the Zora Mask and play New Wave Bossa Nova for Lulu. She will sing along with it and a ginormous turtle will come out! 😀 The turtle will tell you to get on its back so you can go to the Great Bay Temple. 😉 Hookshot onto the tree on the turtle’s back and you will witness a funny scene of the pirates trying to get into the Great Bay Temple. 😀 Now, welcome to your second-to-last temple.
Great Bay Temple
There are just a few things that you should have before you go. I know, I should’ve told you this sooner. At least 1 bottle of green potion, and the rest of the bottles should have fairies in them. Your first stray fairy is actually in here. They are purple this time. 😉 Just thought I’d let you know. Shoot all of the torches in here with a fire arrow and a chest will appear. Open it for your first stray fairy. Head through the door. Tatl will mention the big waterwheel. Put on the Zora Mask and swim to the other side of the room. There appears to be a yellow platform underwater in the far corner with a switch on it. Dive under with the Zora Mask on and push/pull the switch. This will cause the switch to disappear. 😕 There will be a water platform that we will use later. 😉 Head back to where you entered. Under the platform from where we entered from, is a stray fairy trapped in a bubble. Go get it! 😀 There are 2 platforms going up and down. Get on the one on the right (facing away from the door) and you will meet up with a big skulltula. Kill it to get your 3rd stray fairy. Jump down and take the left one this time. There are 2 big skulltulas on this platform. Kill them if you wish, but jump onto yellow pump when it lowers. Then jump on the higher platform across from you when it rises. Head around the corner and go through the small hallway. In here, we need to have the platform go in the opposite direction to get to the hallway we need to get to now. Let’s get a few things first. Jump on the platform and use it to get to the side platform with the barrels. Roll into the barrels and you will find your 4th stray fairy. Hop down to the lower platform next to the water. Look down and you will find a lone jar in the middle of the spinning water. Easiest way to do it, is to break the jar with an arrow and put on the Great Fairy Mask and you will get your 5th stray fairy. Put on the Zora Mask and get into the water. Follow the flowing water. We can only get to 2 places. Go to the upper yellow path (color of flowing pipes). 😉 There are some skullfish in here. You can easily kill them by swimming and pressing R. Get up to the surface, and climb onto the lowest ledge. Turn around and hookshot onto the chest and open it to get the dungeon map! 😀 Sink down to the bottom and you will find some dexihands. They won’t let you pass. Just swim through them while pressing R and you’ll feel better. Swim through the green path. After you round the corner, you will find some Bio Deku Babas. You basically, have to shoot them and kill them. Kill all of them and hop the lily pads to the far platform. Kill the last one to make a chest appear. Open it to get your 6th stray fairy. Head through the door. There is a chest on the other side of the room. Shoot the real bombchu to kill it and kill the bio deku babas under there. Put on the Zora Mask, jump the lily pad, and jump to the platform and open the chest to get the compass. Sink down to the bottom of the water and kill the bio deku babas that we sliced. Go open the chest for a small key. Float up to the surface and climb out of the water. There are some dexihands in the flowing water next to you. There is a jar in between them. Shoot the jar and put on the Great Fairy Mask and the 7th stray fairy will come to you. When you got it, jump into the flowing water and you’ll be taken back to the main room. Swim through the lower red path this time. Ignore the shell blades and the skullfish and the octoroks. Find the red pipe and climb on top of it out of the water. Shoot the real bombchu and follow the red pipe to the locked door, head through it. There are some green chuchus and some yellow chuchus. The yellow chuchus drop arrows after you kill them. Stock up on arrows and magic, and head through the door to confront your miniboss.
This is Wart. Look up at the ceiling to trigger this miniboss battle. Basically, you have to get all of the pink jelly things off of him. One of the easiest ways to get them all off, is to use deku nuts or fire arrows, then quick spin with the Deku Mask on and you will kill most of them. Then shoot the eye when it’s open. Repeat this process until it dies. Open the chest for ice arrows! 😀 We can freeze enemies in their tracks now! Head back to the room with the red pipes. That is just outside the chamber where we fought Wart and head to one of the 2 platforms in the southern corners of the room. There are some octoroks here. Shoot them with an ice arrow, jump on them and climb up to the central platform. Push or pull the red switch to let water flow into the pipes. Head back to the main room (the room with spinning water). Swim through the upper yellow path and float up to the surface. Climb the platform on your left and hookshot onto the chest. Face towards the smaller platform on the opposite side with the 2 jars. Either, use the Deku Mask to hop over to them and spin into them, or put on the Great Fairy Mask, shoot the jars and you’ll get your 8th stray fairy. Shoot the water while facing the southern platform, use the Deku Mask to hop to it and take it off and hop onto the platform we can now access. Head through the door. In here is a blue chuchu. Lure it over to the upper platform and shoot it with an ice arrow. Jump up on the platform and push or pull the red switch. You can kill the real bombchu if you wish. Exit this room. Head through the green path while following the red pipes that are now flowing. You remember this room? There is a hallway we couldn’t access, so get out your ice arrows to make a path to it. Hop from platform to platform with the Deku Mask on and jump into the alcove with the Zora Mask if you’re worried that you won’t make it. 😉 Melt the ice chunk with a fire arrow and enter the door.
Him again?! 🙁 Gekko is back with some new friends. These are mad jellies. If you’re not careful, you’ll get sucked into one! 🙁 Gekko will run around and throw mad jellies at you. You can dodge them or use your sword to fling them back at him. Then go slash him or shoot him. 😀 Then he will run inside a mad jelly and get on the ceiling. Wait until he’s fully on the ceiling, then shoot him with an ice arrow! Then go slash him. Repeat this process until he dies. Go through the new door and open the chest here to get the boss key. 🙂 Hookshot out of here and swim through the flowing water with the Zora Mask to get back to the main room. We are going to change the water flow. Head to the entrance to the room (the south door) and you will find another elevator platform in this room with the waterwheel. Hookshot above it and wait to be taken up to the red platform. Push or pull the red switch and jump back into the water. Get onto the yellow platform and push or pull the yellow switch to cause the water to stop flowing in the yellow pipes. The waterwheel will spin in the opposite direction. Go back to the main room. Get onto the rotating paddles and you will come across a waterfall that’s blocking a ladder. Go shoot it with an ice arrow. Climb up the ladder, and enter the green shaded door. Kill the enemies in here. Kill the blue tektite here and shoot an ice arrow or a couple near the yellow platform. Then kill the blue tektite here with arrows. Look up to find a grating and some holes in it. Shoot an ice arrow to the far north from the yellow platform. Hop to it with the Deku Mask and shoot another ice arrow near the northern wall. Hop to it, turn around and hookshot onto the target above you. Be sure to back up far enough. 😉 Open the chest in the middle to get your 9th stray fairy. 🙂 From either the yellow platform or the entrance, use an ice arrow to get to the green platform and jump to the green platform with the Zora Mask. Push or pull the switch here to make water flow into the green pipes. 😉 Head back to the main room. We can only take 2 paths now. Take the middle path. Sink down at the right time, or you’ll get hit by spike mines! 🙁 Head over to the northwest platform in the room. Wait for the platform to sink down into the water, then hop on it. When it gets up, jump across the turning gear, and onto the platform that’s going back and forth. Turn right and you’ll find a little alcove. Hookshot onto the torch and open the chest to get your 10th stray fairy. 🙂 Get back into the water and head up the same way, jumping on the platform, jumping across the next one, and climbing up the ledge. Turn around and we have a little puzzle. You’ll see water flowing on the waterwheel to make it spin. Shoot it with an ice arrow and we can climb on the waterwheel. Walk partially across the paddles, turn right, when you get to the blades, climb the one on the right, climb to the end, and you’ll find a small hole in the wall with a chest. Hookshot to it and open it for your 11th stray fairy. 🙂 Hop down to the platform directly below you to get to the door. Enter the door. When you get to the first see-saw thing you come to, hop into the water on the raised side and sink down with the Zora Mask. Swim into the barrels and you will find your 12th stray fairy. Float back up and stand on the lower part of the middle see-saw in the room. Shoot a fire arrow at the frozen water on the opposite side and you will rise up. Jump onto the next one and repeat the same process. Jump over to the green platform and push or pull the switch here. Walk along the green pipes, put on the Zora Mask, climb up at the end, turn right, hop into the small area where you can’t go further, and hookshot onto the chest. Open it to find your 13th stray fairy! 😀 Drop down and kill the chuchus here. Get on the first see-saw you saw and shoot a fire arrow on the ice at the opposite side of this see-saw. You will rise to a door. Head through the door. Put on the Zora Mask and head back to the main room. Jump back into the water and take the bottom path with the green pipes. Swim over to the right side of the room where you’ll find an exit back to the central room. Use your fins to break the bubble and swim to your 14th stray fairy. Head back through the bottom path and float up to the surface. You will find another stray fairy. Get onto the green pipe, turn right and shoot it with an arrow, while wearing the Great Fairy Mask. You have all 15 stray fairies! 😀 Follow the green pipe to the end and push or pull the last green switch. Wait for the elevator to be low enough and hop on it. Hop to the next platform to face the boss. Behold: the Gargantuan Masked Fish Gyorg!
You will constantly have to move back and forth on this platform. 🙁 Gyorg will jump over the platform or bump into it. What you have to do is shoot it, sink down with the Zora Mask, and punch/electrocute him! 😀 Eventually, he will make some little fish attack you. Kill them and kill Gyorg the same way. After you kill him, get the heart container and head into the blue light and get Gyorg’s Remains. Then you will appear at another scene with the giants, they say: “Help our friend.” Okay, we have one more temple to go! 😀
The Haunted Canyon of Ikana
We have some errands to do before we go to Ikana. 🙁 I know, your getting sick of all these errands, but you’ll survive. 😀 What you can do is put on the Zora Mask and talk to Lulu to do the rehearsal. 😉 Head back to the Zora Cape and on the south side of it, head along the cliffs. Jump along the stone platforms near the beach, hookshot across the islands using the trees, and use a powder keg on the boulder. Head into the cave. Turn in all of your stray fairies and the Great Fairy of Courage will give you a defense upgrade! 😀 Head to the center of the Great Bay Coast and you will find a patch of land with a boat. Read the sign and get onto the boat. It will take you to some islands. Hookshot onto one of the trees and talk to the fisherman. Jump to the center island to begin the jumping game. There are 5 torches. Jump to the one with the lit torch and keep it up until the time is up. The fisherman will give you a heart piece! 😀 Now, we are going to create a little frog choir. You have to talk to them with the Don Gero Mask. The first one is in the Mountain Village after you defeated Goht. The second one is in the Laundry Pool at Clock Town. The third one is on a log on the eastern portion of the Southern Swamp as your heading to the Deku Palace. The fourth one is found after you have killed Gekko in the Woodfall Temple. The last one is found after you have killed Gekko in the Great Bay Temple. Head back to the Mountain Village and wear the Don Gero Mask to conduct them and they will give you a heart piece. 🙂 After Goht’s defeat, head into the area between Goron Village and Mountain Village, and sink down into the water with the Zora Mask. There is a chest by the ramp to get out of the water. Open it to get a heart piece. 😀 Put all of your rupees in the bank and play the Song of Time.
First, get at least 60 rupees before we go. We also need one more mask before we go. Soar to the Milk Road and take the path to the left. This is the Gorman Racetrack. Bring your horse here and talk to either of the Gorman Bros. to start racing. Fork over 10 rupees and start racing. DO NOT USE ALL OF YOUR CARROTS AT ONCE!! I’ve learned a valuable lesson from doing that. 😉 Avoid the trees and such, but jump over the fences and the mud piles. 🙂 Be sure to pick up speed first. Then you will win for sure! The Gorman Bros. will give you the Garo Mask. This will summon Garos and you can beat them up to learn some clues. 😉 Head into Termina Field, then head through the east entrance to get to Ikana. Don’t take the left entrance to the graveyard, walk up to the one-eyed man and he’ll tell you where to find the Garo Mask. Put on the Garo Mask and talk to him. Hookshot onto the tree that mysteriously appeared and run along the path while avoiding Nejirons and you will make it to Ikana. If it’s the first day, you will find Sakon the creeper. . er. .. thief. And he will ask if he can look at your sword (not really, he wants to steal it). Tatl won’t let you anyways. 😉 Head over to the water and you will find a couple of octoroks. Shoot ice arrows at them and jump across them to the other platform. Hookshot your way up the cliff, using the trees on the ledges and smack the owl statue here. Follow the left wall, going up a ramp, and finding a ledge with a single tree. Look up and shoot down Tingle. Buy the map of Stone Tower for 20 rupees. Head in the opposite direction to the far north where there is a little hut to the left. Head inside and you will find the one-eyed creeper again. Give him 30 rupees and you will face some familiar faces if you played OoT. Kill the 4 poe sisters in 3 minutes and you will get your heart piece. If you don’t have the faintest idea of how to kill them, target them and block their spin attacks with your shield. When they become visible, shoot them or slash them. 😉 After this, you can run around with the Garo Mask and hunt Garos. Now, we have some errands to run. 🙂
First we need to get the Moon’s Tear from the Astral Observatory. Go get it and give it to the Business Scrub in South Clock Town. You will get the Land Title Deed. You already have this heart piece, so let’s soar to the Southern Swamp. Give the Land Title Deed to the Business Scrub near the Swamp Tourist Center and you will get the Swamp Title Deed. Go on the flower and fly on the roof of the Tourist Center and get the heart piece. 🙂 Warp to the Mountain Village and head to Goron Village. Go to the Business Scrub here and give him the Swamp Title Deed in your Deku Form. Use the Deku Flower and fly into the alcove with the heart piece. Go grab the heart piece and soar to the Zora Cape. Head into the Zora Music Hall and go to the door where a Zora is trying to pick a lock. Talk to the Zora as Mikau and he will run away. Head into the door and this is Lulu’s room. Why did a business scrub decide to set up camp in a girl’s room? 😕 Well, give the Mountain Title Deed to the Business Scrub in your Goron form and you will get the Ocean Title Deed. Use the Deku Flower here and fly up to the heart piece. Go grab the heart piece and soar to Ikana. Jump into the river and climb onto the wooden dock. Run to the far east side of the map on the cliff side. You will find your Business Scrub. As a Zora, give him the Ocean Title Deed and he will give you 200 rupees. Use the Deku Flower and fly over to the heart piece, grab it and soar back to Clock Town. Get to the Astral Observatory and get to the telescope. Look at the leftmost wall in Clock Town and you will find the Business Scrub from before. Look down a bit to the right to find a tree. A little lower and to the left, you will find a hole. This is where the Business Scrub’s hideout is. Watch him go in there and stop using the telescope. If you have a magic bean and spring water (or Song of Storms), head outside and plant the seed here and fly over the fence. Otherwise, head to Clock Town and head to the hole that you saw in Termina Field. The scrub will be mad that you found it. He will sell you a heart piece for 150 rupees, reject him and he will sell it for 100 rupees. BUY IT!! If you don’t buy it, he’ll look for another hideout. 😉 Now, we’re going to buy the All Night Mask. First, we need to save the old lady from Sakon in North Clock Town at 12:00 on the First Night. After that, play the Song of Double Time to get to the Final Night. You need 500 rupees to buy it. At 10:00 on the Final Night, head to the Curiosity Shop and buy the All Night Mask for 500 rupees. If you have some more rupees, put them in the bank and play the Song of Time.
Head to the Stock Pot Inn and enter the only door downstairs. The Inn opens at 8 and if you don’t want to wait, use the Deku Flower to get up on the balcony and in the door. Head into the only door downstairs and go talk to Anju’s Grandmother, while wearing the All Night Mask. She will tell you stories. These put people to sleep so we need this mask. Listen to the first story and answer all of the top answers. You will get a heart piece! 😀 Listen to the second story and choose “I dunno.” You will get a heart piece! 😀 Head to the Latte Milk Bar at 10:00 pm on the 1st or 2nd night. BTW: You need the Romani Mask to get in. 😉 Go talk to Toto the Zora, he is the manager of the Zora Band the Indigo-go’s. He’s worried about the moon falling and he would like to do a sound check. Talk to him in each of your 4 forms and play the notes he tells you to play. If you haven’t noticed, Gorman is here and he’s listening to you. He will call your song trash until you have talked to Toto with all of the forms and they will magically play together. Then Gorman will be happy and give you the Circus Leader’s Mask. This is useless, but we need it to get the final mask of the game. 🙂 Turn all of your rupees in and play the Song of Time.
Head to Ikana. As you run around, Tatl will point out the Garos lurking about. One of the Garos say that you can bring the river back by going in the cave to the north. Let’s go up there and see for ourselves. Go in the cave and you’ll find Sharp, the other composer brother. He will play awful music that you just can’t stand to hear!! Literally! 🙁 Play the Song of Storms and he will shut up! 😀 Sharp will tell you to head to Ikana Castle. Okay, let’s do that. Leave the cave and you will find a little girl going to check out the water. When she sees you, she’ll run into the house and lock the door. Wait patiently or get the bombs or the blast mask out and she’ll come out early. Run inside the music box house. Go down the stairs and around the corner. Then a half-mummified person comes out! 🙁 DO NOT TRY TO KILL HIM! The little girl will come back and kick you out. Tatl will give you a clue if you target him. Play the Song of Healing and he will turn into a normal human. 😀 The little girl will come back. Her name is Pamela and the guy you healed is her father. 🙂 Link will grab the mask on the floor. This is the Gibdo Mask. When you wear it, you can talk to Gibdos and do something hilarious to the redeads! 😀 We are going to fall down a well. Again if you have played OoT. 🙂 Here’s what you need before you go: 5 magic beans, 10 deku nuts, 10 bombs, fish, and milk. Or a blue potion if you want to explore the rest of it. 🙂 When you have all of that, go back to Ikana and head up the left ramps and you will get to the top. You will find a circle with a ladder going down it. This is the well. Fall down it and let’s go.
Put on the Gibdo Mask and give the Gibdo to your right, 5 magic beans. Go through the door here. Give the Gibdo to your right 10 deku nuts, head through the door. Head around the corner and give the Gibdo here 10 bombs. Head through the door. Make your way to the center and you’ll find a big poe. Kill it, bottle it, and move on. Go back south, then west and talk to the Gibdo here. Give him a fish and head through the door. Go to the Gibdo straight ahead and give the Gibdo here the big poe. Head through the door. Make your way to the far side of the room and give the Gibdo here some milk, head through the door. In here, light all the torches with fire arrows and a chest will appear. Go open it to get the Mirror Shield! 😀 Reflect light onto the sun face and the sun block. If you climb up the ladder, you will get to Ikana Castle. We need something first, then we’ll get here. We need a powder keg before we go! 😀 Go get one and head back to Ikana. Don’t worry, we don’t have to go through the well again, I know a shortcut! 😀 From the owl statue, run towards the castle gate. It’s red and white with pillars around it. 🙂 On the left side of it is a hole in the wall. 😉 Turn left and hit the crystal switch. Reflect light onto the sun block near the entrance to make it vanish. Now go enter the castle. 😉
As you enter, you will find some redeads. They look like this when you put on the Captain’s Hat, the Garo Mask, or the Gibdo Mask.
They do start dancing when you put on those masks. 🙂 You can easily kill them when you put those masks on. 🙂 There are a couple of frozen eye switches in here. Shoot the one on the left to open the left door. Go through it. You are on a checkerboard floor and there is a blazing hot platform on the top that will fall. If you get on it or get squished by it, then you have to start over again. You can hit the switches to have the platform rise for a few moments. There are some deku flowers under it too. You can push them up with the deku flowers as you fly. Fly on top of one of the pillars and hit the switch to open the door. Get to the other end and head through the door. You have to be careful in this room. There are bottomless pits everywhere. Turn to the left to find a switch, fly over to it and step on it. You can choose right or left. Choose left and use the lens of truth to jump across the ice platforms to the door. Head through the door. There are a couple blue bubbles in here. Don’t touch them or they will jinx you! 🙁 That means no sword until it wears off. If you wear the stone mask they will ignore you. If they touch you, play the Song of Storms to blow it away. Head up the stairs and out the door. We’re outside now. Be careful not to fall! 🙂 Kill all of the guays and climb on top of the outer wall and walk along it to go left. Jump down to the lower platform which is above the entrance in the middle and it has a Deku Flower on it. Use the Deku Flower to fly to the floor switch. Take off the Deku Mask to press down the floor switch. Jump across to the other pillar and fly back to the central area. Use the flower here to get back on top of the wall and go back left. Shoot the nearby crystal switch with an arrow and get on the Deku Flowers that were on fire and fly to the heart piece. Get it, jump down, and reenter the castle. Kill the redeads and shoot the eye switch on the right and head through the door on the right. There’s a floormaster here. Stand in the light and reflect light onto it and onto the little ones that pop out. 😉 Shine light onto the sun block and kill the redeads here. Head through the door. Here’s your miniboss.
AGAIN?! I’m sick of him already!! The wizrobe is back again. >:( Kill him the same way you have been doing twice and head through the door. Run through the door and quickly put on a scary mask. Head up the stairs and through the door. We’re back on the roof. DO NOT FALL DOWN THAT HOLE OVER THERE!! Go around it and around the corner and you will find a crack in the roof. Blow it up with a powder keg and head down the hole you bombed. 🙂 You’re back here again. 😉 Shine light onto the redeads while wearing a scary mask and shine the light onto the sun block. Head through the door here and head through the other door to face your boss.
First he’ll send his lackeys after you. I really don’t have the name of these guys. Just try to get into the light and slash them like there’s no tomorrow. If you wear the Captain’s Hat before you go in, the king will actually think that you’re Skull Keeta. Then he figures out it’s just a mask. So, burn the 2 curtains that you see to let the sunlight in. What you have to do is stun them, then quickly reflect light onto their bodies. Repeat this process a few times with both of them and then you’ll have to face the king. Igos du Ikana.
What you have to do is kill him the same way you killed his lackeys. Be sure to stand in the light if he tries to do something to kill you easier! 🙁 Then the lackeys will come up and start arguing that they’re dead (Twinorva from OoT). Then the king will come up and break it up. He will tell you that you have to go to the Stone Tower Temple where all of the evil is. He will teach you the Elegy of Emptiness. This will turn your current form into a statue. You can still control your current form there will just be a statue of you that comes out of the blue. 🙂 Now we can scale Stone Tower. 😉
Exit the castle and soar to Ikana Canyon. The entrance to Stone Tower is at the top right corner of your mini map. Follow the ramps to the northern side of it and turn right to find the entrance. Jump across the floating blocks to get to the other side. Ignore the first switch and hookshot up to the nearby ledge. Kill the beamos by throwing a bomb or using the blast mask at it. Stand on the switch in your Goron, Zora, or Hylian form and play the Elegy of Emptiness. Hookshot to the ledge above, stand on the switch and create another statue there. Jump down to the first switch we saw and make a statue on the switch. Climb back up and jump across the blocks. When you get there, step on all three of the switches to keep the blocks in place. Ignore the switch here and hookshot up the ledge and put a statue here. Jump back down to the first ledge (that’s after you crossed the blocks!) and put a statue on that switch. Hookshot to the very top and put a statue on that switch. Jump across the blocks and step on the three switches to lock the blocks into place. Hookshot up to the ledge on your right, turn right, and stand between the target and the edge. Hookshot up to the next target and look for the final target you can hook onto. Hook onto that target and you will find the owl statue for Stone Tower. SMACK THE DARN THING! If you should ever come back here, you will have to climb up all over again. Before we go into the Stone Tower Temple, you’ll need lots of arrows, bombs, and magic. I recommend going to the Milk Bar and purchasing Chateau Romani for 200 rupees. This gives you unlimited magic when you drink it and it wears off when you play the Song of Time. 😀 Fill your bottles with fairies! They are by any owl statue (except Clock Town) and when you are ready, soar back to Stone Tower. Place the statues on the switches in the following order: right, left, middle. Then cross the blocks to enter your final dungeon! 🙂
Stone Tower Temple
This place is really complicated. You get to flip it upside down and such. That’s why it’s so flipping complicated. Shoot the eye switch ahead of you, kill the bombchu, and jump over to the platform and open the chest for your 1st stray fairy. Enter the left door. Run through while killing the real bombchus and there are 4 switches here. We can only press down 3 with the Elegy of Emptiness. There is a cracked wall straight across where you can bomb it and use the blast mask on it. There are some big crates here. Roll over them and lift up one of the smaller crates and put it on one of the switches. Use the Elegy of Emptiness on the switches (the big switch has to have the Goron statue on it). In the second half of the room there are some dark patches here. Blow up the one without grass on it and fall down the hole it created. This is a creepy basement! 🙁 This dungeon reminds me of the Shadow Temple and the Spirit Temple in OoT. Stand in the light and reflect light onto the sun block in front of you. Turn right and you should see a target. Hookshot on it and open up the chest for your 2nd stray fairy. 😉 Jump back down and in the lava are 4 armos statues that live. Put on the Goron Mask and fire punch them to kill them. Open the chest for a small key. You can also open the chest on the other side for the dungeon map. 😉 Head back up the stairs and use the key on the locked door. This place is full of water! 😀 Put on the Zora Mask and jump in. Avoid the spike mines and at the other end of the room is a dexihand. Let it throw you up on the platform and you’ll see a crystal switch behind bars. Take off the Zora Mask and hit it with bombs or a spin attack. Either one will do. 😉 This will help us get a stray fairy later. 😉 Turn to the right and open the chest on this ledge to find a small key. Head into the water and swim through the opening next to the dexihand. Sink down into the water and kill all of the enemies. Head behind the spike mines or simply destroy them with your fin boomerangs and step on the switch here. This will create an upside down chest. This will help us get a stray fairy later on. 😉 Float up to the surface and climb up the ledge. Or you can dolphin jump if you want to be cool. 😉 Stand in the light and reflect it on the mirror. Charge it up for a bit and run over to the light there and reflect it onto the nearby sun block. This is a shortcut to the entrance and it’s an alcove with a chest in it. Kill the real bombchu and open the chest for the compass. Enter the locked door to the north. There are some black boes in here. They are annoying! 🙁 Just put on the Stone Mask and they will ignore you. Put on the Goron Mask and punch the pillars that are by the door. There should be some light coming down from the ceiling. Stand in the light and turn right and reflect light onto the leftmost sun face. A chest will appear. Go open it for your 3rd stray fairy. Stand in the light and face towards the center. Reflect light onto the mirror on the right, charge it up, and go reflect that light onto the nearby sun block. Get past the nejiron or wear the Stone Mask to get past it and open the chest for your 4th stray fairy. Now, charge up the mirrors on the left side of the room while wearing the Stone Mask because the black boes will attack you. Reflect light onto the mirrors and then reflect the light onto the sun block. Head through the door. This place is filled with lava and it is very hard! 🙁 There’s a large switch close to the entrance. Pound it down with the Goron Pound and roll to the switch that had fire around it. DO NOT LET GO OF THE ANALOG STICK! You will run into walls and don’t roll too slow or the fire will come back. This is hard and might take a few tries. Step on the switch and return to the first side of the room. Climb up the ladder and use the Deku Mask and the Deku Flower to fly over the lava. After the fan blows you, go to the left and get some rupees. Open the chest here for your 5th stray fairy. Drop back into the lava with the Goron Mask on and climb up the ladder and fly with the Deku Mask and the Deku Flower. Make it to the end of the room by flying and use the air pumps to restore your flying. Get to the end of the room and open the chest for your 6th stray fairy. Head through the door to face your miniboss.
This is the Garo Master. He can’t be fought like any other Garo you have faced. Wear the Bunny Hood so you can run away quicker. When he charges at you, move to the side and slash him. Repeat this process until you beat him up enough. He will give you useful info. like the other Garos we’ve faced. Open the chest for the light arrows! 😀 😀 😀 This will shoot light at certain things and can kill enemies with ease. 😉 Head through the next door. This is confusing. If you fall, hookshot to the target on the ceiling to get back up. Climb up the metal and get on the skinny platform. There is a masked hiploop. They’re like the other hiploops, but they have armor. Just hookshot it off and kill the thing. Head through the next door. There is an eyegore here. Run up to it to make it come alive. Just DO NOT FALL DOWN! After it attacks, shoot the eye. Repeat this process until it dies. Open the chest here for your 7th stray fairy. Enter the next door to get back to the entrance. Open the chest ahead if you haven’t yet and exit the temple. Step on the rightmost switch here and put a statue here with the Elegy of Emptiness. This will reveal the red emblem the Garo Master told us about. Stand on one of the side blocks and shoot the emblem with a light arrow. AHH! You have flipped all of Stone Tower upside down along with the temple! 🙂 That’s what happens when you shoot the red emblem with a light arrow. Reenter the Stone Tower Temple. Go stand on the Majora’s Mask symbol on the floor and turn around. You will find a sun face. Shoot it with a light arrow and a chest will appear in the middle. Open it for your 8th stray fairy. Head through the only available door. Shoot the sun block with a light arrow to make it disappear. Around the corner are some air pumps shooting upwards. Jump down to the lower platform and turn around. There is a frozen eye switch under where you were standing before. Shoot it with a fire arrow and it will make a chest appear in a nearby alcove. Put on the Deku Mask and fly to the center gust of wind and fly to the alcove and open the chest for your 9th stray fairy. Fly up to the platform in the middle that has the masked hiploop. Crawl into the opening at one and step on the switch to make a chest appear at the end of the bridge. Go over there and open it for a small key. 🙂 Get to the east side of the room on a platform that has a Deku Flower and a floor switch on it. Put a statue on the switch with the Elegy of Emptiness and use the tallest air pump to get to the upper north platform (watch out for the spike mines) and open the chest for your 10th stray fairy. Jump down to the central bridge and look around at the same platform that is north and you will find an upside down sun face. Shoot it with a light arrow and it will make an upside down chest appear that will help us get a stray fairy later. Take the west air pump to the highest platform and head through the door. Shoot the red emblem with a light arrow to flip it around. Put on the Goron Mask and run through the lava to the middle platform and shoot the red emblem again with a light arrow. Head through the door. What you are trying to do is get the Majora’s Mask block to get in place so we can get to the door. Push the block as far as it goes, shoot the emblem with the light arrow, and keep going. You have to keep doing this until it snaps into place. Then climb up and head through the door.
AGAIN?! THEY USE THIS FLIPPING MINIBOSS TOO MANY TIMES!!! Yep, he’s back again, but this is the last time you get to fight him unless you want to go to the Secret Shrine with me and beat him up again. Just kill him the same way you always have. Watch for the red dot on your mini map and shoot him. Once you kill him, hookshot onto the chest and open it for your 11th stray fairy. Go down the stairs nearby. There are some poes in here. Just shoot them when they’re visible and life is good. Use the Deku Flower to get to the other side and use the other flower to get to the higher alcove to your right. There is a death armos in here. Use the light arrows to flip them over and then slash them. They will ignore you if you wear the Stone Mask. Go to the far end of the area and press down the floor switch to make the flames go away. Play the Elegy of Emptiness on it and open the chest for a small key. Head to the start of this section and jump down to the lower platform. Head through the door. Don’t go through the door on your right, instead shoot an arrow at the spike mines. Fly with the flower to the middle platform and watch out for the killer jars. Then use that flower to fly to the next door. Head through the door. This place is filled with blue bubbles. Wear the Stone Mask or shoot them with a light arrow and pick up the 50 rupees they leave behind. Then head through the door to face your miniboss.
This is Gomess. He has bats all over him. Stay back because his attacks take a good chunk of your hearts out. Target him with L or Z depending on the 64 or the wii or gamecube and shoot him with a light arrow. This will bring the bats out. Slash Gomess when he’s vulnerable and repeat this process until he dies. Head through the nearby door and open the chest for the boss key. Return to the previous room with the blue bubble corridor. Head back to the room where the sky is the ground. Shoot the spike mines and fly to the middle platform. Fly back to the other side of the room and head through the south door (mini map perspective). There is a death armos here. Kill it if you wish or wear the Stone Mask and step on the floor switch to make an upside down chest appear on the ceiling. Hookshot onto the chest and head through the locked door. Kill this eyegore by stunning it with light arrows and shooting it with regular arrows. Open the chest to find not a stray fairy but. . . THE GIANT’S MASK!!! This will make you grow gigantic and it uses magic and we can only use it in the upcoming boss fight. Head through the next door. Run forward and slash the crystal switch to make an upside down chest appear. Hookshot onto it and hook onto the target to get to the upper platform. You can head through the boss door now if you want to. But we have some more stray fairies to get. Play the Song of Soaring to get to the entrance, exit the temple, and play the Song of Soaring and warp to Stone Tower. This will flip the temple for us and that saves us all the trouble of doing it. Reenter the temple and jump down to the lower platform and open the chest for your 12th stray fairy. Climb up the ladder and enter the west door. Kill the bombchus and do the switch puzzle again using the Elegy of Emptiness and the small crates. Head through the gate and the door on the right to get to the room filled with water. If you didn’t hit the crystal switch like I told you, then hit it now with a spin attack or a bomb or the blast mask. This will make a chest appear at the other side of the room. Get in the water while wearing the Zora Mask, swim over to the far western edge and climb up it with the Zora Mask on. Light arrow the sun block and kill the beamos. Open the chest for your 13th stray fairy. Get in the water and swim through the opening under the Dexihand. Swim forward and go down to find a chest. Open it for your 14th stray fairy. Make your way back to the metal room with the masked hiploop. Drop down to the lower portion and open the chest for your last stray fairy. 😉 Soar to the entrance and exit the temple. Step on the rightmost switch and shoot the red emblem with a light arrow again and enter the temple. Hookshot to the open chest on the ceiling and head through the door. Make your way to the boss door room. Hookshot onto the open chest on the ceiling and then the target and head through the boss door. There is a pit of sand. Fall down and here’s your boss: Twinmold.
That’s what they are basically. Put on the Giant’s Mask and slash their heads or tails. If you run low on magic, then destroy the pillars to get some. Just do that and then shrink back down, get the heart container, and go into the blue light to get Twinmold’s Remains and you will see a scene with the next giant. Now, let’s go show Skull Kid who’s boss.
The Moon
First, we have to do a little sidequest and get the remaining heart pieces. Okay, Ikana really hasn’t changed much but okay. Between the entrance to Stone Tower and Ikana Castle, there is a house. Go inside to find that it’s a fairy’s fountain. Go turn in the stray fairies and the Great Fairy of Kindness will come out and give you the Great Fairy Sword! This is more powerful than your sword, but it’s a C item. 🙁 Put your rupees in the bank and play the Song of Time. The requirements of the sidequest are: 1 or more hours of spare time, Epona’s Song, the hookshot, the Garo Mask, the Romani Mask, and you MUST NOT SAVE THE OLD LADY ON THE FIRST NIGHT OR GIVE PAPER TO ???! On Day 1 from 10am-12pm go to the Mayor’s Residence in East Clock Town and enter the door on the right. Talk to the lady in the yellow dress. This is Madame Aroma. She wants you to look for her son Kafei. She will give you the Mask of Kafei. There is an optional even at 11-11:30am on day 1 where you can listen to the conversation between Gorman, Madame Aroma, and Toto. You can go through the door and enter the back room behind the curtains and read Kafei’s diary and he will talk about his betrothed (Anju) and the masks they are making. There is another optional event on Day 1 at 12-12:15pm at the Stock Pot Inn in East Clock Town, go to Anju’s grandmother’s room and witness a conversation between them and her grandmother doesn’t want to eat Anju’s terrible cooking. The event necessary is that you need to talk to Anju at the Stock Pot Inn on the First Day at 1:50-3:50pm. She will ask you if you have a reservation. Say yes and she will give you a room key for you and you can enter the Inn whenever you please. There was another person with your name and you will steal their reservation. 😉 Another optional event is on Day 1 at 2:10pm and the mailman will come and give Anju a letter. Listen in to the conversation. On Day 1 at 4:10pm the goron with your name will come and claim his reservation, but since you stole it, listen in to see what happens. The necessary event is to talk to Anju with the Mask of Kafei on Day 1 at 2:10-8pm. She will tell you to meet her in the kitchen at night. You can go collect rupees and unload them if you want to and you can check out your new room on the top floor and open the chest for 100 rupees. Wait until the other necessary event on Night 1 at 12-6am. Go in the kitchen at the Stock Pot Inn and talk to Anju. She will tell you that she got a letter from Kafei and she will ask you to deliver a letter to Kafei. Don’t save the old lady or give paper to ???. Either on Night 1 or Day 2 well, any time before 9am, go put the letter inside any mailbox. You can run around if you wish, but go to the Laundry Pool and wait until 3:10-3:50pm on Day 2. The mailman will come by and deliver the letter to Kafei. Quickly go inside the now unlocked door and wait inside for Kafei. At 4:10-6pm on Day 2, Kafei will come into the hideout. Talk to him and he will take off his Keaton Mask and reveal himself as Kafei. He was turned into a child by Skull Kid. He’ll give you the Pendant of Memories and you need to give this to Anju. He is right by the Curiosity Shop because his Sun Mask was stolen by Sakon. 🙁 Exit Kafei’s hideout and on Day 2 or Day 3 at 10am-7pm, go to the Inn and give the Pendant of Memories to Anju. She won’t run away on the final night now! 😀 An optional event on Night 2 at 9:30-11pm, go to your room and listen through the little space by the door and Anju will be arguing with her mother and grandmother about staying for Kafei. Another optional event is going to the Curiosity Shop at 12:30-1am on Night 2 listen in to the conversation of the owner and Sakon of how much Sakon will get for giving him the bomb bag. On Day 3 at 1-6pm, go to Kafei’s hideout and you’ll find the Curiosity Shop owner. Talk to him and he will tell you where Kafei might have gone and he will give you the Keaton Mask and the Special Delivery to Mama. The next event, you have to get there early or it won’t work. Soar to Ikana Canyon and head to the lower area through the cave part where the business scrub is and get to the end to find Sakon’s hideout. Go talk to Kafei behind the rock and play the Song of Double Time to make it the final night at 6pm. Stay behind the rock and wait for Sakon to open the door. Go through the door with Kafei and you will find the Sun Mask. Kafei will walk forward and accidentally step on a switch. The Inverted Song of Time is recommended for this part! Step on the switch and Kafei will head through the door. You will actually get to be Kafei. Push the block on the blue switch. The yellow switches make it slow down and the red switches make it go faster! 🙁 You’re Link now and head through the other door and kill the Deku Baba. Go through the door as Kafei and avoid the red switch and touch the yellow one, and step on the blue one in the corner. Now as Link head through the door and kill the 2 Deku Babas. As Kafei, try to push the block on to the yellow switch and push the block onto the blue one. As Link, kill the wolfos, as Kafei run through the door and step on the switch and Link needs to run forward and step on the switch as well. Then Kafei will get the Sun Mask back. Soar to Clock Town and head to the Latte Milk Bar. You have 2 options for this one. Option A: Night 3 after 6pm, go to the milk bar and deliver the letter to Madame Aroma while wearing the Mask of Kafei and she will give you bottle 6 with Chateau Romani inside. Option B: Night 3 after 6pm, instead of helping Kafei, go to the post office and give the letter to the mailman, stalk him to the milk bar and he will give the letter to Madame Aroma. Exit the bar with him and talk to him and he will give you the Postman’s Hat. Do either one, if you did option A, go to the Inn and go into the Employee’s Only door. This is Anju’s room and a chest is in here that has 100 rupees inside. At 1:30 on the Final Night, Kafei will come in and the wedding ceremony will begin. They will give you the Couple’s Mask. They will wait to die together after they give it to you. 🙁 So sad, quickly put your rupees in the bank and play the Song of Time. Do option B if you did option A and we have some more heart pieces to get. 😉
Now, we need to answer the Keaton’s Questions. A Keaton is there if you slash the grass and it moves. They’re in North Clock Town, Milk Road, and the Mountain Village if it’s Spring. Answer they’re questions and they will give you a heart piece. Soar back to Clock Town (or not if you’re already there) and wear the postman’s hat and talk to any mailbox to get a heart piece. Go to the Mayor’s Residence and head through the left door. Talk to anyone with the Couple’s Mask on and the Mayor will give you a heart piece. Now, put at least 5,000 rupees in the bank and the banker will give you a heart piece. Soar to Ikana Canyon, put on the Zora Mask and jump in the water. Swim upstream and you will find a hidden door. Head in. Shoot a light arrow at the sun crest and head through the door. It’s the creeper! The rooms from left to right are the order here. Dinofols: Just kill them with a single slash of the Great Fairy Sword and open the chest for 100 rupees. Wizrobe: NOOOOOOOOOOOOOOOOO! This time you don’t have a mini map and you have to guess where he is, just kill him the regular way and get the 100 rupees. Wart: Kill him like you did before and collect your 100 rupees. Garo Master: Kill him the same way you did before and collect your 100 rupees. Now, head back to the middle and the creeper will leave behind a chest. Open it for your heart piece. 🙂 Soar back to Clock Town.
Before we go to the moon, buy some Chateau Romani and drink it before we go and get some fairies too. You can defeat the dungeon bosses again to kill time if you want to. Then head back to Clock Town and climb the Clock Tower on the Final Night at 12. Head up the stairs and when Skull Kid brings down the moon, PLAY THE OATH TO ORDER! The giants will appear and hold up the moon. Then the Majora’s Mask will go into the moon. You will go in too. This is the moon.
Go up to the big tree and talk to the child that is wearing Odolwa’s Remains. He will want to play hide-and-seek with you. But he’ll ask for one mask, give him one regular mask of your choice and you will appear in the Odolwa dungeon. Put on the Deku Mask and fly to the middle platform that spins. Fly by flower and get to the northeast side of the room and get your heart piece. Get back on the yellow flower and fly to the northwest side and head through the door. Talk to the Odolwa child and give him another mask. Then he will send you back to the field. Go talk to the child that is wearing Goht’s Remains. Give him 2 masks and welcome to the Goht dungeon. This is hard. Put on the Goron Mask and get to the end of track here to find your heart piece. Go to the warp place in the center of the area. Stand next to it and go to the icy platform and head through the door. Talk to the Goht child and he will demand 2 more masks. Give them to him and you’ll warp back to the field. Go talk to the child wearing Gyorg’s Remains. He will ask for 3 masks. Give him 3 masks and welcome to the Gyorg dungeon. Put on the Zora Mask and swim in the water through this route to find the heart piece: right, left, left, left. To find the child use this route: left, left, right, right. Give the Gyorg child 3 more masks and you will warp to the field. Talk to the child wearing Twinmold’s Remains. He will ask for 4 masks. Give him 4 masks and welcome to the Twinmold dungeon. The first room has a Dinofol. Kill it and move on. In the third room, kill the Garo Master and hookshot to the chest above and open the chest for arrows. Head through the door. The 5th room has and iron knuckle. Kill it and open the chest for bombchus. Look at the wall on your right and take out a bombchu. After 3 1/2 blinks, release it. Shoot the eye switch that appears and head up the ladder that appeared. In the next room, you will find a heart piece. Grab it. Stand in the middle and aim towards one of the side walls and take out a bombchu. After 3 blinks, release it. Shoot the frozen eye switch with a fire arrow and head through the door. Talk to the Twinmold child and give him 4 more masks. You will warp back to the field. Now, go to the tree and talk to the Majora child. Since you have no masks to give him, he’ll give you the Fierce Deity’s Mask.
When you slap this puppy on, you will become more powerful! 😀 The Majora child will want to play good guys and bad guys. You will now, fight Majora’s Mask.
Put on the Fierce Deity’s Mask to hurt him pretty bad. You have to stun it. Use a spin attack when it’s trying to saw you in half. Then slash the heck out of him. Or shoot him if you prefer that. Reflect his fire attack with your shield and aim it at the boss remains. Slash him when he’s on the ground. Then he will turn into Majora’s Incarnation.
This is pretty easy, just slash him like there’s no tomorrow and then he’ll die. Then he will turn into Majora’s Wrath.
When you get the chance while wearing the Fierce Deity’s Mask, go slash him like there’s no tomorrow. Congrats, you just beat one of the most frustrating games in history. Thanks to google for helping me find the pics. Thanks to zeldadungeon.net for inspiring me to make this website. Special thanks to Nintendo for creating the Zelda games.

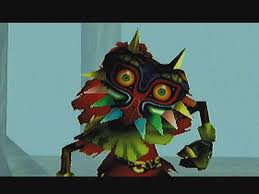
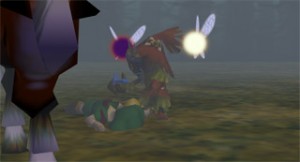
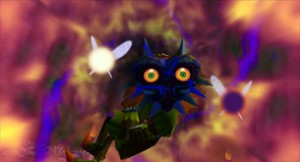
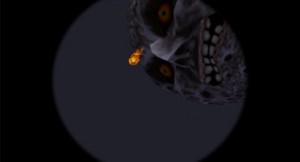
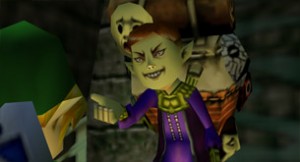
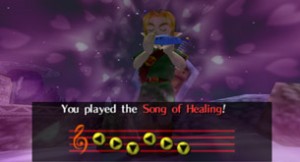
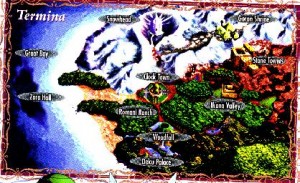
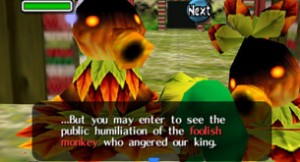
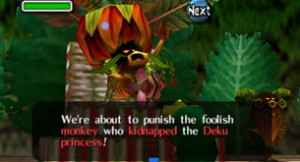
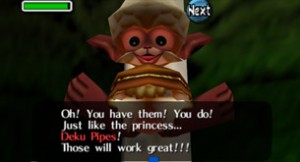
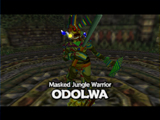
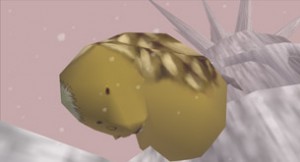
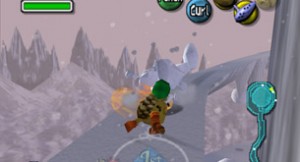
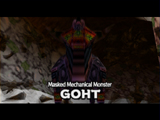
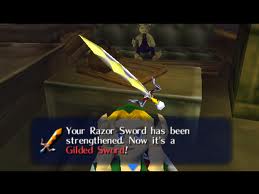
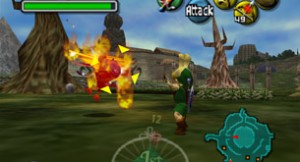
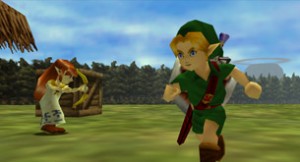
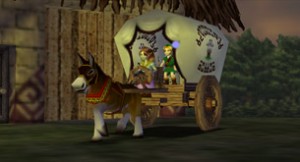

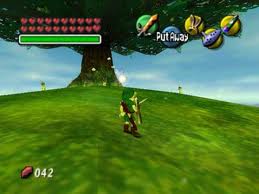
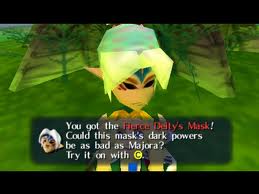

it’s a great game don’t ya like it? 🙂
I really appreciate your work to this site. So thanks for it. I hope you can continue this type of hard work to this site in future also. Because this blog is really very informative and it helps me lot. I am delighted to find many useful things here, that’s superb. Thanks for sharing.