
LoZ 4 😀
Welcome to The Legend of Zelda Link’s Awakening. This is a short game with only 9 chapters to complete. There are 9 dungeons not including the deluxe version color dungeon. We will do the color dungeon because we need different color tunics. 🙂 Enjoy this game.
Tail Cave
The game will start when Link is on a ship going somewhere for some apparent reason. 🙂 There is a storm and Link blacks out and this girl Marin finds Link on Koholint Island where she lives. Marin takes Link to her house and Link is in bed with Marin by his side. Link wakes up and confuses Marin and calls her Princess Zelda. 😀 She explains where you are and how she found you (which you should already know by now). 🙂 Get out of bed and talk to the other guy in the house. His name is Tarin and he is Marin’s father. Talk to him and he will give you your shield. FYI: Tarin is a complete moron and will do things that will get him into other things. You’ll see why later in the game. Get out of the house and here is your map of the Overworld in Koholint.

Welcome to the first place that isn't Hyrule. 😀
As you might’ve already guessed, Zelda is not in this game but Link is. Why do they call it The Legend of Zelda, if Zelda isn’t in the game? 😕 You never know but who cares! 😀 We are now going to go get your sword back. So, head down a screen to find a telephone booth. A guy named Ulrira is at a house near here calling you and giving you hints of where to go and what to do. If you try to talk to him in his house, he will not give you hints. 🙂 Head back to Marin’s house. Most of the places we’ll be going will start at Marin’s house. This is not Hyrule, but there is a castle. Zelda does not live there. You are in a different world so things will be a little bit different. The only thing I can think of that is not different is the bosses. Some of them are exact replicas of the A Link to the Past bosses. 🙂 From Marin’s house, head left 2 screens, down 5 screens, right 2 screens, and you will end up at the Tornobo Shore. You sword is in the water. Go get it and you can now kill enemies. If you had no luck getting here, use your shield to move the enemies without hurting yourself. 🙂

DA DA DA DAAAAAA! 😀
The annoying owl will come by and say annoying things to you. It is information, but still! Head left 2 screens, and head up north back to Mabe Village. Head up a screen and you will find a well. Get on the higher platform above the well and jump down into the well. You will find yourself your first heart piece. There are 12 heart pieces in this game including the one you just got. So you can hold up to 14 or 15 hearts. I really think it’s 14 but if it comes out 15 don’t blame me. 🙂 Head up the stairs to get out of the well. Head up 2 screens, right one screen, up one screen, and right one screen. If you haven’t noticed, you are in the Mysterious Forest. Kind of like the Lost Woods only without all of the logs. There is a key here to get to our first dungeon. There are 2 caves, enter the right one and open the chest for 50 rupees. Head up a screen, left a screen, push the rocks out of the way, exit the cave down a screen, get the mushroom you see there, and head back into the cave. Push all the rocks right, and push the upper right rock up. Head right 2 screens, exit the cave, head up a screen, and right a screen to find a fairy’s fountain. There are no bottles in this game so you cannot keep fairies. Head left a screen, up a screen, right 2 screens, down 2 screens, right a screen, and you might have noticed that you are in the UkuUku prairie. Go into the tree with a hollow doorway and talk to the witch inside the tree. Give her the mushroom and she will make you the magic powder. You can only hold up to 30 sprinkles. We’ll get you upgraded later. 🙂 Head out of the tree, head left a screen, up 2 screens, left 2 screens, down 2 screens, left a screen, and up a screen. There is a raccoon here. It should look like this.

Why do you seem so. . . familiar? 😉 😕
Sprinkle some magic powder on it to find out it is actually. . . TARIN?! 😀 I told you he is a complete moron. 🙂 He runs back to his house and you can now proceed. Head up a screen and open the chest to find the Tail Key. 🙂 This will unlock the first dungeon: the Tail Cave. The owl will come by and tell you that you need to go to the Tail Cave. We have a few errands to do before we can go to the Tail Cave. Some of the dungeons in this game don’t require a key, so don’t worry. 😀 Head down 2 screens, left a screen, and down 2 screens to get back to the village. From Marin’s house, head left a screen, and up 2 screens to find a fishing pond. Talk to the fisherman and pay him 10 rupees. This is a fishing game. Get the big fish that is right under you and you will be rewarded with heart piece #2. 😀 Head back to Marin’s house and head right a screen. This is a big pile of bushes here. Slash them and one of them will hold your first secret seashell. There are 26 of these, but let’s focus on only getting 20. If you get 20 secret seashells, you’ll get a big surprise. I’m not telling you what it is. 😀 You’ll have to find out for yourself. 🙂 Go to the bottom right house in Mabe Village. Enter it and pay the guy 10 rupees to play the Trendy Game. You need to get the Yoshi Doll in the middle there. You need it for part of a trading sequence that will get you a really nice item at the end. When you get the Yoshi Doll, head up 3 screens, left a screen, and enter the large house. There is a lady there with a baby. Talk to her and give her the Yoshi Doll to get the ribbon. If you talk to the father in here, he will tell you that he will get lost later in this game. . . that’s weird. 😕 So. . . anyway, head back to Marin’s house and go to the house that is next door to it from the left. This is the house with the chain chomp. They are not enemies like in A Link to the Past. Go in the small house connected to the huge house. Talk to the small chain chomp in here and give her the ribbon. She will give you her. . . um. . . dog food. 😕 I don’t know how that’s going to come in handy but ooookay. Head back to the Tornobo Shore and go to the house that is located here. Not on the beach area, but the shore area. There is a house there and go in the house. There is an alligator in here that needs some food. Give him the dog food and he will eat it. 😛 In return he will give you some bananas. These will come of use later. Leave the beach area and head right a screen, up 2 screens, right 2 screens, head down, head left a screen, down a screen, and right a screen to find some statues. There is one with a key hole in the middle of it. Use the tail key on it and head into the Tail Cave.

Welcome to your first dungeon. 😀
There are some new enemies you could meet here. I didn’t know the enemy names in A Link to the Past so these are the new enemies: Hardhat beetle (can be defeated by knocking him over the edge), stalfos (jump when you attack, try to corner then slash), spark (can only be killed with the boomerang, which we won’t get for a long time), three-of-a-kind (make the circles on them have the designs match), mini moldorm (just slash it then you’ll be fine), and a blade trap (impossible to kill, try to avoid these things). Head left a screen, knock the hardhat beetle off the cliff with your sword, and get the key. Head left a screen, kill the enemies, and open the chest for the compass. Head right 2 screens, up a screen, kill the enemies, step on the switch, and open the chest for a key. Head right a screen, kill the enemies, and open the chest for the map. Head up a screen, kill the enemies, head right a screen, up a screen, slash the three-of-a-kinds so they have the same design on them, and open the chest for the stone beak. If you are playing the original, the stone beak will not exist. Head down a screen, left 2 screens, kill the enemy, and open the chest for a key. Head left a screen, kill the enemy, and open the chest for 20 rupees. Head up a screen, push the block up 1 square, head right a screen, push the lone block right, head left a screen, kill the enemies, head down the stairs, head left a screen, up 2 screens, and open the chest to get the dungeon item: the Roc’s Feather. This thing will make you jump when you equip it. Now we can go grab flying things and we can jump over gaps. Head down 2 screens, down stairs, right a screen, down 2 screens, right a screen, head right a screen along the upper path, head up a screen, jump over the gap, use the key on the block with the keyhole, head left a screen, and open the chest for the nightmare’s key. It’s a lot like the boss key, only with nightmare’s. Head right a screen, down a screen, head left, and right along the lower portion. head right a screen, jump over the gap and head right a screen to face your miniboss: Rolling Bones. He throws a spiky thing in your way and you have to jump over it and slash Rolling Bones. When a miniboss dies a portal is made to take you back to the entrance. So, if you have a gameover, you can take the portal because you always start at the entrance. Head up 2 screens to face your boss: Moldorm.

Sorry, I couldn’t get a caption on that thing. 🙁 You kill him the same way you did in A Link to the Past. You have to slash his tail a certain amount of times. Don’t fall off the edge. You will come back to this room but, Moldorm will have full life. When he dies, grab the heart container and head up a screen to get the first instrument of the sirens: The Full Moon Cello.

Yay! The Full Moon Cello!
There are 8 instruments of the sirens including the one you just got. The owl says it’s the only way for you to wake up the Wind Fish and get off this island and head back to Hyrule. Now we only have 7 more dungeons left.
Bottle Grotto
Sorry, I guess I forgot to add some more enemies: the spiked beetle (hit with shield then slash), and the. . . goombas? You kill them the same way by jumping on them or you can slash them. I wonder how there are goombas in The Legend of Zelda. Anyways, you are now outside the Tail Cave. Head left a screen, and the owl will come by and tell you that you need the other instruments of the sirens to go home. Head up a screen, left 2 screens, up a screen, and the 2 boys will come by and tell you that the chain chomp has been. . . dognapped? I don’t know how they can kidnap a chain chomp that practically eats everything in sight but okay. Go to the chain chomp house and go inside the house that doesn’t have the small chain chomp. Talk to the owner about what happened. She’ll reward you if you bring him back. Hmmmm. . . you thinking what I’m thinking. 😀 Head out of the house and head left a screen. Head up 2 screens to reenter the Mysterious Forest. Head up 2 screens, right 2 screens, up 2 screens, right 2 screens, jump over the holes with the Roc’s Feather and claim your 3rd heart piece. Jump over the holes again so you can head up a screen. Head right a screen, and enter the hideout of the moblins that stole chain chomp (or Bow-Wow, but I like to call him chain chomp). 🙂 Kill the enemy here, head up a screen, kill the enemies here, and head right a screen to meet: Great Moblin. He is technically a miniboss but who cares? He will try to kill you constantly and you have to dodge his attacks until he runs into the wall and is stunned. Now, you can beat him up. 😀 Repeat this process about 8 times and go grab Chain Chomp. Exit the hideout, head right a screen, down a screen, right a screen, down 2 screens, and you are now in the graveyard. The ghinis here are not as hard but they only appear if you touch the gravestones. The zombies here are easy too. The chain chomp will constantly follow you and will eat all the enemies seen around you. Head down a screen, left a screen, push the bottom right grave up, and. . . Hey, look a staircase, let’s go down it. There is a heart piece at the other side of these rocks. It’s easier with the hookshot but why don’t we do it this way instead. Push the bottom rock right, make a diagonal jump to the other platform with the lone rock, now jump up to the heart piece, and get the heart piece. You have 5 hearts now. Head back upstairs, head up a screen, left 2 screens, up 2 screens, left a screen, and you are back in the Mysterious Forest. Head left 3 screens, and up a screen to enter the UkuUku prairie. Head right 2 screens, and welcome to the Gopongo Swamp. There are these enemy flower things that are Chain Chomp’s favorite snack. This will come in handy because the next dungeon is getting close. 😉 Head up a screen, right a screen, down a screen on the right side, head right a screen, and open the chest for 50 rupees. Head left a screen, up a screen, right a screen, and enter the Bottle Grotto. Sadly, Chain Chomp can’t come with us, so he’ll wait outside the dungeon entrance and we can get him back when we’re done with this dungeon. It’s a little bit more longer than the Tail Cave but we’ll be fine. I couldn’t get a map of the dungeon so listen very carefully. Head up a screen, climb the stairs in the dark and you can light torches with Magic Powder. Do that and head right a screen. Kill the enemies and get the key. The green stalfos tries to jump on you but has to be killed the same way. Some new enemies are the green stalfos, the stalfos knight (they have swords), the mask mimic (these things look like shy guys, they will copy you but you have to be back-to-back and spin attack), vacuums (can’t be killed but try to take you back to the entrance by sucking you up), boo buddy (invincible in the dark, but float away in the light), shrouded stalfos (don’t jump and are easier to kill), and the original pols voice (can only be killed with jars, rocks, etc.). All those enemies are in this dungeon. Head left 2 screens, kill the enemies, head up a screen, jump over the hole, kill the enemies, and open the chest for the stone beak. If you are playing the original, the chest will have your map and the owl statues won’t exist. Head down a screen, right 2 screens, right a screen, and if you talk to the owl statue it will suggest that you hit that crystal switch over there. Hit it and head down a screen. Kill the enemies, hit the crystal, and open the chest for a key. Head right a screen, jump over the gaps, step on the switch, jump up to the chest, and open the chest for a key. Head up a screen, kill the enemies, and the key will come at the other side of the blocks. Time to do some backtracking. Head down a screen, left a screen, up a screen, right a screen, and you can now get your key. Head left 2 screens, down a screen, kill the enemy, and open the chest for your compass. Head up a screen, right a screen, down a screen, right a screen, up a screen, right a screen, kill the enemies, head up a screen, push the 2 blocks towards the center, and head down the stairs the just popped up. You need to go left a screen, up the stairs, kill the enemies, and head up a screen to meet one of the hardest minibosses ever: Hinox. He is this huge creature thing and you need to slash him like there’s no tomorrow. If you get too close, he’ll grab you and throw you. This will be a little frustrating but you’ll kill him eventually. When he dies, head right a screen. Kill the enemies, head up a screen, and open the chest for the map. If you’re playing the original, there will be a stone tablet. Head up a screen and open the chest for 20 rupees. Head left a screen, light the torches, kill the enemies, and open the chest for the power bracelet. You can lift up jars, stones, etc. now. This will be used most of the time throughout this adventure. 🙂 Head back to the room where you fought Hinox, head through the portal, lift the jars, and open the chest for 50 rupees. Head back through the portal, head right a screen, up 2 screens, lift the jars at the upper part, head right a screen, walk on the blocks, hit the crystal switch, walk to the right, hit the crystal switch again, and open the chest for a key. Hit the crystal switch, head right a screen, kill the enemies, head right a screen, head down a screen, head down stairs, and you will find. . . piranha plants? Since when are there Mario enemies in The Legend of Zelda? So, head through the cave, and talk to the owl statue. It will say you need to hit the Pols Voice 1st, the keese 2nd, and the stalfos 3rd. Go back to that place with the 3 enemies and do it that way. Throw the jars at the Pols Voice once you get it out. Then get the rest of the enemies. When they are dead, open the chest for the Nightmare’s Key. 😀 Head up a screen, right a screen, kill the enemies, head downstairs, step on the block to lower yourself, head left a screen, step on the block while carrying that jar over there, and head up the stairs. Jump over the gaps and head up a screen to meet: Genie.

Says you! 😀
This was the best picture I could use. I couldn’t find one with color in it. So, anyways, he is invincible while he has his bottle. What you have to do is dodge him and wait for him to go back in his bottle. Slash the bottle while he is inside. This will stun it so you can lift it up and throw it. Repeat this process until his bottle breaks. Now, you need to slash him like there’s no tomorrow. This will take about 8 slashes. When he dies, grab the heart container, head left a screen, and grab the Conch Horn. We only have 6 more instruments to go. 🙂 😉
Key Cavern
Now, this next dungeon has a lot of keys and is very long. That is mostly some of the reasons why I hate this dungeon. It is kind of hard but it isn’t as hard as the last dungeon you’ll ever go through. 😉 Now that Chain Chomp is back in our possession, you can have some fun with it by going to the beach and it will eat that monkey, it will tell you some secrets, and it will challenge Kiki the monkey. After you’ve had your fun, head left 2 screens, down a screen, left a screen, jump over the gap, head up a screen, kill the enemies, and enter the cave. With the power bracelet, lift the skull, and open the chest for 50 rupees. Head left a screen, jump over the gap, and open the chest for 20 rupees. Exit the cave on this side, head down 2 screens, right 2 screens, down a screen, lift the rock at the upper right, and head downstairs. This is an interesting place. 😉 Sprinkle some magic powder on that torch-like thing over there and a bat will come and curse you! He will let you carry up to 40 sprinkles of magic powder! Wow. . . they can curse you better than that. :! Not that I don’t want them to, I’m just saying! 😀 Exit this place, head down a screen, and enter the cave here. As you might have noticed, we’ve been here before. 🙂 Head up a screen, left a screen, lift the skulls in your way, and go get your 5th heart piece. Exit the way you came in, head left a screen, down a screen, lift the rock, and open the chest for your 2nd secret seashell. 😀 Head left a screen, down 2 screens, and you can have your fun with the chain chomp now if you want to. 🙂 When you’re done, head to the chain chomp house and head into the big house on the left. Talk to Madame MeowMeow and she will give you. . . a kiss. . . for returning the chain chomp to her. From Marin’s house, head up a screen, and right a screen to find the town shop. Head in the shop and buy some bombs and the deluxe shovel. There is a bow here that is worth. . . 980 RUPEES?! That sucks! 🙁 Don’t think about stealing it, because if you try to and go back in the shop, your file name will be changed to “THIEF” and that is not fun! 😀 Well now that we have the shovel, head back to the chain chomp house and enter the small house on the right. Dig in the bottom right corner of the house and you will find your 3rd secret seashell. Now we have to go back to the Tail Cave. Yes, I said the Tail Cave. There is something here that we missed. Once you are in the Tail Cave, head up a screen, left a screen, up a screen, bomb the left wall, head through it, and open the chest for secret seashell #4. Exit the Tail Cave, head back to the shop in the village. From the shop, head right a screen, lift the rocks, and you will find a cave. Head up a screen, kill the enemies, and open the chest for 50 rupees. We got to save money if we want that bow without getting our file name changed. Exit the cave here. Head right a screen, lift the rock, head up 2 screens, head left a screen, lift the rock, head down a screen, cut the lone bush, and dig where it was to find your 5th secret seashell. Lift the rock, head up a screen, lift the rocks, head up a screen, and you will find a house next to a swimming pool-like pond. Go in the house and talk to Crazy Tracy. She will give you the secret medicine for 68 rupees. This works the same way fairies do, when you die, you will come back to life with full health. Exit the house, head right a screen, up a screen, right a screen, and you will find a camera shop. If you’re playing the original, this shop won’t exist. There is a camera sidequest that you don’t have to do and it is only in the deluxe version of this game. So, you can skip the camera sidequest if you want to but I’m still writing it down if you want to do this. Enter the camera shop and talk to the mouse. He will ask you if you can get on the stage. You can say yes and go on and get a good picture, or you can keep saying no and the photographer will throw you on the stage and take your picture anyway. You can get one or the other. Head back to the house with the chain chomp and go in front of it. The photographer will take your picture with it. Go to Ulrira’s house and look through the window on the side. The photographer will take a picture of that. Head back to the shop and steal the bow, just don’t go back in, the photographer will take a picture of this. You don’t have to do what I just told you and you don’t get a reward for finishing this. 🙁 If you are at the camera shop, head back to Mabe Village and go to the shop in the village. Head right 2 screens, down 2 screens, and you will find the Key Cavern. We can’t go in it yet because it requires a key. 🙁 Head down a screen, head right a screen, down a screen, and enter the house here. There are who knows how many frogs are in this house? Talk to the guy named Richard and he lived in the castle, but he had to leave for some reason. To get the key to the dungeon, Richard says that you have to get 5 golden leaves from the castle. Great. Exit Richard’s house, head right a screen, up 3 screens, right a screen, up 2 screens, right a screen, and up a screen to find Kanalet Castle. If you go up to the gates, the photographer will take a picture of you and Richard standing in front of the gates. Head right 2 screens and you will find Kiki the monkey. Talk to him and give him the bananas you got from the trading sequence 2 chapters ago. His monkey friends will build a bridge for you and leave behind a stick. Grab it because we will use it for another part of the trading sequence that will happen in the next chapter. Cross the bridge, and head up 3 screens. Head left a screen, slash the lone bush, head downstairs, head through the underground area, head up the stairs at the end, head left a screen, down a screen, kill the enemy here, and get the golden leaf it leaves behind. 😀 Head down a screen, right 2 screens, up a screen, kill the enemy, and get the golden leaf. Head down a screen, left a screen, and you can now enter the castle. Head left a screen, kill the enemies, and get the golden leaf. Head up a screen, right a screen, step on the switch, head left a screen, upstairs, bomb the left shape, kill the enemy, and get the golden leaf. Head right a screen, down a screen, left a screen, exit the castle here, head through the door on the left, throw the jar at the door, and head up a screen. This is a ball and chain trooper. Slash it 8 times to kill it and get the golden leaf it leaves behind. 😀 We have all 5 now. Backtrack to where we came in at the start of the castle. Exit the castle, head down 3 screens, and you might’ve noticed that the gates are open now. 😀 Head right a screen, up a screen, and enter the house here. This is Seashell Mansion, where you turn in your secret seashells. Walk to the right and a present will fall down. It’s rewarding you for getting 5 secret seashells. Open the present to get secret seashell #6. 😀 Exit the mansion. Head right a screen, and cut the bush to get your 7th secret seashell. Head left a screen, down a screen, left a screen, down 2 screens, kill the enemies, lift the lone rock, and you will find your 8th secret seashell. Head left along the bottom portion of the screen and enter the cave. Head left a screen, kill the enemies, bomb the far left wall, head left a screen, jump over the gap, head upstairs, head left a screen, push the rock in the hole, jump over the hole, head left a screen, head through the rocks, head right a screen, push the 3rd rock from the bottom right (I mean push it right), push the rock right above you up, and exit the cave here. Head up a screen, dig to the bottom left of the owl statue, and you will find your 9th secret seashell. Head down a screen, enter the cave, head right a screen, climb the stairs, jump down to reach the stairs, head right a screen, head down and exit the cave. Head down 2 screens, right a screen, slash the lone bush, and get your 10th secret seashell. Backtrack through the cave, exit the cave, head right a screen, up 2 screens, right a screen, up a screen, enter the seashell mansion, and open the present to get secret seashell #11. 😀 Head down a screen, left a screen, up a screen, left a screen, down 2 screens, left a screen, down 3 screens, left a screen, and enter Richard’s house. Talk to Richard and he will let you explore his basement. Move the block and head downstairs. Head up along the left side, push the block in the hole, jump over the hole, and open the chest for your 12th secret seashell. Head through the cave, head up the stairs at the upper right, head left a screen, exit the cave here, and you will come out in front of a lot of bushes. Most of the bushes you cut down will have holes. Here’s the correct pathway: cut one bush down, cut 3 bushes to the right, head down a screen, cut 3 bushes down, cut 2 bushes to the right, head right a screen, cut one bush to the right, cut one bush down, cut 4 bushes to the right, cut one bush up, cut one bush to the right, cut 2 bushes up, head up a screen, cut 4 bushes up, cut 5 bushes to the left, cut one bush up, head left a screen, cut the bush, dig below the owl statue, and you will find the Slime Key! 😀 Start backtracking the same way, go through the cave, and back to Richard. Exit his house. Head up a screen, left a screen, up a screen, and use the key on the statue. You can’t get to the dungeon just yet. 🙂 Head down a screen, right a screen, down a screen, right a screen, up 3 screens, down along the left side, jump over the water, head up a screen, left a screen, kill the enemies, dig in the middle of the 4 squares of grass, and get your 13th secret seashell. Head right a screen, down a screen, left a screen, and enter the Key Cavern. Some of the new enemies here are: red and green bombite (slash at red ones and they’ll go around the room and explode, green follows you with a 3 second timer), and a red thwomp (found in underground areas, can’t be killed). Lift a jar and throw it at the door, head up a screen. Kill the enemies and open the chest for a key. Head up a screen on the right side, kill the enemies, head up 2 screens, head down stairs, kill the enemies, head up a screen, kill the enemies, and get the key. Hit the switch, head down a screen, upstairs, and open the chest for the stone beak. If you’re playing the original, the chest will have 50 rupees. Head down 2 screens, right a screen, and open the chest for the map. If you’re playing the original, the chest will have 200 rupees. Head left a screen, up 2 screens, downstairs, up a screen, and talk to the owl statue. The owl statue won’t exist if you’re playing the original. The owl statue says: “Far away. . . do not fear, dash and fly!” We’ll put that at the back of our heads for a while. 🙂 Head down a screen, right a screen, up stairs, walk around, kill the enemies, and get the key. Head up a screen, kill the enemies, lift the jar at the bottom right for some bombs, head left a screen, kill the enemies, head left a screen, and get the key. Head up a screen, kill the enemies, head up a screen, kill the enemies, and talk to the owl statue. It says: “To defeat the black monster with the hard shell, feed him something explosive.” This is useful information to use. 🙂 Head upstairs, head right a screen, and notice the wall for later. 🙂 Head left a screen, down a screen, and open the chest for 50 rupees. If you’re playing the original, the chest will have the dungeon map. 🙂 Head down a screen, right a screen, push the block, kill the enemies, head up a screen, and you will find the Dodongo Snakes. They aren’t that bad. All you have to do is put a bomb in front of it’s mouth and feed it bombs. That will kill them with 3 bombs. When they die, grab the fairy and head right a screen. Push the bottom block left, push the upper block up, and open the chest for the Pegasus Boots. These will help you go very fast and will help you run and jump with the boots and the feather equipped at the same time. Dash through the weird green rocks, push the block right, head down a screen, left a screen, up a screen, through the portal, dash right a screen, and open the chest for a key. Head left a screen, throw a jar at the door, head up a screen, head up a screen on the left path, use the boots, head up a screen, kill the enemy, head down 2 screens, up 2 screens on the right side, kill the enemies, and open the chest for 200 rupees. If you’re playing the original it will have a stone tablet or something. Head down 3 screens, through the portal, head down a screen, right a screen, up a screen, right a screen, kill the enemies, and talk to the owl statue. It says that if you poke your sword against the walls, it will make a cool sound that will tell you you can bomb it. Bomb the bottom wall, and run jump the gap and head up the stairs. Head up a screen, jump over the gap, and open the chest for the Nightmare’s key. Jump off the platform, head up a screen, kill the enemies, head left a screen, kill the enemies, and open the chest for the compass. Bomb part of the left wall by tapping on it first of all, then bomb the place where it makes the weird sound. Head left a screen, kill the enemies, head right 2 screens, head down a screen, left a screen, head down a screen, head left a screen, use the key on the block, head up a screen, unlock all the other blocks you come across in your path until you reach some stairs, head downstairs, dash into the red thwomp to make it fall down, fall down on top of it, head right a screen, run jump across the spikes to the ladder, and head down the ladder. Kill the enemies, head left a screen, and head up a screen to meet the boss: Slime Eyes.

This is just plain creepy! 😀 :! 😕
Dash against the wall and he will fall down. Keep slashing at his eye and when they are just about to be separated, run in between the 2 eyes and slash the 2 eyes until they die. When they die, grab the heart container and head up a screen. Go get the Sea Lily’s Bell.

Yay! don't know what good it'll do but still! 😀
We have 5 instruments to go. First we are going to get ourselves a new tunic. Skip this next chapter if you are playing the original Link’s Awakening.
Color Dungeon
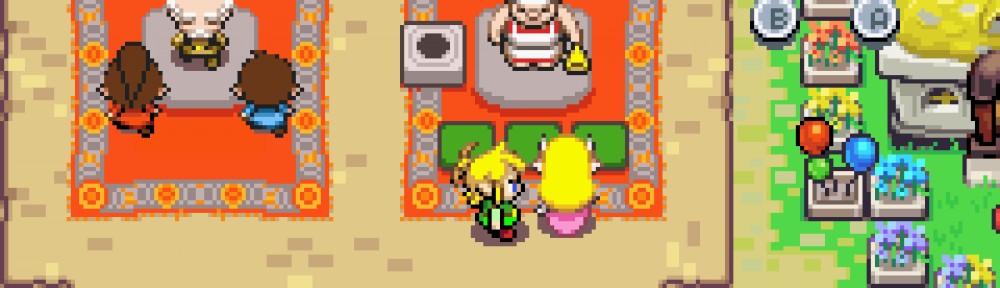
There are actually some parts of this chapter that you can’t skip. I’ll tell you when you can skip the part with the Color Dungeon, for those of you playing the original game on the Gameboy. 🙂 This is the part you absolutely CANNOT skip! Walk right, and you will meet up with the owl, who will tell you annoying things about the next dungeon, which is the Angler’s Tunnel. We’ll get to that part later. Right now, we are going to work on getting the Angler key. Head right a screen, up a screen, right a screen, up a screen, left a screen, bomb the skull, head up a screen, and you will find the moron named Tarin. He will ask you to give him your stick. Do it and he will swat the bees’ nest and the bees will go after him and try to kill him. Well, that’s the end of Tarin the moron. 😀 Just kidding. . . Tarin is a complete moron so I just wanted to do that. Grab the honeycomb that fell down from the tree. We will use this thing later. 😉 Bomb the crack to get to a fairy’s fountain. You can go in if you need full life. After you have restored your life, head left a screen, and bomb the crack here and enter the cave. Dash through the rocks in your way, head up a screen, circle the rocks, head down a screen, head up a screen on the right side, poke the right wall until you here that weird sound again, bomb the wall, head right a screen, and get heart piece #6. Head left a screen, down a screen, dash through the rock, push the rock, and open the chest for 50 rupees. Backtrack through and exit the cave. Head down a screen, left 2 screens, down a screen, dash into the tree by the phone booth, and get the secret seashell that fell from the tree. Head up a screen, left a screen, go to the upper right part of Mabe Village, that is right above the shop, lift the rocks and enter the house here. This is the Dream Shrine. Go in the bed and you will be in the Dream Shrine. Dash your way up a screen, right a screen, down a screen, climb the stairs, head up a screen, and open the chest for 100 rupees. Head down a screen, dash through the rock, head up a screen, and open the chest for the ocarina. 😀 We can only learn up to 3 songs with this thing. 😉 Head down a screen, jump off the ledge, and exit the Dream Shrine. Link will be awake and still have the ocarina. . . Weird. 😕 Exit the house, go up a screen from Marin’s house, and talk to Marin. She will teach you a song on your ocarina. It is called the Ballad of the Wind Fish. Now that you have learned it, we need to get somewhere. Head to the screen that is left of the Tail Cave entrance. Dash into the lone tree here at the bottom left and get the secret seashell that falls down. Go to the phone booth that is east of Kanalet Castle. Head right a screen, down 2 screens, right a screen, slash the bush, head downstairs, dash through, head down 4 screens, left a screen, up a screen, dig left of the owl statue, and get the secret seashell. Head down a screen, right a screen, up a screen, right a screen, and you are now in Animal Village. Go to the bottom right part of the village, enter the house with the pink roof, talk to the bear, give him the honeycomb and he will give you the pineapple. 🙂 Exit the house, head left a screen, down 2 screens, right a screen, and you will find a sleeping walrus. We need Marin’s help to wake him up. Head back to Animal Village, from the bear’s house, head down a screen, left a screen, fall down the portal, go to Mabe Village, and go to where Marin was. The boy tells you that she went out to look at the sea. Leave to the south so we can reach the Tornobo Shore. Go to the shore and when you reach the sand area, head right 4 screens, right a screen, lift the rocks, and open the chest for 50 rupees. Head down a screen and talk to Marin. It should look like this.

I think I should tell her that I already have a girlfriend. . . 😕 :!
After Marin talks to you, she will follow you to Animal Village and wake up that walrus. 😀 We’re going to take some pictures with Marin while we’re at it. Head up a screen, left 5 screens, down a screen on the left side, and Marin will talk about how she likes you. 😉 Then the photographer will come and take a picture of you 2 together. You have to be at the edge of the platform to make this work. Go back to Mabe Village and jump down that well you fell down earlier, wait for Marin to jump down, that means don’t move a muscle, then the photographer will take a picture of Marin falling on top of you. 😀 I found this picture extremely hilarious! Leave the well and go to the statue thing north of Marin’s house. Stand in front of the statue and the photographer will take a picture of you, Marin, and. . . TARIN?! Don’t you just hate him?! 🙂 Go back to Animal Village, and go to the walrus. Marin will wake it up and you can now head right a screen. Marin will not follow you at this point. She is going to stay in Animal Village from now on. Now, head right a screen, to the Yarna Desert. We are going to get the Angler Key here. Head up 2 screens, right a screen, you can sprinkle magic powder on the bones for it to give you a hint, head left a screen, and up a screen to meet the boss from A Link to the Past: Lanmola. He is back and you have to slash him anywhere at least 8 times. Just don’t fall down the middle of the quicksand. When Lanmola dies, get the Angler Key, and fall down the middle of the quicksand. You are in a tunnel. 🙂 Tap against the wall at the top and keep tapping that top wall until you here that awkward sound. Bomb the place where the sound is and head up a screen. Hey, look there’s a heart piece calling your name. Sweet, 7 heart pieces. Only 5 left! 😀 Head through the cave for a while and exit with the stairs. Head down a screen, and head down 2 screens on the right side. Lift the rocks and get secret seashell #17. Head back to the entrance where the walrus was, and use the portal in Animal Village. For those of you who are playing the original, you can skip the rest after secret seashell #17. 😉 For those of you that are playing the deluxe version, follow along. Head back to Mabe Village and head to the left side of town. Enter the library, dash into the shelf with the book on top, and read that book. Head back to the portal close to Mabe Village, fall down the portal, head up 3 screens, right a screen, down a screen, and right a screen to enter the graveyard. Push the bottom middle grave down, push the bottom left grave left, push the upper left grave up, push the upper middle grave right, push the upper right grave up, and head downstairs to the Color Dungeon.

Welcome to the Color Dungeon! 😀
Talk to the skeletons and they will ask you what color they are wearing. Say the color they are wearing and head up a screen. Kill the enemies, head right a screen, slash the blue statue at the bottom left, slash the blue statue at the upper right, and open the chest for the compass. Tap the bottom wall until you hear that weird sound, bomb the place where you heard the sound, and head down a screen. Get the rupees scattered around here so we can get that bow that’s worth 980 rupees! 🙁 Head up a screen, right a screen, kill the enemy, head right a screen, slash the enemies and throw them in the proper colored hole. Open the chest for the stone beak. Head up 2 screens, slash the bottom right statue once, slash the upper left statue twice, and get the key that’s lying around. Head right a screen, up a screen, and you will find the 1st miniboss: Giant Buzz Blob. That’s really what it is. All you have to do is sprinkle magic powder on it and then slash it 6 times. Get the fairy when it dies, head left a screen, push the top and bottom blocks to the left, push the middle block up, and and open the chest for the Nightmare’s Key. Head right a screen, down a screen, left a screen, down 3 screens, kill the enemies, head left a screen, kill the enemies, and open the chest for a key. Head up 2 screens, and you will find the last miniboss: Dekudon. This is my least favorite miniboss because he is like Hinox, only a million times harder. All you can do is either use 2 bombs/arrows on it or slash it 8 times. Get the fairy when he dies, head left a screen, kill the enemies, lift the upper left jar, step on the switch, head up a screen, hit the upper middle statue, the left middle statue, the right middle statue, and the bottom middle statue. You have to hit the statues in that order. 🙂 Head up a screen, kill the enemies, head left a screen, and head up a screen to meet the boss: D. Poon.

It's like a giant moving switch. . . 😉
All you have to do is hit him constantly without stopping. You have to get his head at red so that he will die. When he dies, get the fairy, and head right a screen. Talk to the Great Fairy and she will let you choose either the red tunic (more offense), or the blue tunic (more defense). The red tunic will give you a much better chance of killing enemies. The blue tunic will give you a much better defensive pattern. You don’t have to skip this anymore, original Link’s Awakening players. 😀 Now, we can move on to the Angler’s Tunnel. 🙂
Angler’s Tunnel
Now, that you are done with the Color Dungeon (or not if you’re playing the original), we can tackle the Angler’s Tunnel. This is a little bit longer and harder than the Key Cavern. Head up 2 screens, left a screen, up 2 screens, left a screen, lift the rocks blocking the way, head right 2 screens, lift the rock, head right a screen, down a screen, right a screen, and right a screen. Head up a screen, right a screen, and unlock the keyhole with the Angler Key. The entrance to the next dungeon will open! Wait, something isn’t right here. . . . . 😕 Oh! I know. . . the entrance is on the other side. 🙁 That really sucks! 🙁 Time to start going around. 😉 Head right a screen, down a screen, left 3 screens, up the ladder, left 2 screens, up a screen, lift the rocks, and enter the cave here. Watch out for the enemies here, they are in the water and will try to kill you. Head right a screen, push the block up, break the crystal, push the block right, push the block below you down, head down the staircase, head right a screen, up stairs, head right a screen, and exit the cave here. Open the chest for 50 rupees. Go back into the cave, dash through the rocks, head right a screen, dash through the rocks, and exit the cave. Head right a screen, and enter the cave you see here. Head up a screen, up the stairs, down a screen, and exit the cave here. Head down a screen, and left a screen to find not Tarin (though he is a complete moron), but Papahl. That guy that said he’d get lost. Well. . . he got lost all right. 😉 Talk to the dude and he’ll ask you for some food. Give him the pineapple and he will give you the hibiscus. Head up a screen, left a screen, jump off, head right 2 screens, jump off the cliff, and you can finally enter the Angler’s Tunnel.
There are some new enemies including: tektite (slash), peahat (slash when on ground), star (slash), iron mask (slash at their backs), thwomp (dash to not get crushed), and the classic Mario enemy, the cheep-cheep (slash). Head up a screen, kill the enemies, head left a screen, get the floating bombs, head right a screen, climb the stairs, head right a screen, up 2 screens, right a screen, up a screen, and open the chest for the map. Head down a screen, run and jump over the gap, head right a screen, bomb the cracked block, move the block out of the way, head up 2 screens, bomb the block, and open the chest for a key. Head down 2 screens, left 2 screens, right a screen, and open the chest for the stone beak (unless you’re playing the original and it will have something else). Head left 2 screens, kill the enemies, head through the open door, kill the enemies, and open the chest for the compass. Head down a screen, kill the enemies, slash the crystals, and open the chest for a key. Head up a screen, right a screen, kill the enemies, head up 2 screens, kill the enemies, run and jump over the gap, head up a screen, unlock the block, push the block that is really close to you upward, kill the enemies, head left a screen, kill the enemies, head down a screen, and talk to the owl statue to learn an important hint. Head down a screen, jump over the deep water (dark blue water), head left 2 screens, up a screen, right a screen, and open the chest for a key. Head left a screen, down 2 screens, right 2 screens, up 2 screens, up a screen, and you will find the miniboss: Cueball. You have to dash into the back of his head to kill him. The front is invincible. Head up a screen when he dies, pull the lever as far back as you can, and run left a screen before the blocks close in on you. Kill the enemy and open the chest for the flippers. We can now swim in deep water! 🙂 Head down a screen, there is a weird glint in these tiles and you have to follow this pattern. It is middle, bottom left, upper right, upper left, and bottom right. You have to hit all the tiles without hitting the other ones. Head down a screen, push the block, head left a screen, and there are more tiles on the floor. The order is random so it is different from my order. Hit the tiles in the correct pattern, and head down the staircase at the top right. Head left 2 screens, jump on the top, head up the ladder to resurface, head down a screen, and open the chest for the Nightmare’s Key. Head up a screen, jump off the edge, head right 2 screens, up a screen, and open the chest for 50 rupees. Did you know that we can now access that key that fell down a hole? Head right a screen, up a screen, right a screen, down the stairs, jump left a screen, get in the water, and swim to your key. Head right a screen, and head up the stairs to resurface. Push the left-most block down, head down a screen, run jump across the gap, head down a screen, swim to the chest, and open the chest for 50 rupees. Head up 2 screens, left a screen, down 2 screens, left 2 screens, step on the switch at the upper part, unlock the block, head down stairs, kill the enemies, head left a screen, climb the stairs, head left a screen, kill the enemies, head up a screen, and downstairs to meet the boss: Angler Fish.

EEEEKS!. . . oh wait, this boss is easy. 😉
What you have to do is slash the boss 10 times with your sword, or you can shoot it if you have the arrows. When he dies grab the heart container and head up a screen to the surface. Now, go get the 4th instrument of the Sirens: The Surf Harp. We are about halfway there. 😉
Catfish’s Maw
We have a long list of errands to run before we go to the Catfish’s Maw. This won’t take long, so don’t worry. Head left a screen, enter the cave, and there is a gigantic fish here. Talk to the fish and he will teach you a song on your ocarina. Sweet! This song will warp you to the pond by Crazy Tracy’s house. Well, you have to say yes first because the fish will ask you if you have an ocarina. He will teach you the song and you will automatically learn it. Exit the cave. By the way, the song is called Manbo’s Mambo, just to let you know. 😉 Head right 4 screens, enter the cave, and dive underwater all over the place until you find heart piece #8. You now have 9 hearts. 😀 Exit the cave, head down a screen, get out of the water, head left 3 screens, head back in the water, head left 3 screens, down 4 screens, stay against the bottom portion, dive underwater, swim right while you’re underwater, and you will find your 9th heart piece. If you haven’t noticed, a ghost is starting to follow you. Don’t worry he’s nice. 😉 He wants you to take him to his house. I know where the house is but we’re not taking him there until we’re done with our errands.
Head up 4 screens, right 3 screens, down 6 screens, right 2 screens, up a screen, climb the ladder, and bomb the wall for a fairy’s fountain. When you’re done healing, exit, head in the water, head right a screen, get out of the water, head right a screen, enter the cave, head through the cave, head down a screen, and you will find the raft shop. Pay the dude 100 rupees and you can ride the raft. Exit the shop and you will find your raft waiting for you. Get on it, and you can control where the raft goes. Head left 3 screens, jump off the second waterfall, and you will enter the river rapids. Move right, get the rupees, head right a screen, stay on the top portion of the screen, get the rupees, head right a screen, take the upper path, stay going right on the upper portion, jump up to get the rupees, go up hold left, go left along the bottom portion, go left, get the floating goodies, head down a screen, stay on the upper path, go right, get the rupees, get the floating goodies, head right, and fall down the waterfall at the end. Head left 2 screens, get on land, get back on the raft, head down a screen, left 2 screens, down 2 screens, left a screen, use the ladder at the bottom portion, head right a screen, down a screen, right a screen, and you will find yourself back in Animal Village. Enter the upper right house and talk to the goat. Give her the hibiscus, and she will give you a letter for Mr. Write. Another complete moron who decided to live right above the Mysterious Forest. Don’t the monsters get in the house? Exit the house, and leave the village to the left. Head up a screen, left a screen, get in the water, head down 2 screens, left 2 screens, climb the ladder, head down 2 screens, in the water, swim around the island, get on the island, slash the lone bush, and get your 18th secret seashell. We’re almost done and soon we’ll get that surprise! 😀 Head right a screen, and this is a little hard. All you have to do is jump slash the bush in your way. If you don’t make it, run jump then slash. Head down the stairs, head through the area, resurface, head left a screen, head down the stairs, and you will find another place where we can find Mad Batter. Sprinkle magic powder on the torch-like thing and the Mad Batter will curse you. He’ll make you carry 60 bombs. Well. . . if he didn’t want us to do that, why’d he upgrade our magic powder to keep waking him up? 😕 Exit this place, start backtracking through the caves, jump over the holes, head left 2 screens, run jump over, head left a screen, and enter the house to take the ghost home. 😉 He’ll say that he wants you to take him to his grave now. 🙁 Great.
Exit the house, play Manbo’s Mambo, head left a screen, down 3 screens, and head up the left stairs to take the ghost to his grave. If you walk up a little more, the photographer will stop by and take a picture of you and the ghost by the grave. If you sprinkle magic powder on the grave the ghost will curse you. It doesn’t really affect you in any way. Head up a screen, down a screen, up 3 screens, left 4 screens, up a screen through the forest, and go in the house to meet the moron #2. Give Mr. Write the letter and he will hold up a picture that looks like Princess Peach. The goat was probably being stupid and decided to forge a picture to make the guy like her. Mr. Write will give you a broom. Exit the house, head down a screen, right a screen, down 3 screens, left a screen, down 2 screens, go to Ulrira’s house, and you will find an old lady outside the house. Talk to the old lady and give her the broom and she will give you a fish hook. Go to the shop, enter the shop and by now, you should have 980 rupees or more. If you don’t, start hunting monsters. By the time you have 980 rupees, enter the shop and buy the bow. You don’t have to do this if you already stole it. Exit the shop, head down a screen, left 3 screens, down 4 screens, right 6 screens, down a screen, enter the ghost’s house, lift the bottom right jar, and get secret seashell #19. Exit the house, head right 2 screens, up 2 screens, right a screen, get in the water, head up 5 screens, left a screen, down 2 screens, left 2 screens, slash the bush on the small piece of land, well slash the bush from the top so it doesn’t go in the water, and get the 20th secret seashell! YAY! Now we can go get the prize! Head right 2 screens, up 2 screens, right a screen, down 2 screens, right a screen, up a screen, enter the seashell mansion, walk right, and go get the. . . . . . LEVEL 2 SWORD! Now, you are more powerful! There are more secret seashells and if you go to the places where they are hidden, it will only contain 20 rupees. Exit the seashell mansion, head down a screen, left a screen, down 3 screens, get in the water, head right a screen, down 2 screens along the right side, swim over to the bridge, and dive under the bridge to find a fisherman. Swim over to the boat and get on the boat. Talk to the fisherman, give him the fish hook and he will give you a necklace in return. Head up 2 screens, left a screen, talk to the mermaid and give her the necklace. She will let you pull out one of her scales. Dive under water right next to her and get the scale. Head right a screen, down 2 screens, dive under the bridge, and the photographer will be swimming around. The fisherman will pull him up with the rod and will snap a picture of it. Head up a screen, left a screen, go to the left side of the rocks, swim in between the rocks, dive under the rocks, head right a screen, resurface, and enter the Catfish’s Maw. The entrance should look like this. 😉

This is kind of scary if you think of it from a different point of view. 😀
Head left a screen, kill the enemies, head left a screen, kill the enemies, head left a screen, and open the chest for the compass. The new enemies are bloopers, all you do is slash them. Head down the stairs, head left a screen, resurface up the stairs, kill the enemies, push the 2 upper blocks together, and get the key. Head downstairs, through the underground part, kill the enemies, head right a screen, up a screen, left a screen, kill the enemies, head left a screen, kill the enemies, and open the chest for the stone beak. Head right 2 screens, up a screen, kill the enemies, head up a screen, and you will meet the miniboss: Master Stalfos. You have to slash him until he falls apart and bomb his bones when he has fallen apart. Keep doing this until he can’t take it anymore and leave you alone. Head right a screen and open the chest to find. . . WHAT?! IT’S EMPTY?! The stupid Master Stalfos stole the dungeon item and you have to track him down to get it! 🙁 The dungeon item was awesome. 🙁 Head up a screen, push the block up, head left a screen, head back right a screen, push the block, head up a screen, down a screen, step on the switch, push the block, head right a screen, and. . . hey, it looks like we tracked him down again. Kill Master Stalfos the same way, and we have to track him down again. Head left a screen, push the block, head up a screen, kill the enemies, head right a screen, get the floating bombs, head left a screen, up a screen, kill the enemies, head left a screen, kill the enemies, lift the left most block, kill the enemy, head up a screen, and it looks like our tracking job is doing great. This is the second to last time you will be fighting Master Stalfos. Kill him the same way. He’ll run away and will appear somewhere else. Head left a screen, and open the chest for the map. Play Manbo’s Mambo to warp to the beginning of the dungeon. Head left 3 screens, kill the enemies, go underground, resurface at the end, head left a screen, and you will finally get to kill Master Stalfos. Kill him for reals this time and when he dies, go claim your prize. THE HOOKSHOT! I told you the item was awesome. 🙂 Head right a screen, go underground, head right 2 screens, head right a screen at the upper part, cross the gap with your hookshot, and open the chest for 200 rupees. Hookshot left a screen, up a screen, left a screen, up a screen, kill the enemies, head left a screen through the upper portion, hookshot to the chest, and open the chest for a key. Kill the enemies, head right 2 screens, hookshot the bridge on the right, head up a screen, left a screen, and you will meet the optional miniboss: Gohma. This is like the 1st and A Link to the Past. You just have to shoot the eyes of the 2 gohmas and they will die with 3 arrows. You can head right a screen along the upper portion to find a dead end. Head right a screen on the lower portion, head down 2 screens, right a screen, up 2 screens, right a screen, up a screen, push the center block, head left a screen, kill the enemies, head up a screen, kill the enemies, dive under the deep water, go through this place, hookshot the bridge, head up a screen, and open the chest for the Nightmare’s Key. 🙂 Head down a screen, head through the underwater area, head down a screen, right a screen, push the center block right, head up a screen, jump over the bottom right part, hookshot to the chest, and open the chest for 50 rupees. Head right a screen, hookshot to the chest, and open the chest for a key. Hookshot across, head left a screen, up a screen, hookshot the bridge, and open the chest for 50 rupees. Hookshot to the left block, head down 3 screens, head downstairs, through the area, head right 3 screens, unlock the block, head left a screen, and up a screen to find the dungeon boss: Slime Eel.

This is really scary now! 😀 (not really)
You have to hookshot his head out of the hole and slash the heart on his body. Repeat this process until he dies. Get the heart container, head up a screen, and go get the 5th instrument of the Sirens. . . the Wind Marimba. Only 3 more instruments to go. 😉
Face Shrine
Now that we have this dungeon behind us, let’s get to the other 3 dungeons. So, dive under the water, and head through the underwater sequence to get out of this place. Once you are surfaced, head right a screen, climb the stairs, head up 2 screens, right a screen, down 4 screens, left a screen, hookshot the rock on the left side, head up a screen, head left a screen, and there is a mermaid statue there. Put the scale we just got in the mermaid statue and head down the stairs. Head up a screen and get the second-to-last item in the trading sequence. . . the magnifying lens. 🙂 This will help you see the invisible enemies in this cave. This item is automatically equipped so don’t worry about equipping it or losing it. Head down a screen, and back up the stairs. We have to go back to the Tornobo Shore to get the last item in the trading sequence. head right a screen, down a screen, right 2 screens, up 3 screens, right a screen, left a screen, down 3 screens, right a screen, up 3 screens, bomb the crack, and enter it. Head left a screen, up a screen, and you will find a heart piece sitting there. We can’t get it at the moment but we will get it. Head down a screen, right a screen, bomb the upper wall, head up a screen, left a screen, bomb the rock, hookshot to the second rock, and get your 10th heart piece. Exit the way you came in and head down 3 screens, and left a screen. Go to the upper right house and enter it. I know this is the goat house but if you look in the pond in the back, there is. . . a zora? He’s not an enemy. Talk to him and the photographer will come by and get a picture of the 2 of you meeting.
Back to trading sequence business. 🙂 Go to the portal outside Animal Village, head through it, and go to Mabe Village. Exit the village to the south and keep going south until you are near ocean. Head right 2 screens, bomb the crack in the wall, enter it, and you will find a goriya that will trade you the last item in the trading sequence, for anything on your “B” button. Give him the shovel because we don’t need it anymore because we have the level 2 sword. He will give you the last item in the trading sequence. . . . . THE BOOMERANG!!!!!!!!!!!!! 😀 😀 😀 You needed the magnifying lens to see him, if you just went in the cave without it, you wouldn’t see him. Play Manbo’s Mambo, head left 3 screens, lift the rocks, and enter the cave. Use the hookshot on the chest and open it for 50 rupees. Now, you should go to the shop in Mabe Village. You don’t have to buy anything there, I’m just telling you to start there. Exit to the right, lift the rocks, head down 2 screens, run jump to the sign and read it. Welcome to the Signpost maze. What you have to do to get the next item here, is to read the signs and follow the directions of where to go. The sign says to go down. So head straight down a screen, and read the next sign. Follow all of the signs and go the directions they tell you to. At the end of the maze, head down the stairs, and you will find some frogs. Well, you have to read the last sign first before you go downstairs. Talk to the giant frog and he will teach you a song on your ocarina. This is the last song on your ocarina. I know it sucks, but look on the bright side, in the next game you get to have 12 songs. 🙂 Exit this place, head up 3 screens, use the portal to get to Animal Village, exit Animal Village to the left, head up 3 screens, right 2 screens, and owl will come by and tell you that there are 2 shrines, one to the north, and one to the south. We’re going to tackle the south one first because the key to the north one is in that shrine. The north shrine is the next dungeon so we need to tackle the other one first. Head right 2 screens, up a screen, down 2 screens, down a screen, left a screen, left along the upper portion, up a screen, right a screen, touch the bottom right armos, head left a screen, awaken the upper left armos, head down a screen, left a screen, up the stairs, and enter the Southern Shrine.
This is NOT optional, you have to do this place. Head up a screen and you will find a gigantic statue. I wonder what happens when you touch it? Touch it and it turns out to be. . . . . . ARMOS KNIGHT?! Yep, he’s back from A Link to the Past to seek his revenge. But there’s one thing that’s not right, how did he know where you were? 😕 Well, we need to kill him for good this time. Just slash him 6 times and he will die. Get the face key that’s waiting for you! 😀 Head up a screen, light the torches, and read the upper wall. It says: “TO THE FINDER… THE ISLE OF KOHOLINT , IS BUT AN ILLUSION… HUMAN, MONSTER, SEA, SKY… A SCENE ON THE LID OF A SLEEPER’S EYE… AWAKE THE DREAMER, AND KOHOLINT WILL VANISH MUCH LIKE A BUBBLE ON A NEEDLE… CASTAWAY, YOU SHOULD KNOW THE TRUTH!” This is important information, so write it down. Head down 3 screens, and exit the shrine. The owl will come by and notice that you have read the wall in there. STALKER! D: He will say that only the Wind Fish knows if this island is an illusion. So, head down a screen, right a screen, up a screen, down a screen, right 2 screens, up 2 screens, left a screen, up a screen, left a screen, get in the water, head down a screen, up the ladder, touch the left statue, down stairs, left a screen, hookshot, up stairs, head up along the right side, and insert the face key. Head down a screen, head up the stairs, and enter the Face Shrine.
The new enemies are: wizzrobes (have to bomb them when they appear), giant sparks (regular sparks can be killed with a boomerang, this guy is invincible and can’t be defeated), tile (slash them), twimp (can’t be killed), and beamos’ (can’t be killed). Head left a screen, up 2 screens, kill the enemy, go to the upper right door, hit the switch with the boomerang, head up a screen on the right side, follow the path, bomb the right wall, head right a screen, light the torches, kill the enemies, head down stairs, head left a screen, resurface, kill the enemies, head up a screen, and open the chest at the left side for the level 2 power bracelet. 🙂 Now, you can lift heavier things. 😀 Lift the statues, head up a screen, hit the switch, head up a screen on the left side, lift the upper left block, step on the switch, head left a screen, hit the switch, kill the enemies, and open the chest for the map. Make sure the blocks on the right side are lowered. Head up a screen, right a screen, and open the chest for the beak. Head left a screen, lift the jar, throw it at the upper door, head up a screen, right a screen, and open the chest for the compass. Climb the stairs, hit the switch, follow the path, down a screen, right 2 screens, up a screen, kill the enemies, and get your key. Head down a screen, left 2 screens, up a screen, left a screen, lift the statue, throw it at the door, head up a screen, up the stairs, and open the chest for 100 rupees. You have to lift the horse heads over there and keep throwing them until they both land straight up. Head down 3 screens, right 2 screens, talk to the statue, head left 2 screens, down 2 screens, kill the enemy, hit the switch, lift the statue, throw it at the door, head right a screen, and open the chest for 100 rupees. Lift the statue, throw it at the door, head down a screen, and open the chest for 50 rupees. Head down a screen, right 3 screens, kill the tiles, head up a screen, lift the statue, throw it at the door, head right a screen, kill the enemies, head down a screen, kill the enemies, lift the jar, talk to the statue, climb the stairs, jump down on the right side, jump over the enemies, climb the stairs, head up a screen, and open the chest for secret medicine. 🙂 Jump off, head up a screen, kill the enemies, head up 3 screens, and open the chest for a key. Head down 3 screens, left a screen, up a screen, kill the enemies, bomb the upper wall, head up a screen, and you will meet the miniboss: Smasher. When Smasher throws his ball, you have to quickly pick it up and throw it at him 4 times to kill him. 🙂 Head up a screen, lift the left block, head downstairs, through the underground thing, resurface, kill the tiles, and get the key. Unlock the block, head up a screen, lift the statue, throw it at the door, head left a screen, throw the horse heads straight up, head left a screen, down stairs, dash through the underground sequence, resurface, and there are more pols voices in here, now when you play the Ballad of the Wind Fish their ears will get so affected that will kill them. Lift the upper left jar, head up a screen, get the bombs, head up a screen, hit the switch, and open the chest for 200 rupees. Throw the horse heads facing upward, head down 3 screens, kill the dodongo snakes, head left a screen, hookshot across, unlock the block, head up 2 screens, lift the blocks, talk to the statue, throw a jar at the chest to open it, and when you open it you get the Nightmare’s Key. Head down 2 screens, jump off, head down 2 screens, kill the enemies, head left a screen, up 3 screens, lift the left statue, head down stairs, head through the underground sequence, resurface, head down a screen, kill the enemies, head right a screen, push the bottom block right, kill the enemies, run jump over the gap, head up 2 screens, and you will met the dungeon boss: Facade.

Yep, it's a face on the ground. . . 🙂
All you have to do is kill all the tiles he shoots at you and when he comes out on the floor, bomb his face. Watch out for the holes he makes on the floor. When he dies, get the heart container, head up a screen, and get the 6th instrument of the Sirens. . . the Coral Triangle. Only 2 left. 😀

only 2 left and then I can go home and see Zelda! 😀
Eagle’s Tower
This next dungeon is harder than you think. It has 4 floors and you have to get a huge ball to hit 4 pillars. The Eagle’s Tower boss name is a little less creative than you think. Well, not all the names in this game are very creative so yeah. 🙂 Head down a screen and the owl will come by and tell you a hint to get to the next dungeon. It is fly like a bird. Whatever that means, this is useful info. for later. Play Manbo’s Mambo, head down 5 screens, and left 2 screens to get back to Mabe Village. Go to the place where Marin was before and use the level 2 bracelet to pull that statue. It will reveal some stairs. Head downstairs and head up a screen. There is a pile of bones here. Go stand by the bones and play the Frog’s Song of Soul that you got after the signpost maze. WHOA! Well, what do you know? The blue rooster has come back to life. . . weird. 😕 Head down a screen, exit the cave, play Manbo’s Mambo, head left a screen, up 2 screens, right 3 screens, up a screen, lift the rocks, and enter the cave. Head through the 2 screens of this cave and fly over any holes with the rooster. Head down stairs, right a screen, up stairs, right a screen, fly to the chest with the rooster (or you can hookshot), and open the chest for 50 rupees. Hookshot back over, dash right a screen, exit the cave, head right 3 screens, climb the ladder, left 2 screens, enter the cave, head left a screen, fly over the holes with the rooster, head up a screen, fly over the holes, head left a screen, and get the Bird’s Key that’s sitting right there. Backtrack through the cave and exit the way you came in. Climb the stairs, and inside the house is a cucco loving dude. He’s very weird. 😕 Head left 3 screens while flying, cut the bush, head down stairs, kill the enemies, bomb the bottom wall, head down a screen, right a screen, and get the heart piece. This is your 11th heart piece. Only one left. 🙂 Head left a screen, up a screen, exit the cave, head right 3 screens, down the steps, head right 2 screens, down a screen, swim across, head right a screen, and enter the cave. This place is full of water except for a small piece of land. Bomb that small piece of land and head up a screen. Climb the steps, head down a screen, push the rock next to the upper left chest left, walk down, push the rock down, and exit the cave here. I know it was very tempting to open those chests but there is a reason why I didn’t have you open them. Head down a screen, and open the chest for 20 rupees. Head up a screen, enter the cave, and open all the chests for rupees. Head up a screen, down the steps, down a screen, right a screen, and exit the cave. Head right a screen, climb the steps, and enter the cave. Head right 2 screens, and exit the cave. Head left a screen, and enter the cave. Head right a screen, down the steps, jump over the side, climb the steps, head right a screen, down a screen, hookshot across the gap, jump off the ledge, and exit the cave. Bomb the bottom wall for a fairy’s fountain. Enter the cave on the right, head through the cave, and exit the cave at the other side. Head left a screen, lift the rock on the left side, insert the Bird Key, climb the steps, and enter the Eagle’s Tower.
As I said before, this dungeon is very long and can get frustrating. Use this walkthrough to help you pass all the useless rooms. 🙂 The enemies are: gibdos (slash them a lot of times), anti-kirbies (hit with the boomerang), and ropes (slash them). Head right a screen, jump, head right a screen, kill the enemies, and get the key. Head through the locked door, head up the steps, head up a screen, pull the lever on the right side, run left a screen, fall down the hole, kill the enemies, follow the path left 2 screens, head down a screen, and open the chest for the stone beak. Head up a screen, right 3 screens, up a screen, talk to the statue, head down a screen, hit the switch, head left a screen, down a screen, right a screen, down a screen, and up a screen along the right side. Climb the steps, and open the chest for the mirror shield. This will be useful when blocking fireballs and other things. Fall down the hole on the right side of the room, head up 2 screens, and open the chest for a key. Jump down, head left a screen, climb the steps, throw the horse heads so they face straight up, and open the chest for the map. Head down a screen, right a screen, talk to the owl statue, lift the giant ball, throw it at the blocks, and pull the lever. Pick up the ball and run left a screen. Kill the enemies, and throw the ball at the pillar on the right side. The pillar will now collapse! :! Pick up the ball, head down a screen, and throw the ball at the pillar from the bottom part. Pick up the ball, head up a screen, push the block on the left, head left a screen, get across the spikes, head up a screen, kill the enemies, and open the chest for the compass. Pick up the ball, head down a screen, head through the left passage, and throw the ball over the barrier. Don’t worry, we’ll get it later. Head up a screen, down the steps, head left a screen along the upper part, kill the enemy, head down 2 screens, down the steps, head up a screen, kill the enemies, head right a screen, and throw the ball at the pillar. Push the block into the hole, throw the ball over it, jump over the hole, pick up the ball, head right a screen, down 2 screens, and throw the ball over the barrier at the bottom of the room. Head up 2 screens, head left a screen, up a screen, down the steps, head left a screen, down 2 screens, up the stairs, head odwn a screen, kill the enemy, and get the key. Fall down the hole on the far left side, head up 3 screens, jump off the ledge, head up stairs, down a screen, right a screen, kill the enemies, head right a screen, pick up the ball, head left a screen, and throw the ball over the barriers. Head left a screen, up 2 screens, kill the tiles, head right a screen, bomb the bottom wall in between the torches, head down a screen, bomb the bottom wall, head down a screen, hookshot to the chest, and open the chest for some bombs. Get the ball, head up a screen, and throw the ball at the last pillar. Now, the whole dungeon will drop down a floor. 🙂 Sweet! 😀 Head down a screen, fall down the hole, head right 2 screens, head up a screen on the right side, head up stairs, head down a screen, unlock the block, climb the steps, head left a screen, jump off the ledge, hit the switch, head up stairs, head up a screen, head right a screen and you will meet the miniboss: Grim Creeper. You can’t really hurt him. All you have to do is kill all 6 bats he sends at you at the same time. Then the Grim Creeper will seek his revenge on you. Head up a screen, kill the enemies, hit the switch, push the blocks toward the middle, and open the chest for the Nightmare’s Key. Head down a screen, left 2 screens, up a screen, right a screen, kill the enemy, throw the horse heads so they face straight up, and open the chest for some secret medicine. 🙂 Head left a screen, down a screen, climb the steps at the upper left, hookshot the block on the right side, head down a screen, right a screen, up stairs, and climb the steps to meet the boss: Evil Eagle.

Well, he found his revenge. . . 🙂
All you have to do is block the eagle’s face with your shield when he gets really close to you. You can hookshot his head 6 times to kill him. When he dies, get the heart container, head down the ladder, reenter the dungeon, jump off the ledge to the right, head up a screen, and get the second-to-last instrument of the Sirens. The Organ of Evening Calm. Only one instrument left. 😀
Turtle Rock
Yes, they were stupid enough to put Turtle Rock on Koholint. Jump off the ledge on the right side, head right a screen, enter the cave, backtrack through the cave, exit the cave at the left side, head left a screen, enter the cave, head through it and exit it, head left a screen, climb the stairs, head left 2 screens, and if you haven’t noticed yet, our rooster friend is gone! :! Enter the house here and you will see the cucco loving dude with the rooster. HE KIDNAPPED HIM! Just leave him there, he’s happy there. Exit the house, head right 2 screens, jump over the gap, move the rocks out of the way, head right a screen, go to the house with the rooster, head left a screen, hookshot across the bridge, and head left a screen to find. . . MARIN! D: I guess Tarin was stupid enough to let Marin get kidnapped and put on this bridge. 🙂 No, that’s not what really happened. 😀 Although that would’ve been hilarious! 😀 Hookshot across to the other rock and Link will get Marin and save her! 😀 Awwwwwww! That’s a cute moment. Marin is just about to say something to Link and then TARIN comes in to ruin the moment!!!! :! JERK! Then the owl will come by and blab some more about the Wind Fish. 🙁 Head left a screen, slash the bush, head down stairs, head left a screen, jump off, head down the stairs, head left a screen, hookshot across the gap, head left a screen, and exit the cave. Head left a screen, climb the steps, head right a screen, head up a screen, head left a screen, and open the chest for 50 rupees. LIft the rock, head down the stairs, sprinkle some magic powder on the hole and the Mad Batter will come by and allow you to carry more arrows. 😀 Sweet! Too bad it’s the last upgrade. Well, back to the drawing board. 🙁 Exit the cave, head left a screen, jump off the ledge, bomb the cracked wall, enter the cave, head up a screen, head up stairs, head left a screen, down a screen, left 2 screens, and you will find a giant turtle sitting there. 😕 Play the Frog’s Song of Soul and the turtle will come to life! You have to slash it 8 times! 😀 When you’re done, enter Turtle Rock. 🙂
Don’t look at the A Link to the Past walkthrough because this is a million times different than that Turtle Rock. The new enemies are called Vires, you have to slash them and they will die. Head up a screen, kill the enemy, head left a screen, kill the enemies, head up a screen, kill the enemy, head left a screen, and you will find one of these blocks that you can control once you push them. Push the block left 4 blocks, up 2 blocks, left 1 block, down 5 blocks, and open the chest for 20 rupees. Head down a screen, kill the enemies, and open the chest for some rupees. Head left a screen, kill the enemy, head up a screen, kill the enemies, and get the key. Head down 2 screens, kill the enemies, and open the chest for the compass. Play Manbo’s Mambo, head up a screen, jump over the lava, and head up a screen. Head right a screen, push the platform up 2 blocks, and left 2 blocks. Follow the path you just created and head left a screen. Push the top and bottom blocks left, and push the middle block down. Open the chest for the map. Bomb the crack at the top, head up a screen, head down the stairs on the left side, head through this area, resurface, lift the jars, throw them at the enemies, and open the chest for the beak. Head up a screen, kill the enemy, head left a screen, push the block left 2 blocks, up a block, left a block, up a block, left a block, up a block, left 2 blocks, down a block, right a block, down a block, right a block, down a block, right a block, down a block, right a block, up a block, right a block, down a block, right a block, and get the key that falls down. Bomb the upper wall, bomb the left wall, head left a screen, climb the steps at the bottom, head down a screen, jump off the ledge, head left a screen, get the stuff in the jars, left a screen, up a screen, right a screen, push the platform up a block, right 2 blocks, up 3 blocks, and follow the path. Push the right block right, head up a screen, unlock the block, head right a screen, kill the enemy, head right a screen, up a screen, kill the enemies, get the bombs, head up a screen, kill the enemies, and get the key. Head left a screen, up a screen, hookshot to the chest, and open the chest for secret medicine. Jump off the right ledge, head up a screen, head up stairs, head right a screen, climb the left ladder, hookshot the statue, head down the steps to resurface, head up a screen, bomb the left wall, head left a screen, light the torches, jump over the gap, head left a screen, kill the enemy, head left a screen, kill the enemies, light the torches, bomb the left wall, head left a screen, shoot the statue with the eye, and get the key. Head left a screen, push the block that’s left of the chest up, push the other blocks left, and open the chest for a key. Head right a screen, up a screen, kill the enemies, left a screen, climb the steps, right a screen, hookshot to the chest, and open the chest for some rupees. Jump off the ledge, head up the steps, climb the steps, and get the last heart piece. 😀 Head right a screen and you will find a portal. You can activate it if you want but you don’t have to. Reenter the dungeon, throw bombs at the dodongo snakes to kill them, and open the chest for a key. Play Manbo’s Mambo, head up 2 screens, right a screen, push the platform up a block and all the way to the right. Head right 2 screens, hit the switch, head left a screen, down a screen, left 2 screens, up a screen, right a screen, push the block up a block, right 2 blocks, up 5 blocks, push the right block right, and head up a screen. Head right 2 screens, up a screen, left 3 screens, climb the steps, unlock the block, head right a screen, hookshot to the platform, unlock the block, head down the steps, jump across the moving platform, head right a screen, up the ladder, resurface, jump off the ledge, head down a screen, and you will meet one of the hardest minibosses in the history of Zelda: Blaino. You have to slash him from the top or the bottom of him. Just watch out for his swing punches or you will be sent right back to the entrance of the dungeon. When he dies, head up a screen, climb the steps, and open the chest for the magic rod. Jump off the ledge, head down stairs, head through the sequence, resurface, jump off, head left 3 screens, down a screen, light the torches with the magic rod, and open the chest for a key. Play Manbo’s Mambo, head up a screen, right a screen, push the moving platform to the bottom right, head down stairs, use the magic rod on the ice blocks that get in your way, head left a screen, jump up, use the magic rod on ice, head down the steps to resurface, head down the steps, head left a screen, kill the enemy, head up a screen, push the platform up 3 blocks, right 2 blocks, down a block, right a block, up a block, right 2 blocks, down 3 blocks, left a block, up a block, left a block, down a block, left a block, up a block, left a block, down 2 blocks, right 5 blocks, and open the chest for the Nightmare’s Key. Head down a screen, right 2 screens, down a screen, push the block into the lava, head right a screen, climb the steps, clear the ice, climb up the steps, jump over the ledge, head left a screen, head down the steps, clear the ice, head down the steps to resurface, head up a screen to meet the boss: Hot Head.

hmmm... i wonder where his fire went? 😀
Basically, you have to hit him with the fire rod for a certain amount of hits. When he dies, get the heart container, head up a screen, and get the last instrument of the Sirens: the Thunder Drum. 🙂 Now, let’s go check out the Wind Fish’s Egg. 🙂
The Awakening
This is pretty important that you go to the library in Mabe Village first. There is a code in one of the books that you NEED to write down immediately! So, head right a screen, jump off the ledge, head down 2 screens, left a screen, down a screen, right a screen, down 2 screens, left a screen, down 3 screens, and you will be back in Mabe Village. Head down 2 screens, enter the library, and read the book at the bottom right. Write down the path it tells you to take, it is different for every game, but if it is the same as yours, don’t worry. I will provide a map of the Egg but the path isn’t the same. Exit the library, play Manbo’s Mambo, head left a screen, up a screen, right a screen, up a screen, kill the enemies, lift the rocks, head right a screen along the upper portion, head up 2 screens, and you will be at the Wind Fish’s Egg. Unfortunately, the egg is closed. Play the Ballad of the Wind Fish and the instruments will all play it automatically with you. Just then the owl comes by to say that he used you to get to the egg and he drops you off the mountain and flies into the egg! . . . . Just kidding, 🙂 he just sits there and let’s you go in the egg. Well, take a deep breath and go inside the final and shortest dungeon of the game.

This is much more scarier on the inside. 😕
It’s dark and scary, head up until you fall down a hole. Follow the path you wrote down from the library, and at the end there is a hole. Take a deep breath and fall down the hole to face the nightmares.

They change shape! D:
They will change into different forms and shapes. The first form is a giant bot. You have to sprinkle magic powder on him 3 times to get to his second form. Agahnim. Just like in A Link to the Past, you have to use his own magic against him. The magic that looks like an X can’t be thrown back. After the Agahnim form is the Moldorm form. Just like in the Tail Cave, you have to slash his tail. The next form is Ganon. You have to spin attack him 6 times to kill him. Now, the next form is the Lanmola form. He will stalk you constantly, all you have to do is hit him with the magic rod once and he will die. The music stops, but it’s not the end of the fight. Now, you have to face Dethl, the last nightmare. You can shoot his eye with arrows, or you can hit his eye with the boomerang for 1 hit and he will die. Head up the stairs that appear and when you get to the top the annoying owl will come back one last time. Then the Wind Fish comes by, he looks like this:

Wind Fish: I'm the Wind Fish. Link: That's great, can you take me home now? 😀
Now, sit back and enjoy the ending. The ending is terrible but I’m keeping it a surprise. 🙂 Good job! The next game is the most popular game ever! 😀

by: Zindera_Omega
Special thanks to zeldadungeon.net for helping me beat this game and for inspiring me to make this website. Thanks to google.com/images for helping me get the pictures for this game. A very special thanks to Nintendo for making The Legend of Zelda games.
I would really like to say thanks a whole lot for that work you have made in writing this article. I am hoping the same most effective work from you down the road too.
He who has the gold, makes the rules.
whoah this weblog is fantastic i really like studying your posts. Stay up the great paintings! You realize, lots of persons are looking around for this information, you can aid them greatly.
Simply desire to say your article is as amazing. The clarity in your post is simply cool and i can assume you are an expert on this subject. Fine with your permission allow me to grab your RSS feed to keep up to date with forthcoming post. Thanks a million and please carry on the enjoyable work.
I have not checked in here for some time because I thought it was getting boring, but the last few posts are good quality so I guess I will add you back to my everyday bloglist. You deserve it my friend 🙂
you are really a just right webmaster. The web site loading velocity is amazing. It seems that you are doing any distinctive trick. In addition, The contents are masterpiece. you have performed a magnificent process in this subject!
Heya i’m for the first time here. I found this board and I find It truly useful & it helped me out a lot. I hope to give something back and aid others like you aided me.
Definitely, what a great blog and illuminating posts, I will bookmark your website.Have an awsome day!
I simply had to thank you very much all over again. I’m not certain the things that I might have worked on in the absence of the actual aspects shown by you on such area of interest. Entirely was an absolute hard dilemma for me personally, nevertheless witnessing a new specialized mode you processed the issue took me to weep for joy. I am just happy for this work and as well , trust you comprehend what a great job you were getting into instructing the others thru your web page. I am sure you have never come across any of us.
Hi, Neat post. There is an issue with your web site in web explorer, might check this¡K IE still is the market leader and a good portion of other folks will omit your excellent writing because of this problem.
I¡¦ve been exploring for a little bit for any high-quality articles or blog posts in this kind of area . Exploring in Yahoo I at last stumbled upon this site. Studying this info So i¡¦m glad to express that I’ve a very good uncanny feeling I found out just what I needed. I such a lot surely will make certain to do not omit this website and give it a look on a relentless basis.
This is really interesting, You’re a very skilled blogger. I have joined your rss feed and look forward to seeking more of your excellent post. Also, I have shared your web site in my social networks!
Great work! That is the kind of info that are meant to be shared around the web. Disgrace on the search engines for not positioning this publish higher! Come on over and discuss with my web site . Thanks =)
Very efficiently written information. It will be valuable to anybody who usess it, as well as me. Keep up the good work – for sure i will check out more posts.
Thank you for sharing excellent informations. Your site is very cool. I’m impressed by the details that you have on this site. It reveals how nicely you understand this subject. Bookmarked this website page, will come back for more articles. You, my pal, ROCK! I found simply the info I already searched all over the place and simply could not come across. What an ideal web site.
you are in reality a just right webmaster. The web site loading velocity is amazing. It kind of feels that you’re doing any distinctive trick. Also, The contents are masterpiece. you’ve performed a fantastic job in this subject!
It¡¦s actually a nice and helpful piece of information. I am glad that you just shared this helpful info with us. Please keep us up to date like this. Thank you for sharing.
You made some nice points there. I did a search on the subject matter and found most guys will consent with your website.
Hi my friend! I wish to say that this article is awesome, great written and include approximately all significant infos. I¡¦d like to look extra posts like this .
I think this is among the most vital information for me. And i am glad reading your article. But wanna remark on some general things, The website style is wonderful, the articles is really excellent : D. Good job, cheers
Great website. Plenty of helpful information here. I am sending it to several buddies ans also sharing in delicious. And naturally, thanks to your effort!
I’ve been absent for some time, but now I remember why I used to love this web site. Thank you, I will try and check back more frequently. How frequently you update your site?
Simply want to say your article is as surprising. The clarity in your post is simply cool and i can assume you are an expert on this subject. Fine with your permission allow me to grab your feed to keep updated with forthcoming post. Thanks a million and please continue the enjoyable work.
I was just looking for this info for some time. After 6 hours of continuous Googleing, at last I got it in your web site. I wonder what is the lack of Google strategy that do not rank this kind of informative sites in top of the list. Usually the top websites are full of garbage.
I¡¦ve read several good stuff here. Definitely value bookmarking for revisiting. I surprise how much attempt you set to create this kind of fantastic informative website.
Thanks for sharing excellent informations. Your website is very cool. I am impressed by the details that you¡¦ve on this site. It reveals how nicely you understand this subject. Bookmarked this web page, will come back for more articles. You, my pal, ROCK! I found just the info I already searched all over the place and simply couldn’t come across. What an ideal site.
I really appreciate this post. I have been looking all over for this! Thank goodness I found it on Bing. You’ve made my day! Thanks again
Helpful information. Fortunate me I found your site by chance, and I’m shocked why this coincidence did not happened in advance! I bookmarked it.
Excellent weblog here! Additionally your site rather a lot up fast! What web host are you using? Can I get your affiliate hyperlink in your host? I want my website loaded up as quickly as yours lol
Great remarkable things here. I am very happy to see your article. Thank you so much and i am having a look ahead to contact you. Will you kindly drop me a e-mail?
Undeniably believe that which you stated. Your favorite justification seemed to be on the net the simplest thing to be aware of. I say to you, I certainly get irked while people consider worries that they just do not know about. You managed to hit the nail upon the top as well as defined out the whole thing without having side-effects , people can take a signal. Will probably be back to get more. Thanks
Hello.This article was really remarkable, especially because I was looking for thoughts on this matter last couple of days.
I do consider all of the concepts you’ve offered for your post. They are really convincing and can definitely work. Still, the posts are very brief for novices. May you please lengthen them a little from next time? Thanks for the post.
I was just looking for this information for a while. After 6 hours of continuous Googleing, finally I got it in your website. I wonder what is the lack of Google strategy that do not rank this type of informative websites in top of the list. Usually the top websites are full of garbage.
I get pleasure from, result in I found just what I was having a look for. You have ended my 4 day long hunt! God Bless you man. Have a nice day. Bye
I am very happy to read this. This is the type of manual that needs to be given and not the random misinformation that’s at the other blogs. Appreciate your sharing this best doc.
I’ve been absent for some time, but now I remember why I used to love this website. Thank you, I will try and check back more frequently. How frequently you update your website?
I think this is one of the most significant info for me. And i am glad reading your article. But should remark on few general things, The site style is ideal, the articles is really nice : D. Good job, cheers
Barking up the wrong tree.
To get one’s ducks in a row.
The laugh is always on the loser.
great submit, very informative. I ponder why the other experts of this sector do not notice this. You must continue your writing. I am confident, you have a great readers’ base already!
Love is blind
Nothing ventured, nothing gained.
I would like to thnkx for the efforts you have put in writing this web site. I am hoping the same high-grade blog post from you in the upcoming also. Actually your creative writing skills has inspired me to get my own blog now. Actually the blogging is spreading its wings fast. Your write up is a good example of it.
What i do not realize is in reality how you’re not actually much more neatly-favored than you may be now. You’re very intelligent. You already know thus significantly on the subject of this subject, produced me for my part consider it from numerous numerous angles. Its like women and men are not involved except it is something to do with Girl gaga! Your own stuffs excellent. At all times take care of it up!
He who laughs last laughs longest.
When in Rome, do as the Romans do.
Perfect post, I seriously watch for up-dates by you.
Up the creek without a paddle.
I simply desired to thank you so much again. I am not sure what I would’ve tried in the absence of these tactics provided by you about that subject matter. Previously it was an absolute daunting setting in my view, nevertheless taking a look at your expert form you dealt with that took me to leap for contentment. I’m just happier for your information as well as pray you find out what an amazing job you are carrying out instructing people today using your blog post. I know that you haven’t come across all of us.
Hi, Neat post. There is an issue with your site in internet explorer, could test this¡K IE still is the marketplace leader and a large portion of folks will pass over your great writing because of this problem.
Charity begins at home.
I actually wanted to send a quick remark in order to say thanks to you for all the awesome advice you are writing here. My time consuming internet lookup has at the end of the day been honored with brilliant details to write about with my colleagues. I ‘d assume that many of us visitors actually are definitely fortunate to live in a fine website with many perfect people with beneficial tricks. I feel extremely grateful to have used your entire site and look forward to many more excellent times reading here. Thanks again for a lot of things.
As a Newbie, I am constantly browsing online for articles that can aid me. Thank you
Impressive blog post, I truly wait for updates of your stuff.
Don’t count the chickens before they are hatched.
As I web site possessor I believe the content matter here is rattling wonderful , appreciate it for your hard work. You should keep it up forever! Best of luck.
I¡¦ll right away grab your rss feed as I can’t find your email subscription link or newsletter service. Do you have any? Kindly let me recognize in order that I may just subscribe. Thanks.
Its like you read my mind! You seem to know a lot about this, like you wrote the book in it or something. I think that you can do with a few pics to drive the message home a little bit, but instead of that, this is great blog. A fantastic read. I will certainly be back.
Honesty is the best policy.
I’m still learning from you, while I’m improving myself. I certainly liked reading all that is posted on your site.Keep the information coming. I enjoyed it!
Every man is the architect of his own fortune.
I haven¡¦t checked in here for a while since I thought it was getting boring, but the last few posts are good quality so I guess I¡¦ll add you back to my daily bloglist. You deserve it my friend 🙂
Tit for tat.
The pitcher goes often to the well and gets broken at last.
As I site possessor I believe the content material here is rattling magnificent , appreciate it for your efforts. You should keep it up forever! Good Luck.
hey there and thank you for your information – I have certainly picked up something new from right here. I did however expertise a few technical points using this website, as I experienced to reload the website lots of times previous to I could get it to load correctly. I had been wondering if your web host is OK? Not that I am complaining, but sluggish loading instances times will sometimes affect your placement in google and can damage your quality score if ads and marketing with Adwords. Anyway I’m adding this RSS to my e-mail and could look out for a lot more of your respective exciting content. Ensure that you update this again very soon..
To get one’s ducks in a row.
Thank you for trying to explain the terminlogy to the newcomers!
Great ¡V I should definitely pronounce, impressed with your website. I had no trouble navigating through all the tabs as well as related info ended up being truly easy to do to access. I recently found what I hoped for before you know it in the least. Reasonably unusual. Is likely to appreciate it for those who add forums or anything, site theme . a tones way for your client to communicate. Nice task..
The pot calling the kettle black.
Blood is thicker than water.
We’re a group of volunteers and opening a new scheme in our community. Your web site offered us with valuable information to work on. You have done an impressive job and our entire community will be grateful to you.
Better late than never.
Must you always get into a huff?
My brother suggested I might like this blog. He was totally right. This post truly made my day. You can not imagine simply how much time I had spent for this information! Thanks!
To be at a loss.
There’s no fool like an old fool.
It’s not the size of the boat, it’s the motion in the ocean.
If you run after 2 hares, you will catch neither.
Actions speak louder than words.
The grass is always greener on the other side of the fence.
Great amazing issues here. I am very glad to peer your post. Thank you a lot and i’m looking forward to touch you. Will you kindly drop me a e-mail?
What you deserve is what you get
Before you can say knife.
Time will tell.
Beware of the doctor, whose wife sells cemetery plots, whose brother owns a granite quarry, and whose father deals in shovels.
They sow the wind and reap the whirlwind.
A miss is as good as a mile.
What doesn’t kill you, makes you stronger.
I’m all ears.
Wow, wonderful blog structure! How long have you been running a blog for? you make blogging glance easy. The full look of your web site is wonderful, as well as the content material!
Hello there, just became aware of your blog through Google, and found that it’s really informative. I am gonna watch out for brussels. I will appreciate if you continue this in future. Numerous people will be benefited from your writing. Cheers!
All mouth and no trousers.
It¡¦s truly a great and helpful piece of information. I am happy that you simply shared this helpful information with us. Please keep us up to date like this. Thanks for sharing.
Long story short.
I have been absent for a while, but now I remember why I used to love this web site. Thank you, I¡¦ll try and check back more frequently. How frequently you update your web site?
I’m very happy to read this. This is the kind of manual that needs to be given and not the random misinformation that is at the other blogs. Appreciate your sharing this best doc.
Good blog! I truly love how it is easy on my eyes and the data are well written. I am wondering how I might be notified whenever a new post has been made. I’ve subscribed to your RSS feed which must do the trick! Have a nice day!
hey there and thank you for your information – I have certainly picked up anything new from right here. I did however expertise several technical issues using this website, as I experienced to reload the website many times previous to I could get it to load correctly. I had been wondering if your hosting is OK? Not that I am complaining, but sluggish loading instances times will very frequently affect your placement in google and could damage your quality score if ads and marketing with Adwords. Anyway I’m adding this RSS to my email and can look out for much more of your respective exciting content. Ensure that you update this again soon..
My heart is in my boots.
Marry in haste, repent at leisure.
Bad weeds grow tall.
I¡¦m now not positive the place you’re getting your information, but great topic. I must spend some time finding out much more or understanding more. Thanks for excellent info I used to be searching for this information for my mission.
fantastic put up, very informative. I ponder why the opposite experts of this sector do not understand this. You should continue your writing. I am confident, you have a great readers’ base already!
As I site possessor I believe the content matter here is rattling magnificent , appreciate it for your hard work. You should keep it up forever! Best of luck.
Hey There. I found your blog using msn. This is an extremely well written article. I’ll be sure to bookmark it and come back to read more of your useful information. Thanks for the post. I will definitely return.
Keep functioning ,splendid job!
I do agree with all of the ideas you’ve offered in your post. They are really convincing and will definitely work. Nonetheless, the posts are too brief for beginners. Could you please extend them a bit from subsequent time? Thanks for the post.
Hey, you used to write magnificent, but the last few posts have been kinda boring¡K I miss your tremendous writings. Past several posts are just a bit out of track! come on!
Thanks for the sensible critique. Me & my neighbor were just preparing to do some research about this. We got a grab a book from our area library but I think I learned more clear from this post. I am very glad to see such magnificent information being shared freely out there.
Hello.This post was extremely fascinating, especially since I was searching for thoughts on this matter last Friday.
I think this is one of the most significant info for me. And i’m glad reading your article. But should remark on few general things, The website style is perfect, the articles is really great : D. Good job, cheers
great points altogether, you just received a logo new reader. What would you suggest in regards to your put up that you simply made a few days ago? Any positive?
It¡¦s actually a cool and helpful piece of information. I am satisfied that you just shared this helpful info with us. Please stay us up to date like this. Thank you for sharing.
Nice blog here! Also your site loads up very fast! What web host are you using? Can I get your affiliate link to your host? I wish my web site loaded up as fast as yours lol
I am very happy to read this. This is the type of manual that needs to be given and not the accidental misinformation that’s at the other blogs. Appreciate your sharing this best doc.
Great beat ! I wish to apprentice while you amend your site, how could i subscribe for a blog web site? The account aided me a acceptable deal. I had been tiny bit acquainted of this your broadcast offered bright clear concept
Wonderful beat ! I would like to apprentice while you amend your website, how could i subscribe for a blog web site? The account helped me a acceptable deal. I had been tiny bit acquainted of this your broadcast provided bright clear concept
Thank you for any other magnificent post. Where else may just anyone get that type of info in such an ideal manner of writing? I have a presentation next week, and I’m at the search for such info.
I’m so happy to read this. This is the kind of manual that needs to be given and not the random misinformation that is at the other blogs. Appreciate your sharing this best doc.
Hello. Great job. I did not expect this. This is a great story. Thanks!
I have been absent for a while, but now I remember why I used to love this blog. Thanks , I will try and check back more often. How frequently you update your web site?
Good site! I truly love how it is simple on my eyes and the data are well written. I’m wondering how I might be notified whenever a new post has been made. I have subscribed to your feed which must do the trick! Have a nice day!
You could certainly see your enthusiasm in the work you write. The arena hopes for more passionate writers such as you who aren’t afraid to mention how they believe. At all times go after your heart.
My spouse and i were absolutely joyous that Ervin could complete his investigations through the ideas he obtained from your web pages. It’s not at all simplistic to simply possibly be releasing tips and tricks that many the rest may have been making money from. And now we understand we now have the blog owner to thank for this. The entire explanations you have made, the easy blog navigation, the friendships you assist to promote – it’s got most superb, and it is letting our son in addition to the family know that that subject is interesting, and that’s rather fundamental. Thanks for everything!
Very good written story. It will be valuable to anyone who employess it, as well as yours truly :). Keep up the good work – looking forward to more posts.
Useful information. Fortunate me I found your website by chance, and I’m shocked why this twist of fate did not came about in advance! I bookmarked it.
Whats Taking place i’m new to this, I stumbled upon this I’ve discovered It absolutely helpful and it has helped me out loads. I am hoping to give a contribution & assist different users like its aided me. Great job.
Hate the game, not the player!
Iím not that much of a internet reader to be honest but your blogs really nice, keep it up! I’ll go ahead and bookmark your site to come back later. All the best
Hi my friend! I wish to say that this post is awesome, nice written and include approximately all important infos. I’d like to see more posts like this.
An attention-grabbing discussion is worth comment. I believe that you must write extra on this topic, it may not be a taboo subject however generally persons are not enough to speak on such topics. To the next. Cheers
Hello! I
Wonderful of you to admit they attacked the Israelis without the need of warning as they boarded the boat. Whenever they had nothing to hide and were being on the critical “peace” mission, violence ought to are the last factor on their minds. Form of hard to demonstrate that just one away, is not it?